Tacolicious Tulum

Share on FacebookTweet about this on TwitterPin on Pinterest


Going on holiday with a best friend pretty much guarantees a good time. Ben and I have been going on holiday together now for 14 years and we both agree that this might be our best one yet. Tulum is my idea of the perfect beach holiday with not a high rise building in site. Our basic but charming room with a simple hammock on the balcony had unadulterated views of the Caribbean that we were photographing every few minutes as the light seemed to become ever more beautiful.


Tulum has also become quite a foodie destination mainly because of the much written about Hartwood Restaurant. The food is undeniably delicious and all cooked in a wood burning oven with a menu that changes daily. The rustic open air setting feels like a well styled movie set and the lines to get in feel more like New York than a Mexican beach town. The difference being that the hour and a half wait for The Hartwood was spent chatting to Matt, a clown doctor and his wife Stephanie, a dancer, over a pitcher of margaritas. 


Hartwood Restaurant

The bar at the Hartwood Restaurant (pictured above)


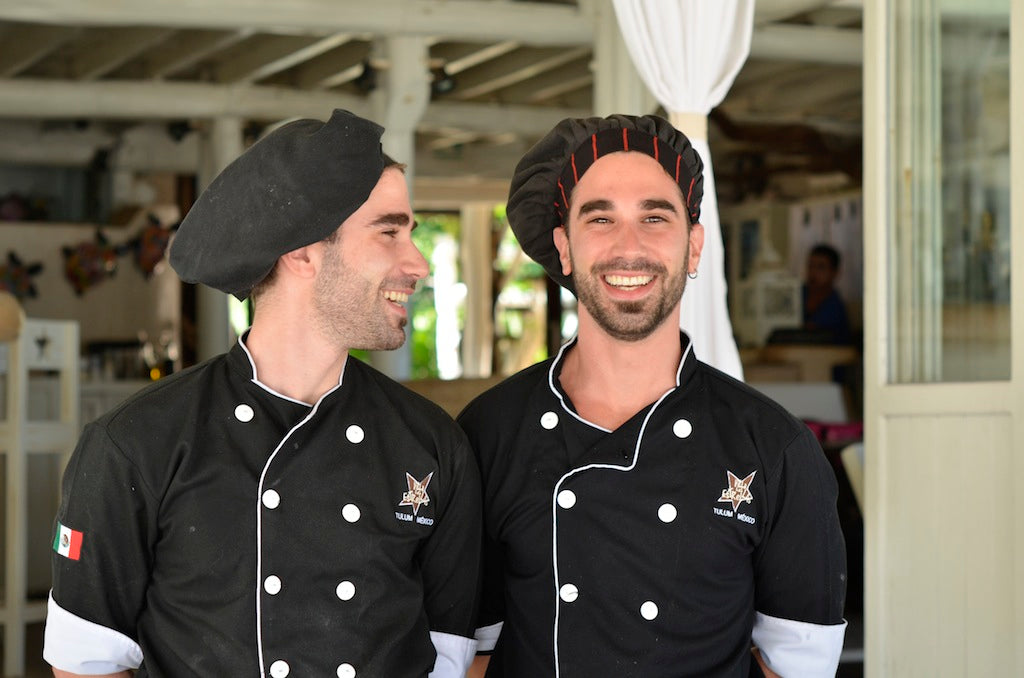
But the real discovery of the trip were the new chefs at our hotel; Mauro and Federico Cappi, twins born 5 minutes apart in Uruguay and taught to cook by their grandmother as children. Their food was both simple and delicious. We became slightly obsessed with their tacos; particularly their flank steak tacos for which they kindly shared their recipe. I alternated between their steak, shrimp and octopus tacos for almost every lunch. 


I’m afraid I’ve been sworn to secrecy by the friend who recommended the hotel so you’ll have to email me directly and I can give hints as to where we stayed. It was hard to leave paradise and return to the Polar Vortex but I’m excited to try these at home and share the recipe with you all. 

Warm Lentil Salad with Roasted Beets and Goat Cheese

Share on FacebookTweet about this on TwitterPin on Pinterest


I first tried this dish in 2008. I was on a sales trip in Asia and escaped for a week to a hotel in Bali that I had been dreaming of for years. Since I was going alone, I thought I’d break the habit of a lifetime of rich food and cocktails and actually try one of the juicing cleanses they offered. It was less than a week so I figured it couldn’t kill me.


The hotel was everything I imagined: a room in the jungle with 3 walls of windows and an outdoor bath in total seclusion. A butler would find me at one of the various pools every few hours for my next juice. As the days went by I was pleasantly surprised by the juicing diet. I even naively marveled at how reasonable the pricing was – conveniently forgetting that I was only injesting a few fruits and vegetables so my overheads weren’t exactly high!


The juices were practically meals unto themselves but I had been passing these incredible restaurants that I was dying to try so I eagerly awaited day 5 when I would be back on solid foods. Since I needed to ease my way back, I decided to start with this salad. It was so delicious that I immediately asked them for the recipe. I now make it every year in January to remember that healthy, wonderful week in Bali. I may not be juicing but it is still a salad- despite my friend’s incredulous comments when I tell them what I’m making for lunch. I actually had to email a picture to my friend who refused to believe me.


Warm Lentil Salad with Roasted Beets and Goat Cheese

Serves 2

Ingredients:

2 medium red beets, roasted and sliced (see below – you can also expedite by buying pre-cooked beets)

Olive oil

1 cup of lentils (I like Puy lentils but any small ones will work)

1 red onion, finely diced

8 oz vegetable stock

4 tablespoons of good quality goat cheese

A small handful of green beans, remove stems, halve and then boiled for 4 minutes

1/2 cup baby arugula greens (I prefer frisee but the store was out of stock)

1 pear, peeled and cored


Dressing:

2 tablespoons extra virgin olive oil

2 tablespoons walnut oil

1 tablespoon champagne vinegar

1 teaspoon honey

Salt and pepper to taste


Method:

Roasted beets

1. Preheat oven to 375°.

2. Drizzle the beets with a little olive oil, sprinkle some salt and wrap tightly in foil.

3. Roast the beets anywhere between 30 and 60 minutes depending on size. They’re ready when you can easily pierce with a knife.

4. When cool enough to handle, slice off the ends and peel the skin off with a paper towel.

5. Cut into 1/4 inch slices.


Lentils

1. In a medium sized saucepan, sweat the onions in 2 tablespoons of olive oil until soft (about 8 minutes on low).

2. Add the lentils, the stock and a good pinch of salt.

3. Bring to a simmer and cover for about 40 minutes or until the lentils are tender.

4. Season as desired with salt and pepper.


Assembling the salad

1. In a small bowl, whisk together salad dressing ingredients and season to taste.

2. Mix half of the lentils gently in a little of the dressing and spoon onto each plate (save the remaining lentils for another meal – they are wonderful eaten alone).

3. Divide the goat cheese between the two plates and place on top of the lentils.

4. In a medium bowl, dress the arugula and green beans with dressing as desired.

5. Arrange the arugula and green beans on top of the goat cheese and lentils. (this is a beautiful stacked salad when finished)

6. Add some paper thin slices of pear on top of the salad. I use a pairing knife and shave thin slices but you could also use a potato peeler as well.

7. Finish by dividing the beets between the two salads.

8. Serve while the beets and lentils are still warm, allowing the goat cheese to melt slightly and all the flavors to combine.

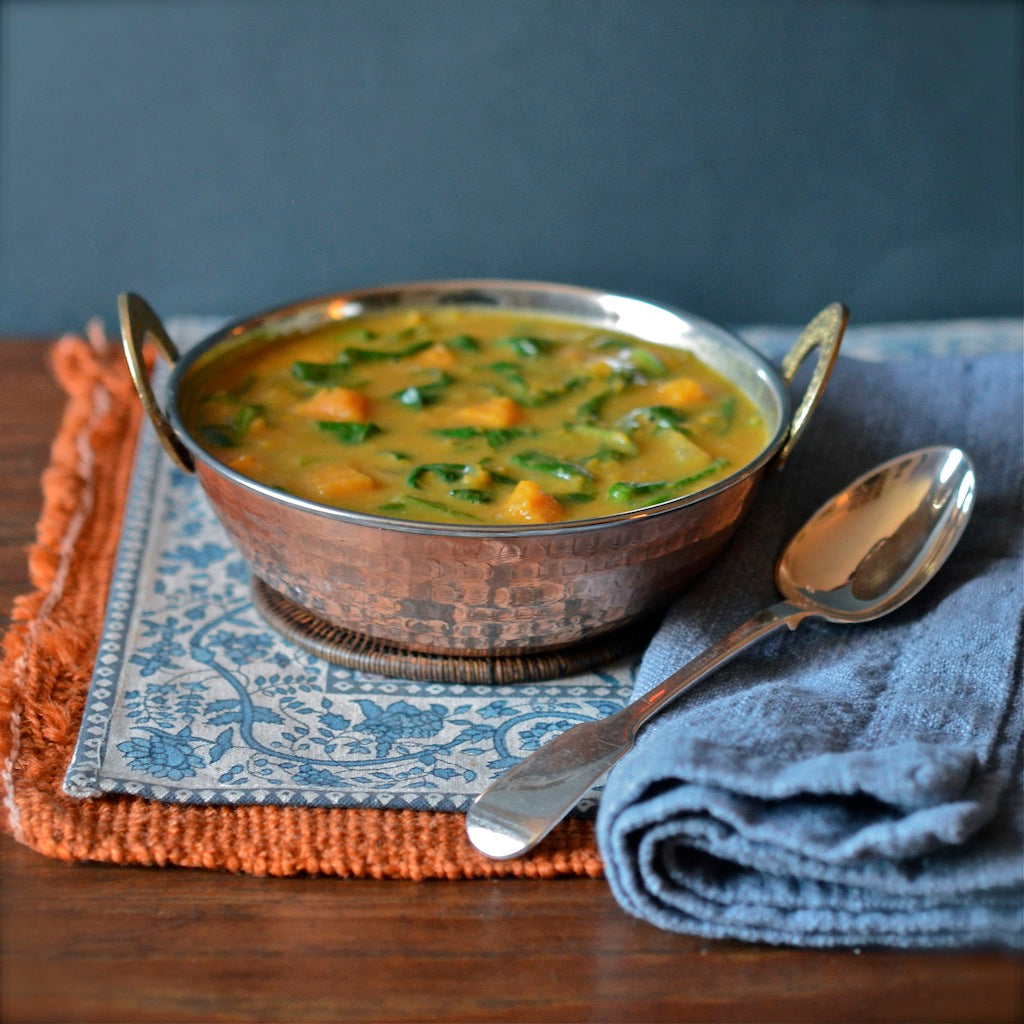
Thai Coconut, Sweet Potato and Spinach Soup

Share on FacebookTweet about this on TwitterPin on Pinterest


I spent Christmas at home in London this year and like most people, definitely overindulged! My mother’s inability to eat much at the moment in no way impeded her ability to feed me. There was goose, foie gras, smoked salmon with blinis, pasta, pasta, more pasta and the traditional cotecchino with lentils on New Year’s Day.  The lentils are supposed to represent gold coins. Their abundance and the richness of the cotecchino signify a year of wealth ahead. Here’s hoping!


My father, who miraculously survived a fall down a flight of stairs on Christmas Eve was also intent on sending me back to New York well fed. There was a decadent and delicious old school French dinner complete with escargots, lamb and Tarte Tatin, a wildly over ordered Chinese meal and a nostalgic chicken paprikash that we cooked together (recipe to follow).


All this to say, that when I finally returned to New York after a (not so fun) 37 hour journey home thanks to winter storm Hercules, I was ready to cut back a bit. This is a soup that my father used to make for me years ago and I crave every winter. It is incredibly tasty, easy to make, filling and about as healthy as I’m ever prepared to get. It’s also perfect when you’re hiding from an Arctic vortex. 


I have a week to get beach ready before I leave for my annual holiday with Ben in the sun. I plan to eat this soup for as many meals as possible before Mexico! Once I get there, I’ll be on a diet of guacamole and margaritas. And people say I don’t eat enough greens! 


Thai Coconut, Sweet Potato and Spinach Soup

Cook time 25 minutes

Serves 4


Ingredients:

2 tablespoons butter

1 lb sweet potatoes, peeled and cut into 1/2 inch dice

1 yellow onion, diced

2 cloves garlic, crushed

1 teaspoon grated fresh ginger 

1 tablespoon red Thai curry paste

1 pint vegetable stock

7 fl oz coconut milk

Juice of 1 lime

6 oz fresh baby spinach

Salt and black pepper


Method:

1. Melt the butter in a saucepan and fry the potatoes, onion, garlic, ginger and curry paste for about 5 minutes until lightly browned.

2. Add the stock, coconut milk and lime juice.

3. Bring everything to the boil, cover and reduce to a simmer. Cook until the potatoes are tender (approx. 15 minutes).

4. At this point, I turn off the heat and use an immersion blender (blend as smooth as you would like- I like mine about halfway blended so that I can spoon up some potato cubes with each bite).

5. Add the spinach and return to heat, covered for a few minutes.

6. Once the leaves are wilted and the soup is heated through, season to taste and serve warm.


Rigatoni with Ham, Peas and Cream Sauce

Share on FacebookTweet about this on TwitterPin on Pinterest


I pretty much lived off this at university so I can make it in my sleep. The sauce is ready even before the pasta which means it takes under 15 minutes to make (half that if using fresh pasta)! It’s so comforting and easy to make that I always want it on cold nights when I can eat it in front of the TV after a long day. Minimum effort but maximum pleasure!


Rigatoni with Ham, Peas and Cream Sauce

Serves 4 people


Ingredients:

1 lb of rigatoni

1/2 tablespoon olive oil

1 cup frozen peas

1 tablespoon cream cheese

1 cup light cream

3 thick slices of ham (cubed)

1/3 cup gorgonzola (optional)

Grated Parmesan cheese for serving


Method:

1. In a large pot, bring plenty of salted water to the boil and add pasta.

2. Meanwhile, in a frying pan on a low heat, add oil and frozen peas.

3. When the peas are melted, add the cream cheese and light cream.

4. At this stage, you can also add the gorgonzola if you like it (I do!) Mix in the ham.

5. When everything is melted and warmed through turn off the heat until the pasta is ready.

6. Before draining the pasta, scoop out a cup of the salty water to use with the sauce if it’s too thick.

7. Drain pasta and add to the frying pan with the sauce. Turn heat back to medium and mix well. If the sauce is too dry, add some of the water from the pasta.

8. Serve warm with grated Parmesan cheese.


Lolly’s White Bean and Kale soup with Ham

Share on FacebookTweet about this on TwitterPin on Pinterest


Every year after Thanksgiving, Lolly makes a huge batch of her White Bean and Kale Soup. After the indulgence of the day before, I always look forward to this soup which somehow feels good for the soul. She has played around with the recipe in recent years, using ham hock and chorizo, but no matter what she adds it is always delicious and hearty while somehow still feeling cleansing. This works perfectly as a vegetarian soup but I just can’t resist adding ham.


Lolly’s White Bean and Kale soup with Ham

Serves 6-8


Ingredients:

1 1/2 cups of white beans

2 tablespoons kosher salt

1 tablespoon olive oil, plus more for finishing

2 medium yellow onions (roughly chopped)

3 cloves of garlic (crushed and finely chopped)

1 bunch of kale (washed, dried and torn into large pieces)

6 cups of stock (including 1 cup of ham stock if you have it)

2 thick slices of ham, cubed

Salt and pepper to taste


Method:

1. Soak the beans overnight in cold water with a tablespoon of salt.

2. The next day, rinse the beans and add to a large pot. Cover with water and bring to boil with another tablespoon of salt.

3. Once the water is boiling, reduce down to a simmer and cook for about an hour (until the beans are tender when tested).

4. Meanwhile, in a large frying pan add a tablespoon of olive oil and sauté the onions and garlic until translucent.

5. Add the kale to the frying pan and cook for a few minutes covered until the kale is tender.

6. When the beans are ready, drain them and return to the pot over medium heat.

7. Add the kale, onions and stock to the pot and lower to a simmer.

8. Use an immersion blender to thicken the soup. If you don’t have one, just put a few cups of soup in a regular blender, purée and stir back into the pot. (You can change consistency to your liking. The more you blend the smoother the texture.)

9. Once you’ve blended your soup to your desired consistency, add the ham. Continue to cook on low for several minutes until ham has warmed.

10. Serve warm (I like to drizzle with olive oil to finish).

Croque Monsieur

Share on FacebookTweet about this on TwitterPin on Pinterest


I’m slightly obsessed with the Croque Monsieur at Buvette on Grove Street in the West Village. I’ve been a huge fan of the chef/owner, Jodi Williams since her days at Gusto and can honestly say that she’s responsible for getting me over my long lived ambivalence to salads. Her Fava Bean, Escarole and Pecorino Salad is something I’ve tried to recreate and am very excited to hear she has a cookbook coming out so I can finally make it myself.  Every time I visit Buvette, I’m stuck between ordering her Steak Tartare and the Croque Monsieur. The Steak Tartare usually wins out only because I’ve figured out how to make the Croque Monsieur at home using an Ina Garten recipe that comes wonderfully close. The Steak Tartare, I’m yet to figure out!


Croque Monsieur

1 serving

Ingredients:

1 tablespoon unsalted butter

1 tablespoon all-purpose flour

1 cup hot milk

Salt and pepper to taste

1 bay leaf

2 cups grated Gruyère cheese, divided

1/2 cup freshly grated Parmesan

2 slices of white bread (I use Italian Round)

Dijon mustard to taste

1 thick slice of ham


Method:

1. Preheat oven to 400 degrees.

2. Make a Béchamel sauce by melting the butter over a low heat in a saucepan and then adding the flour.

3. Stir for 2 minutes until it reaches the consistency of a fine paste.

4. Add the bay leaf and hot milk and stir over a low heat until the sauce thickens (about 5 minutes).

5. Turn off the heat and remove the bay leaf.

6. Add in 1 cup of Gruyère, all of the Parmesan and salt and pepper to taste. Stir well until the cheese has melted.

7. Lightly toast the 2 slices of bread.

8. Assemble the sandwich on the baking sheet. On one slice of toast, spread a little mustard then add the ham and sprinkle 1/2 cup Gruyère on top.

9. Top with the other slice of bread then slather over the cheese sauce until the sandwich is covered. Let the sauce spread over the edges and don’t be afraid to let it get a bit messy.

10. Top with the remaining Gruyère and bake in the oven for 5 minutes.

11. Finish the sandwich under the broiler for a further 3 minutes until the top is nicely browned.

12. Serve warm.


Brussels Sprouts with Chestnuts and Pancetta

Share on FacebookTweet about this on TwitterPin on Pinterest


I have spent every Thanksgiving in America with the same wonderful family and their extended family in Cape Cod. One of my favorite emails of the year has the subject matter “Gobble Gobble” and is sent to find out who is bringing what. This from a family that my father describes as “having built homes that are essentially kitchens with rooms attached”. Suffice to say, every single dish is always amazing and with over 20 people round the table, plates are piled very high even before we’ve attacked the sea of pies waiting in the wings.


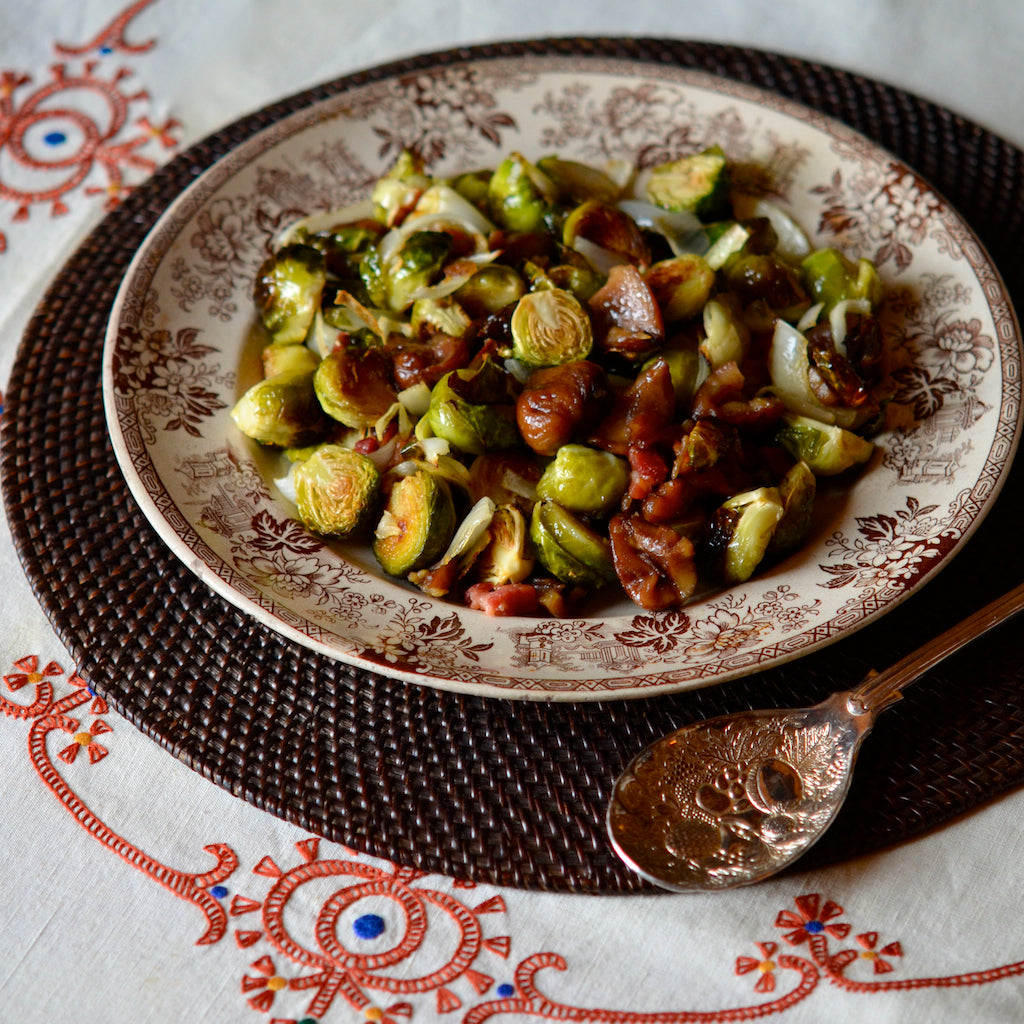
A creature of habit, I tend to make the same dishes every year mainly because I know my godson, Henry, is a fan. No Thanksgiving dinner should be without Brussels sprouts and when you add pancetta, chestnuts and Marsala, even the naysayers, like my godmother, will put a spoonful on their plate. So, Gobble Gobble to you all- wishing you a very happy Thanksgiving!


Brussels Sprouts with Chestnuts and Pancetta

(Adapted from Nigella Lawson)

Serves 8

Ingredients:

2lbs of Brussels sprouts (bottoms trimmed and sliced in half)

½ lb of pancetta (cubed)

1 onion (quartered and sliced)

3 tablespoons of olive oil

1 tablespoon of butter

1 jar of precooked chestnuts

¼ cup of Marsala

Bunch of flat leaf parsley (chopped)


Method:

1. Heat oven to 350 degrees.

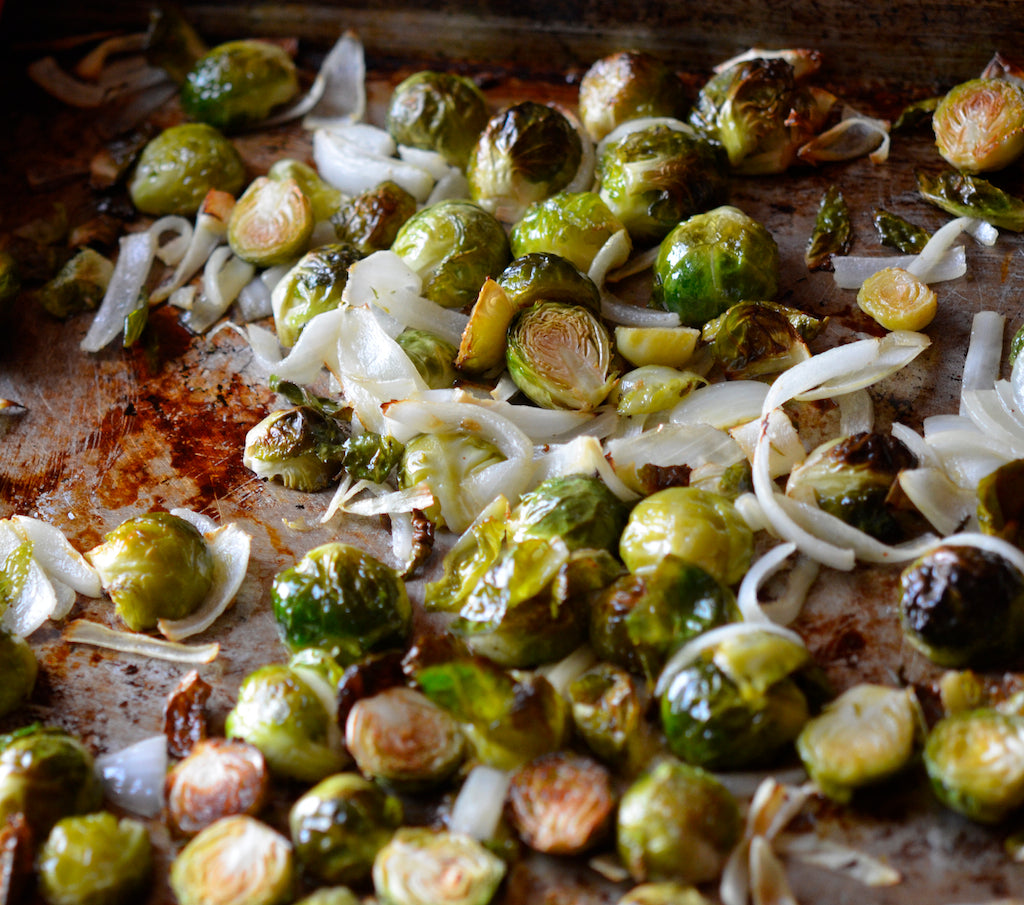
2. Spread the Brussels sprouts and onion out on a cookie tray and toss well with 2 tablespoons of the olive oil and a good pinch of salt.

3. Roast in the oven for about 20 minutes (turning halfway through) until the sprouts are crunchy and the onions are caramelized and soft.

4. In a large pan, fry the pancetta cubes until brown and crispy in the remaining oil.

5. Add the chestnuts and crush with the back of a wooden spoon.

6. Raise the heat and add the butter. When it starts to sizzle, add the Marsala.

7. Cook for a few minutes until it becomes syrupy, stirring constantly.

8. Add the Brussels sprouts to the pan and mix well.

9. Serve with a sprinkling of chopped parsley on top.


Risotto alla Milanese with Asparagus and Red Wine Sea Salt

Share on FacebookTweet about this on TwitterPin on Pinterest


When Francis and Vanessa of Gustus Vitae Condiments first sent me samples of their amazing spices and salts, I didn’t know which one I wanted to try first. I decided on the red wine sea salt as it sounded so original as well as ingenious (sea salt and red wine being two of my favorite flavors).


I’ve often had red wine risottos and liked them but found them a little overpowering especially paired with an actual glass of red wine so the idea of being able to sprinkle some over the top of a classic saffron risotto seemed like the perfect solution. I’m going to try Taste of the Southwest on some skirt steak next!


Risotto alla Milanese with Asparagus and Red Wine Sea Salt

Serves 6

Ingredients

1 bunch of fresh asparagus, ends discarded (slice into ½“ diagonal slices and steam or boil for about 3 minutes until tender)

4 cups of homemade chicken broth, or for vegetarians use vegetable broth (heat in a saucepan on low, ladling from there)

1 medium yellow onion, finely chopped

4 tablespoons of butter, divided in two

2 tablespoons of extra virgin olive oil

2 cups of risotto rice (I like to use Carnaroli but Arborio is often easier to find)

1 teaspoon of powdered Saffron

2/3 cup of freshly grated parmesan cheese

Red Wine Sea Salt to taste


Method

1. In a dutch oven or heavy saucepan, add 2 tablespoons of butter, olive oil and onions. Sweat until translucent – about 5 minutes.

2. Add the rice and cook on medium-high for 2 minutes. Stir continuously so the rice is coated with the fat and onions.

3. Lower the heat and slowly begin to add the stock; one ladle at a time.

4. Stir continuously and only add another ladle of stock once last ladle is absorbed.

5. After about 15 minutes, add the saffron and stir until the entire risotto turns a bright yellow. (If you run out of broth, you can add hot water)

6. Turn the heat off just before you think the risotto is ready (about 20 minutes after you’ve added the rice) – rice should still have a slight bite to it.

8. Stir in the asparagus, the rest of the butter and the parmesan cheese and cover for a few minutes to let everything blend together.

9. Serve in warmed bowls and sprinkle a little red wine sea salt and extra grated parmesan on top for a pop of flavor.


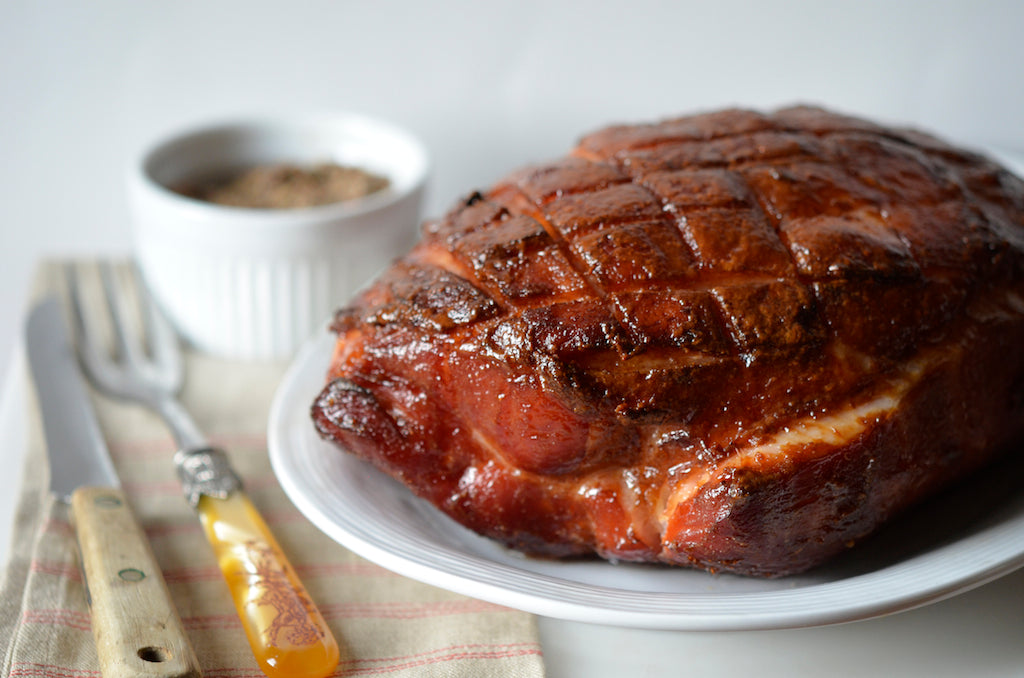
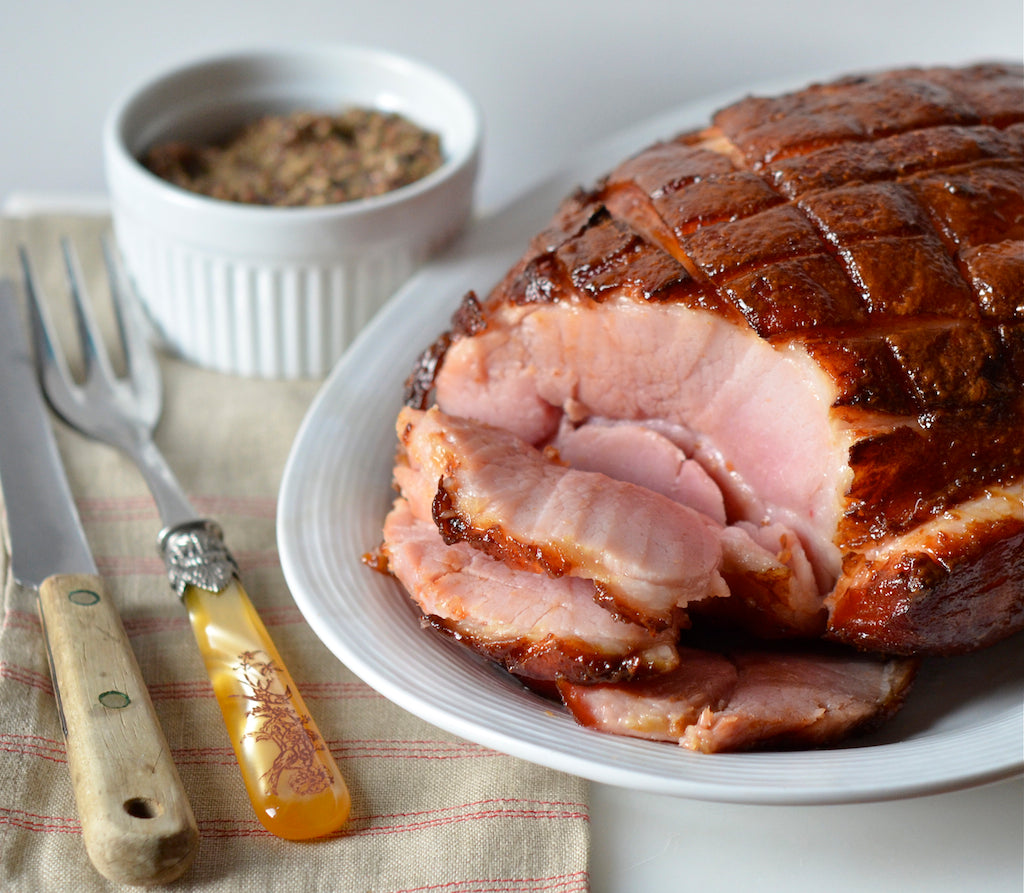
The Perfect Glazed Ham

Share on FacebookTweet about this on TwitterPin on Pinterest


I remember very clearly the first time I went with my friend Sarah Thorowgood to visit her family for the weekend. Sarah’s mother, Sue, had asked if I was one of those people who ‘ate like a sparrow’ and was quickly reassured that was most definitely not the case. I can still picture the family sitting around a large kitchen table and everyone laughing over words that each of them found annoying; ‘pamphlet’, ‘capsule’, ‘foliage’ etc. while Sue carried over the most enormous and delicious looking ham. Ham was not something we ever had at home growing up and my only experience till then was overly salty slabs of ham covered in tinned pineapple – classic 80’s England. I have seriously never had a ham that came close to the one that Sue made that night and has had me searching unsuccessfully for the last 17 years. That was the first of many happy weekends at their house in Berkshire until I moved to America. I remember my last visit and being given Martini glasses by the family for my ‘Sex and the City’ new life that I was embarking on with great trepidation. Would anyone see the humor in the word ‘pamphlet’? Where could I go to play Articulate? My favorite board game first introduced to me by the Thorowgoods and the source of hours of laughter. I’m glad to say that I’ve found all of the above in New York.


But back to that ham. I’ll admit that I never tried to make it myself as I was always slightly intimidated by the idea. It sounded so complicated and I was always unsure of what ham to buy in the stores especially since they all appeared to be precooked or smoked in some way. It wasn’t until recently when we started selling Schaller & Weber that I received a proper education on the different types of hams on the market. As soon as I tasted their Swedish Party Ham, I ran home and emailed Sue for her recipe. Although there were a lot of steps, it wasn’t nearly as complicated or intimidating as I had originally thought. As the ham was in its last stages in the oven, my entire flat was filled with a smell so delicious that it took me right back to the Thorowgoods kitchen all those years ago. We had to photograph it before I was allowed to taste it and the smell was driving me crazy. I couldn’t wait to find out if it tasted as good as it smelt and looked. It did!


What makes this recipe so delicious is how juicy the ham stays – you can almost cut it with a butter knife. The glaze is both sweet and salty and for a ham cooking novice like myself, very easy to make a large crowd happy. Getting through 7lbs of ham on your own though is no mean feat even after you’ve packed your friends off with multiple slices. So get ready for a post soon on my favorite ways to use up that delicious leftover ham.


Glazed Ham

Ingredients

1 Swedish Party Ham or Bone-in Holiday Ham– approx. 7.5lbs

2 teaspoons whole black peppercorns

3 large cloves of garlic (sliced)

4 bay leaves


For Glaze

1 cup of dark brown sugar

3 tablespoons of dry mustard powder

3 cloves of finely chopped garlic

Balsamic vinegar


Method

1. Preheat oven to 325 degrees. In a large pot, cover ham with water and bring to a boil – boil for 3 minutes.

2. Discard all the water and cover again with fresh water (this step helps remove excess saltiness from the finished ham).

3. Add peppercorns, garlic and bay leaves.

4. Bring back to the boil and simmer on a low heat, covered for 1 hour.

5. Remove ham from the pot but reserve the water.

6. On a cutting board, place ham flat side down. Remove any tough skin and much of the fat from the top, leaving about 1 inch of fat remaining. Score the remaining fat with shallow diagonal lines creating a diamond pattern.

7. While ham is simmering, prepare the glaze. In a medium bowl, mix all the dry ingredients thoroughly and then very slowly, drop by drop. Add balsamic vinegar, stirring as you go, until you have the consistency of a sticky paste.

8. Coat the whole ham with the glaze and place flat side down in an ovenproof dish.

9. Add about 3 or 4 ladles of the reserved water to the bottom of the dish. (Freeze the remaining water to use for stock and soups)

10. Cook for about an hour or until the surface of the ham is golden brown and the sauce is bubbling.

11. When ready, remove the ham to a cutting board and transfer juice to a saucepan.

12. Reduce the sauce by half (it is ready when it easily coats the back of a spoon). Serve the sauce separately in a gravy boat and pour over carved ham at the table.

NB: I found it very useful to pre-slice my leftovers and freeze in individual bags. That way when I was making a new recipe, I could defrost only what I needed.


A Day Trip to Hudson, NY

Share on FacebookTweet about this on TwitterPin on Pinterest


Sometimes I forget to take advantage of being my own boss. The 9 to 5, Monday to Friday structure is still so deeply ingrained that the idea of going to a museum on a Tuesday to avoid the crowds still feels like I’m playing hooky. So when Frances Janisch, the über talented photographer, food blogger, Many Kitchens producer and now dear friend asked me to join her on a day trip last week, I jumped at the chance. She had been commissioned to write and photograph a story on Hudson, New York.


I can’t think of many such beautiful towns (though technically it’s a city) that you can get to so easily from New York City (but would love to hear about them if you know of any!). Frances and I caught an early train and the ride itself was stunning as we hugged the Hudson River almost the whole way and could enjoy the spectacular leaves from the comfort of our Amtrak seat.


We had a full schedule of places to visit before catching a 4pm train home so up and down Warren Street we went with me being pathetically unhelpful except for holding the tripod for a few minutes every now and again. We stopped into the very eclectic Trout & Co antique store (below) on the way to our first appointment at Olde Hudson Deli; a food store to rival any in the city with huge jars of olives, mountains of cheese and freshly baked pies.


We then went from establishment to establishment learning more and more about the history of Hudson from the various owners that Frances charmed. A few of my favorite stores are photographed below: The linens at Rural Residence, the table settings and furniture at Finch and the apothecary jars and mid century chairs stacked high at Hudson Supermarket.


The proximity to the city, gorgeous shops, restaurants and countryside, while no longer offering much in the way of bargains, is a far cry from the Hudson of even 5 years ago when you could (apparently) still buy crack on street corners.


In the 1800’s, Hudson was the 4th largest city in New York State and was one vote away from being the State’s capital but by the late 19th Century, it had fallen on bad times and for much of the 20th Century, it was known for its vices and even nicknamed The Little Town with the Big Red Light District. It was heartening to see a city restored to its former glory days! (Below is a view from the very chic Hudson Merchant House)


I’m definitely going back if only to eat at some of the incredible looking restaurants. Top of my list would be Fish and Game who were setting up for dinner when we arrived. They are housed in a beautifully converted blacksmith shop and have an entirely seasonal and local menu that changes weekly. This Pork Roast turning on the spit, dripping fat onto the potatoes below, had me seriously considering trying to find a bed for the night – it might be the only way to stop me drooling. Sadly, we had heard from the two Inns that we visited that they didn’t have a spare room until January – it seems Hudson is no longer a well kept secret!