Faux Tarte Tatin with Creme Anglaise


Sometimes there’s nothing quite like a sweet shortcut when you’re pressed for time. My favorite cheats are sweet cheats. We all lead busy lives and the idea of baking a pie after a long day’s work can seem like a step too far. Years ago, one of my best friends whipped up this “faux” tarte tatin in minutes, and had I not seen her do it I would never have believed it was so easy. It’s now my go-to recipe for a dinner party dessert, and one that I rarely have to leave the house to make; it has just four ingredients, all of which I usually have on hand. So when you find yourself stuck with a last-minute guest coming to dinner, or you have been asked to bring a dessert to a potluck dinner, I’d highly recommend giving this a try.


The “faux” creme anglaise sauce that I serve alongside is the best cheat of all. It is melted vanilla ice cream! Could anything be simpler than that? I pour it over everything from brownies to mixed berries but it’s absolutely perfect with apple pie.


Faux Tarte Tatin
Ingredients:
4 tablespoons brown sugar
4 tablespoons butter
2 Granny Smith apples
1 sheet frozen puff pastry (thawed)


Method:
1. Heat the oven to 350 degrees F.
2. In a small saucepan, melt the butter and sugar until you have a smooth liquid.
3. Peel and slice the apples (I cheated and used an apple corer and divider) and mix with the butter and sugar.
4. Butter a round cake pan (I used a 9-inch) and arrange the apple slices in a fan. Scatter what’s left over on top.
5. Place the sheet of pastry over the apples; you may need to roll it a little to get it to be big enough.
6. Trim the pastry to the edges of the tin.
7. Bake for 45 minutes or until the pastry looks perfectly browned.
8. Invert onto a plate and serve with melted vanilla ice cream or, as I like to call it, creme anglaise!

Raspberry Madeleines


There’s no two ways about it, for this recipe you need a Madeleine pan, but the fact that within 20 minutes you can always whip up a batch of these soft, buttery French classics should be enough to convince you to get one. You can make them without raspberries but I loved the touch of tartness and juiciness that they added.


Raspberry Madeleines 

Published in Recipes from Many Kitchens

Makes approximately 20 Madeleines

Ingredients:

4.5 ounces (127g) unsalted butter

3 large eggs

4.5 ounces (130g) sugar

6 ounces (170g) flour

¼ teaspoon baking powder

15 raspberries (cut in half)


Method:

1. Preheat the oven to 375°F/190°C.

2. In a small saucepan, melt the butter and set aside.

3. In a large bowl, beat the eggs and sugar until the mixture becomes pale.

4. Sift the flour into the bowl, then add the baking soda and butter to the mixture. Stir well until smooth.

5. Butter up the madeleine molds well and add mixture to mold until each is 3/4 full. Nestle a raspberry half in the middle of each one.

6. Bake for 10 – 15 minutes until the color is just beginning to turn. They pop right out of their molds and can be served immediately.

Hamantaschen


This week Aurora takes over the blog to share a classic hamantaschen recipe for Purim as well as a little lesson on the holiday.


It’s almost Purim, a Jewish holiday celebrating the salvation of the Jewish people in ancient Persia from the Prime Minister Haman’s plot to eradicate them. Queen Esther turned the tables on Haman thus saving her people.


Today the holiday is celebrated with costumes (many little girls dress as Queen Esther), noisemakers (to drown out the sound of Haman’s name), drinking and these delicious hamantaschen cookies. Hamantaschen in Yiddish means “Haman’s Pockets” and they have three sides much like Haman’s three-cornered hat. The cookies are often filled with poppy seeds but here we took the liberty of filling with Friend in Cheese’s delectable jams. We hope you enjoy them and have a joyous and fun Purim whether you dress up and celebrate or simply want to try a taste of another culture!


Hamantaschen

Makes 18 cookies

Ingredients:

2 cups of flour

1 teaspoon baking powder

1/4 teaspoon kosher salt

1 egg plus 1 egg yolk

1/3 cup vegetable oil

Zest of 1 lemon

2 teaspoons fresh lemon juice

2 tablespoons orange juice

1 tablespoon brandy

Lavender Plum Jelly

Forbidden Fruit Marmalade

1 egg, beaten


Method:

1. In a medium bowl mix flour, baking powder and salt then set aside.

2. In a large bowl beat eggs with yolk then add oil, zest, juices and brandy. Mix until smooth with a wire whisk.

3. Slowly stir the flour mix into the egg mixture until a sticky batter is formed. Cover the batter in plastic wrap and refrigerate from 1 hour to overnight.

4. When ready to bake cookies, preheat the oven to 375F.

5. Divide the dough in two and roll one ball out on a lightly floured surface to 1/4 inch thick. Cut the dough with a biscuit cutter or a cup that is 4 inches in diameter.

6. Spoon a teaspoon of jam in the center of each cookie. Then fold up the sides of the circle to create the triangular shape of the hamantaschen. Pinch along the seams as you go to make sure they are secure. Repeat with remaining dough, alternating between jams.

7. Transfer finished hamantaschen onto 2 baking sheets. Brush all the sides with the beaten egg and then bake in the center of the oven for 10-15 minutes until browned on all sides.

8. Allow to cool and then eat immediately or store for up to 4 days in an airtight container.

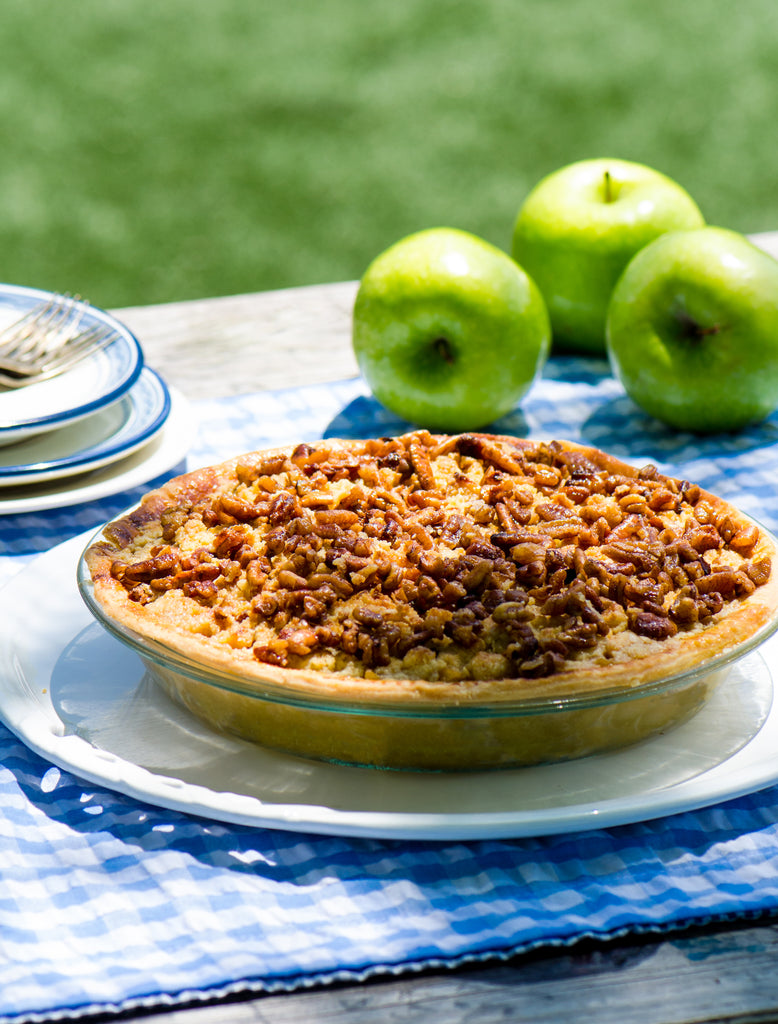
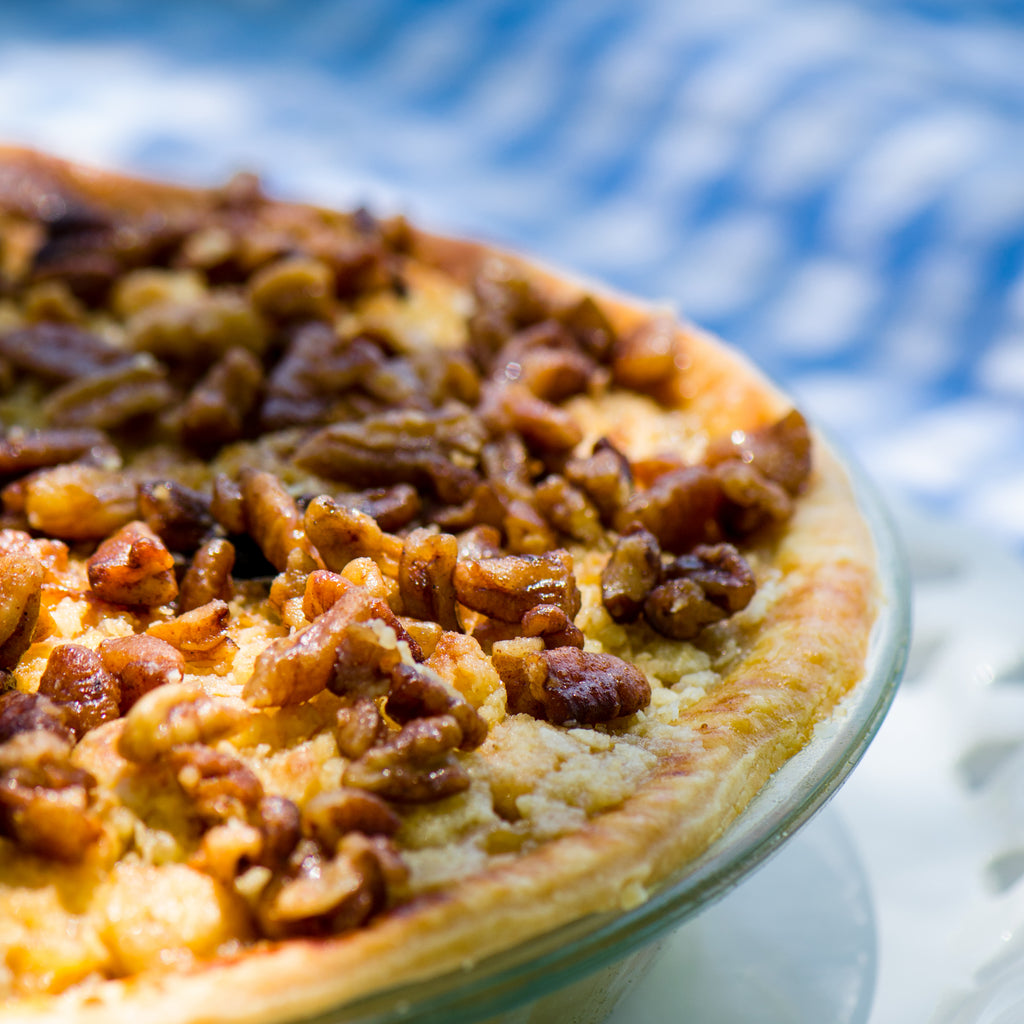
Pecan Apple Crumble Pie


I can never decide which I like more, apple pie or apple crumble and now I don’t have to. The best of all worlds with buttery flaky pastry on the bottom and sweet juicy filling oozing out of the nutty crunchy layer on top. I used Molly and Me’s Praline Pecan Toppings but any of her home grown and home roasted pecan mixes would work just as well.


Pecan Apple Pie

Serves 4-6

Ingredients for the pastry:

8 oz plain flour

5 oz unsalted butter, chilled and cubed

3 ounces sugar

1 egg plus 1 egg yolk mixed with a splash of milk


Ingredients for the filling:

4 or 5 apples, I like to use a mixture

Zest of 1/2 lemon

3 tablespoons muscovado sugar

1/2 teaspoon cinnamon

1/2 teaspoon salt

1 cup of all purpose flour

1/8 teaspoon salt

1/4 cup of oats

1 stick of butter at room temperature

1/2 cup of soft brown sugar

1 jar Praline Pecan Toppings


Method for the pastry:

1. Preheat the oven to 300°F.

2. Put the flour, butter and sugar in a food processor and blitz until you get crumbs.

3. Add the egg and mix again.

4. Roll out the pastry on a floured surface until 1/4″ thick. Lay the pastry in a 9″ pie dish, cut off any overhang with a knife and press the back of a fork around the rim. Refrigerate while you prepare the filling.


Method for the filling:

1. Peel and core the apples then cut into eighths.

2. In a sauce pan over low heat, toss the apples with the lemon, sugar, cinnamon, salt and a tablespoon of water. Simmer for about 5 minutes and then allow to cool completely.

3. In a large mixing bowl, mix the flour, salt, oats and butter using your fingertips until you get a “crumbly” texture. 

4. Add the sugar to the mixture and combine well.

5. Remove the pie dish from the fridge, line with foil or parchment paper and then fill with uncooked rice or beans. Bake for 20 minutes and let cool.

6. Once cool, pack the apple mix tightly into the dish and sprinkle the crumble mixture  and then the pecans over the apples.

7. Use the yolk and milk mixture to egg wash the pastry rim and then bake in the oven for a further 30 minutes or until nicely browned. 


Caramel Pecan Sticky Buns


Everyone loves a good sticky bun but not many people have the time or inclination to wait for dough to rise. These are the perfect solution. They use self-rising flour instead of yeast and as a result they cook in under 20 minutes and have an incredibly fluffy texture. It is one of those recipes that looks too good to be true but you’ll be passing along to your friends and making again and again.


Caramel Pecan Sticky Buns

Makes 12 

Ingredients:

Caramel Glaze:

2 tablespoons caramel sauce

4 tablespoons melted butter

1/4 cup brown sugar

1/2 cup Bourbon Pecan Toppings


Dough:

2 cups self rising flour, plus a little additional for rolling

1 cup heavy whipping cream

1-2 tablespoons cold water


Cinnamon Filling:

5 tablespoons warmed and soft butter, divided

2 teaspoons cinnamon

1/2 cup brown sugar


Method:

1. Preheat oven to 425F. Line a 9 inch cake pan with parchment paper. To do so, roll out a piece of parchment and place your cake pan on top. Trace around the edge with a pairing knife using just enough pressure to cut. Lay circular parchment in cake pan.

2. Pour butter on top of parchment then drizzle caramel sauce on top. Sprinkle with brown sugar and chopped pecans and spread to create one even layer.

3. In a medium bowl mix flour and whipping cream. Add 1-2 tablespoons cold water (just enough to get the dough to hold together to form a ball).

4. On a lightly floured surface, roll out your dough to about a foot long and 8 inches wide. Top with 4 tablespoons softened butter. Then sprinkle with cinnamon and evenly spread out the brown sugar.

5. Roll the dough towards you to create a 12 inch log with the seam facing down.

6. Slice off 1/4 inch from each of the ends and discard then divide the dough into 12 even slices.

7. Position your slices in a ring atop the caramel pecan coating (leaving as much space between them as possible). Brush with remaining tablespoon of butter and bake 17 minutes until browned.

8. Flip onto a serving plate so the caramel pecan glaze faces up and trickles down your finished buns. Serve warm.

Popina’s Plum Tart


I’m writing this from my very favorite place on earth. It is pure heaven to be back in Italy where everything is reassuringly unchanged. I slip so easily into the daily routine of morning visits to Gaiole to stock up on supplies; succulent meat from Vincenzo, the butcher and a replenishment of fresh fruit from Angiolo, the green grocer before heading back to a lazy day of reading on the wall before preparing dinner.  


Banished from the wall for a few hours due to a torrential downpour, I decided to try my hand at Popina’s plum tart that is usually Ben’s domain. He started making it a few years ago and it looks and tastes so impressive that I assumed it was beyond my capabilities. Guided by Ben’s husband Charlie, an expert baker, the tart was in the oven in no time at all and our sweet toothed guests were finally given something to satisfy their cravings. I can’t recommend Popina’s Book of Baking highly enough for novices to experts alike.


Popina’s Plum Tart

Adapted from Popina Book of Baking


Ingredients:

Sweet Shortcrust:

8.8 ounces plain flour

4.4 ounces unsalted butter, chilled and cubed

3 ounces granulated sugar

1 egg

Sponge Dough:

1.6 ounces unsalted butter, at room temperature

3.2 ounces granulated sugar

1 egg

1 1/2 teaspoons baking powder

3.2 ounces plain flour

Tart:

A selection of plums (about 15)

3 tablespoons marmalade 

2 tablespoons water


Method:

Preheat the oven to 325°F


Make the Shortcrust pastry:

1. Put the flour, butter and sugar in a food processor and blitz until you get crumbs.

2. Add the egg and blend again until the ingredients form a ball of dough. 

3. Wrap the dough in plastic wrap and put in the fridge while you do the next steps.


Make the sponge dough:

1. With an electric whisk, blend the butter and sugar in a mixing bowl.

2. Add the egg and baking powder and whisk to combine.

3. Gently fold in the flour by hand until you get a smooth paste.


Make the tart:

1. Butter a 9″ fluted tart pan, preferably loose based.

2. Roll out the shortcrust pastry on a lightly floured surface and line the tart pan. You can also cheat like I did and put the ball of dough directly into the pan and use the palm of your hands to distribute evenly and then your fingers to fill the sides. 

3. Trim any excess dough from the edges.

4. Spoon the sponge dough into the tart shell and spread in an even layer.

5. Scatter the plums around the tart. 

6. Bake in the preheated oven for 45 minutes. The sponge dough will rise around the fruit and turn a golden brown.

7. Leave the pie to cool and heat the marmalade in a small pan with the water. 

8. Sieve the marmalade and brush over the tart before serving. 

Blueberry Crisp


What would you have for your last supper? I know it sounds like a morbid question but it’s one I love to ask people and have been annoying friends and strangers with ever since I was given a copy of the gorgeous  ‘My Last Supper’  by Melanie Dunea. I’ve been perfecting mine for years. It starts with zucchini flowers stuffed with ricotta and fried in a light batter. Then unsurprisingly, if you’ve read my earlier blogs, spaghetti with tomato sauce followed by roast lamb, caramelized carrots and potato gratin all finished off with a fruit crumble buried in heavy cream. What I’ve found in my own little (completely unsubstantiated) anthropological experiment is that no matter how much of a connoisseur of fine food a person has become, most everyone seems to want their last supper to contain something they were fed as a child. The connection between food, emotions and memories that we read so much about proven once more.


Crumbles (or Crisps if you are American) are my kind of dessert; baked fruit bubbling up under a thick streusel like topping. I remember picking blackberries in Suffolk as a child and reaching a little too far for that perfect juicy berry before the inevitable fall into the bramble and the later satisfaction of having contributed to the apple and blackberry crumble for dinner. Perhaps best of all fruit desserts is my godmother’s blueberry crisp, a staple at large dinners she gave; so easy to put together for a big group and always beloved by all.


When Mr. Wittle’s joined our community I instantly thought of how delightful and easy their pie fillings would be as crisps/crumbles. Keeping a jar on hand lets you have a fresh baked dessert all year round, no matter what is in season. So below is my godmother’s recipe adapted for Mr. Wittle’s delectable blueberry pie filling. I hope you enjoy.


Blueberry Crisp

Serves 6

Ingredients:

1 jar of Mr. Wittle’s blueberry pie filling (or if making fresh: 4 cups of fresh blueberries)

1 cup of all purpose flour

1/8 teaspoon salt

1/4 cup of oats

1/2 cup of soft brown sugar

1 stick of butter at room temperature


Method:

1.Preheat the oven to 350°F.

2. Butter a large baking dish.

3. Add the pie filling (or fresh blueberries) and spread evenly.

4. In a large mixing bowl, mix the flour, salt, oats and butter using your fingertips until you get a “crumbly” texture.

5. Add the sugar and combine with the flour, oats and butter.

6. Sprinkle the mixture over the fruit and bake on the highest shelf for 40 minutes or until the crumble has begun to brown and the fruit is bubbling through.

7. Serve warm with creme fraîche, ice cream or my favorite, heavy cream.


Baked Peaches (Pesche alla Piemontese)


My mother has a repertoire of a few desserts that she does expertly but rarely and I’m sure I have her to thank for my relatively savory tooth. Baked peaches were one of these famous few and a dish that her grandmother used to make for her when she was a child growing up in Piedmont. Every summer, the minute I start to see ripe peaches in the market, I feel the need to bake up a batch and hope that they taste as good as my great grandmother’s.


I have just returned from a blissful but brief visit to Italy where the peaches were in abundance and so juicy that I had to eat them over the sink. I crammed a two week holiday into 5 days with my oldest friend Catherine. She has the house across the way from me and as children we used to talk about being old ladies together in Italy. Sitting on ‘The Wall’ last week, we joked that we were finally living the dream! Ben joined us from London for just two nights and wrote how he felt like he’d been away for a whole week. There’s something about being there (probably the lack of internet) that makes you feel wonderfully cut off and relaxed.


But back to those peaches! Ever since Aurora and I first discovered Bunches & Bunches delicious Snaps ginger cookies, I’ve been dying to try them on top of baked peaches. It was one of those pairings that I just knew would work as an improvement on the traditional Amaretti di Saronno. The delicious smells emanating from the oven told me I was right before I even tasted them. Wanting to still include a little of that classic flavor, I added a few splashes of Amaretto into the baking dish.


Pesche alla Piemontese

Serves 8

Ingredients:

3 tablespoons unsalted butter, divided

4 peaches (as ripe as you can find)

1/4 cup sugar

8 ginger snaps

1/2 cup Amaretto


Method:

1. Preheat the oven to 350° F.

2. Grease an ovenproof dish with 1 tablespoon of the butter.

3. Halve and pit the peaches and place in the ovenproof dish.

4. In a bowl, crumble the ginger snaps and mix with the sugar.

5. Divide the mixture among the peaches.

6. Dot each peach with butter.

7. Pour over the Amaretto (you could also use sherry or even white wine) allowing some to fall into the bottom of the dish.

8. Bake in the oven for about an hour and serve warm with creme fraiche.  


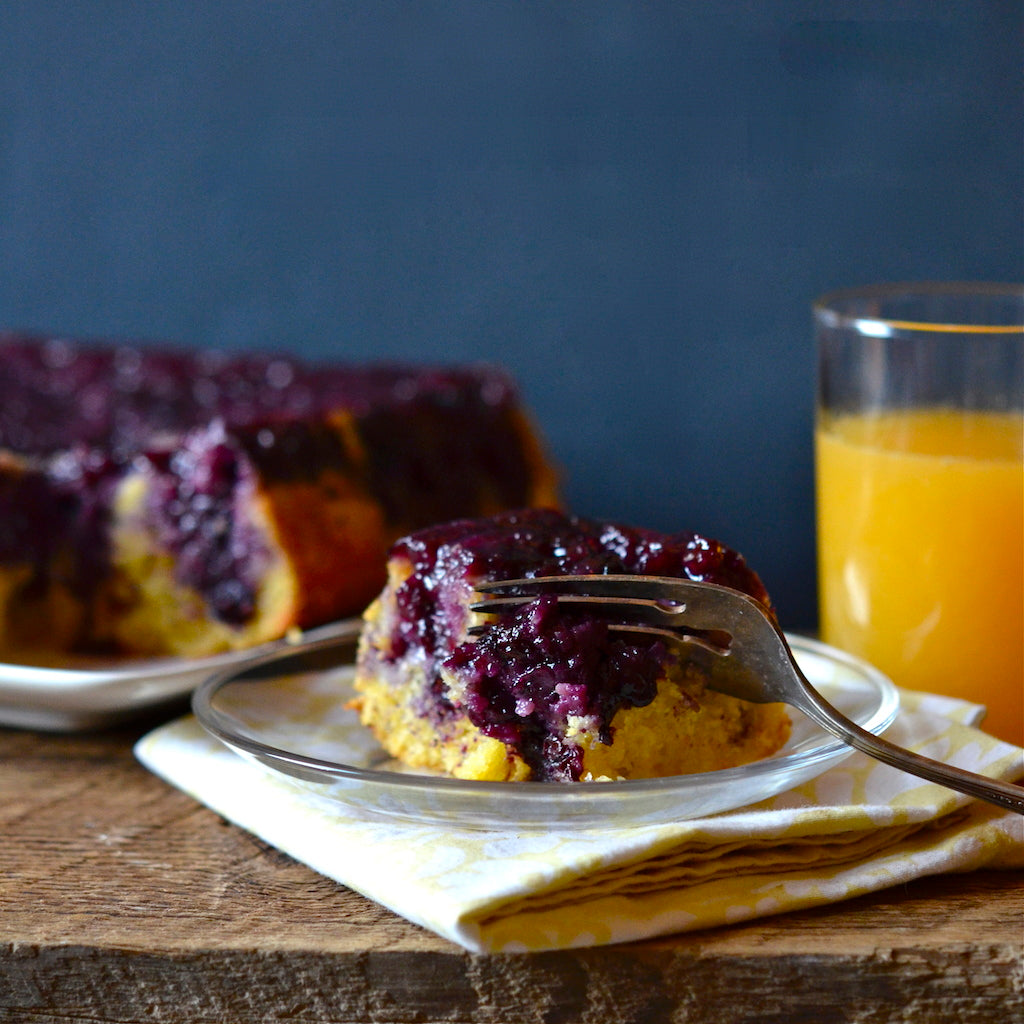
Upside Down Orange and Blueberry Polenta Cake


The highlight of every February is the much anticipated arrival of a box of Honeybells (also called Tangelos) thanks to Tim and Lolly’s generous annual gift. For those who have never had one, they are a cross between a tangerine and a grapefruit taking the best from each fruit; the juiciness of the grapefruit and the sweetness of the tangerine.  As corny as it sounds, they bring a touch of summer to this otherwise cold and depressing month. My box arrived last week and there are so many that I try to incorporate them into recipes as well as the obvious morning glass of OJ and the “occasional” evening cocktail.


For all my love of cooking, I have a primal fear of baking. One that I plan to overcome but that I’ve managed to hide for years by having this ONE amazing cake recipe. It is so easy and foolproof that it makes everyone who bakes it look like a domestic goddess. I even baked 4 of them at once when cooking for a friend’s large dinner that included the likes of Al Pacino and Sting! Thank god they went for my first suggestion of dessert as I didn’t actually have a second.


It comes from the self nominated domestic goddess, Nigella Lawson but was introduced to me by my fairy godmother, Eliot who first made it for me over 10 years ago. I thought I’d bake it for ValentinA’s day and get to use some of those juicy Honeybells – killing two birds with one stone.


Upside Down Orange and Blueberry Polenta Cake

Serves 6-8 people

Ingredients and Supplies: 

Parchment paper

1 1/3 cup of sugar

3 cups of blueberries

2 large eggs

The zest of 1 large orange (I just substituted a Honeybell wherever the recipe calls for an orange)

2/3 cup of freshly squeezed orange

2/3 cup of olive oil (not extra virgin)

1/2 cup of polenta

1 1/4 cup of all purpose white flour

2 teaspoons of baking powder

1/4 teaspoon of salt


Method:

1. Heat the oven to 350 degrees.

2. Grease and line the pan (I use an 8 x 8 inch pan) with the parchment paper hanging over the edges.

3. Sprinkle 1/3 cup of sugar over the base then cover with the blueberries.

4. In a large bowl, mix the eggs with 1 cup of sugar and the orange zest.

5. Whisk until mixed then add the orange juice and olive oil and continue mixing.

6. Add polenta, flour, baking powder and salt and mix until smooth.

7. Pour over the blueberries and bake in oven for approximately 45 minutes (insert a skewer and test – skewer should come out clean when cake is done).

8. It should be a nice golden brown on top and still springy to the touch.

9. Let cool for about 10 minutes and then invert over a plate and remove the pan and gently peel off the parchment paper.


Torrone Molle


I do not come from a family of bakers. Great cooks, yes, but not bakers. My first attempt at baking was when I was about 7 years old and my mother wanted to keep me occupied so sent me to the kitchen with some baking ingredients. I decided to put my “cake mix” in a fish shaped tin and was beyond excited when I removed it from the oven as I thought I had struck gold with the idea of a fish shaped cake. As I turned it out on to the serving plate, my “cake” slipped and fell to the floor only to bounce an impressive foot before wobbling to its final resting place. In my defense, I think the whole meal flour was to blame.


That’s why I love this recipe so much – you literally mix the ingredients and put it in the fridge – no baking required and no fear of rubber fish. My mother made Torrone Molle for me every year on Valentine’s Day having got the recipe from her friend Anna Del Conte. Saint Names Days are a big deal in Italy and being called Valentina, I’ve managed to have a lifetime of cards on February 14th even if they are rarely from romantic admirers. My father once got all the assistants in his office to sign cards for me and send them from their homes. I got 15 cards that year from all around England.


I made Torrone Molle for the first time the other week – it’s very rich but also very delicious. A little goes a long way. Since it’s raw, please make sure to use the freshest of eggs and you might want to leave out the alcohol if you’re serving it to children! As far as portions, it is a versatile dessert. You can cut in slices as you would biscotti, cube as you would for bite size brownies or slice a larger portion to be served with a dash of whipped cream after dinner.


Torrone Molle

Ingredients

8oz. unsalted butter, softened

8oz. granulated sugar

4oz. good cocoa powder

1 egg plus

1 egg yolk

4oz. almonds coarsely chopped (blanched peeled cooking almonds work well)

4oz. plain cookies crumbled (you can use Lu’s Le Petit Beurre)

2 or 3 tbls. Brandy or rum (optional)


Method:

1. Cream together butter and sugar till light and fluffy.

2. Add cocoa (a little at a time) until all is absorbed.

3. Beat egg and egg yolk together lightly and add slowly to the mixture until well mixed.

4. Add all the rest, mix well and spoon into a 12” loaf tin lined with greaseproof paper.

5. Refrigerate overnight or for at least for 4 hours.

6. Turn out onto serving dish. It is not the most beautiful looking of deserts so I recommend cutting it into cubes or slices before serving.