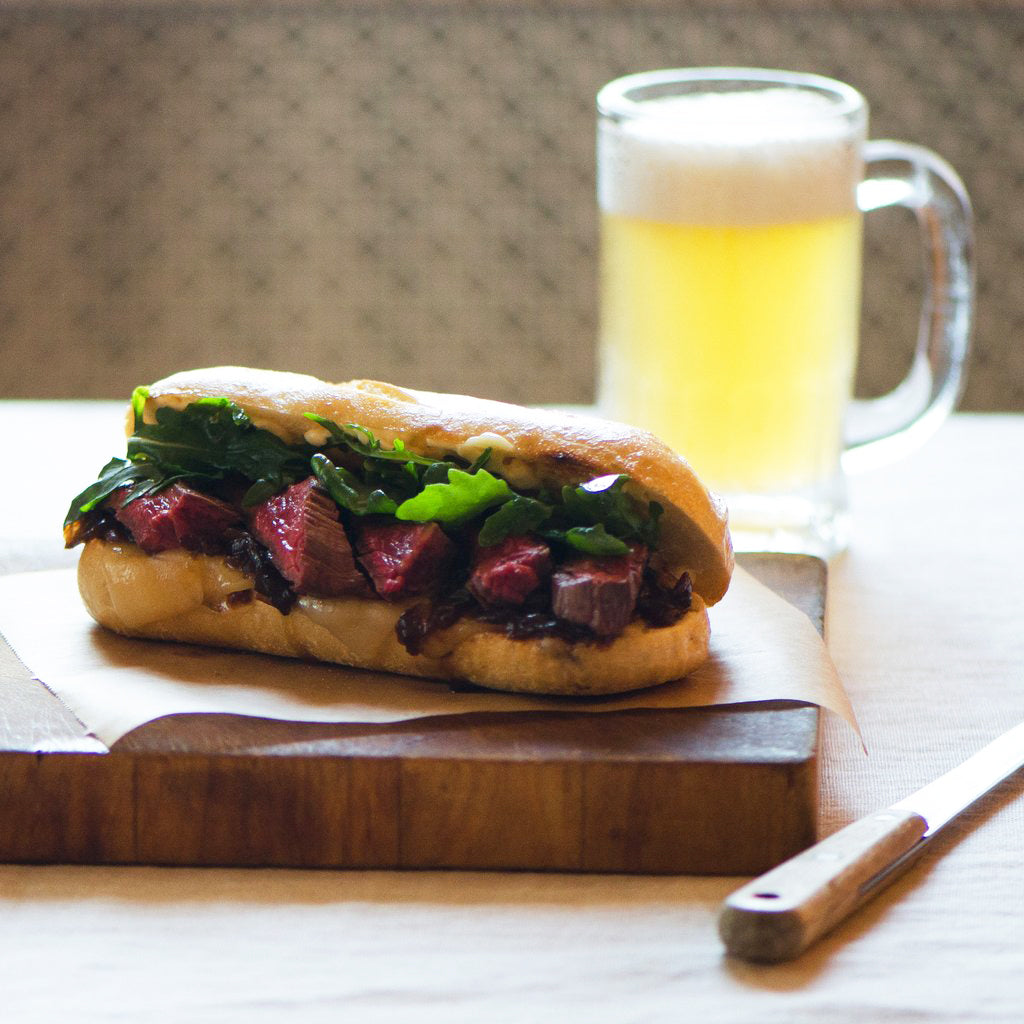
The Ultimate Steak Sandwich


There is a Skirt Steak Panino at Swoon Kitchenbar in Hudson, NY that I have literally dreamt about. Last week, while contemplating the 4 hours it would take me to get a ‘fix’, I realized it might be just that little bit more convenient to figure out how to recreate it at home. With Hillhome’s Vidalia Onion Jam and Victoria Amory’s Roasted Garlic Mayonnaise being permanent fixtures in my fridge, it took almost no effort to achieve a very convincing forgery of the original.


This sandwich is incredibly juicy and you’ll find yourself savoring the steak as it should be appreciated- messily and carnivorously. Basically, this is not the meal for a first date. It is a sandwich that can only be shared with a true friend who appreciates its goodness. Choose wisely.


Skirt Steak Sandwich with Caramelized Onions and  Aioli

Serves 2 

Ingredients:

2 French bread rolls

4 slices Swiss cheese

1/2 lb skirt steak

Sea salt and freshly cracked pepper

1 tablespoon olive oil

Roasted Garlic Mayonnaise

Vidalia Onion Jam

1 cup arugula


Method: 

1. Slice the rolls in half lengthwise, making sure not to slice all the way through. They should open like a book. Toast them in a toaster oven until just beginning to brown.

2. Spread garlic mayonnaise on the inside of both rolls, making sure to cover all sides. Next, lay 2 slices of Swiss cheese on the bottom half of each roll. Return to the toaster oven or broiler to finish off. Cook until cheese is just melted.

3. Season the skirt steak generously with salt and pepper. Heat the olive oil in a frying pan. Once hot (1-2 minutes), add the skirt steak and cook for 2-3 minutes on each side for rare to medium rare. Remove to a cutting board to rest for a couple of minutes before slicing. Cut the steak against the grain into 1 inch thick slices.

4. Spread Vidalia Onion Jam on the top half of your toasted French rolls. Then divide the steak between the two rolls and top with arugula.

5. Eat immediately!

Jerk Shrimp Sandwich


For this post, Aurora and I set about constructing our perfect summer sandwich. We wanted to create a recipe from scratch and really think about each ingredient. We wanted bright colors, refreshing flavors and complimentary textures. We took inspiration from the unforgettable Jerk Chicken Fajitas I had 12 years ago in Jamaica as well as the Louisiana Po’Boy. The result was everything we hoped for and more. Marinating the shrimp in Baron’s International Jerk Sauce gave us the heat we wanted. Spreading the brioche bun with Victoria Amory’s Classic Lemon Mayonnaise gave us just the right amount of tang. The mango and red pepper relish along with some arugula filled in the missing sweetness and extra bite. We hope you’ll make them for your next picnic and enjoy them us much as we did.


Jerk Shrimp Sandwich

Serves 2

Ingredients:

1 lb. large shrimp, peeled and deveined

1 cup Jerk Sauce

2 brioche style buns

Classic Lemon Mayonnaise to taste

1/4 cup arugula


Mango Relish:

1 cup finely diced mango

1/2 cup finely diced red pepper

2 tablespoons minced red onion

1 tablespoon olive oil

1 lime, juiced

Sea salt to taste


Method:

1. In a large bowl, cover shrimp with jerk marinade, toss and cover the bowl with plastic wrap. Allow to marinate for at least 1 hour in the refrigerator or overnight.

2. In a medium bowl, combine ingredients for the relish and mix thoroughly. Season to taste with sea salt.

3. Heat your griddle or grill pan on high.

4. Dress buns with mayonnaise and top bottom buns with arugula.

5. Grill the shrimp on a grill pan till just pink about 1-2 minutes per side. Repeat until all the shrimp are cooked.

6. Divide your shrimp between the two buns and top with mango relish. Eat while shrimp is still warm. Enjoy.

Grilled Kielbasa with Shoestring Onion Rings


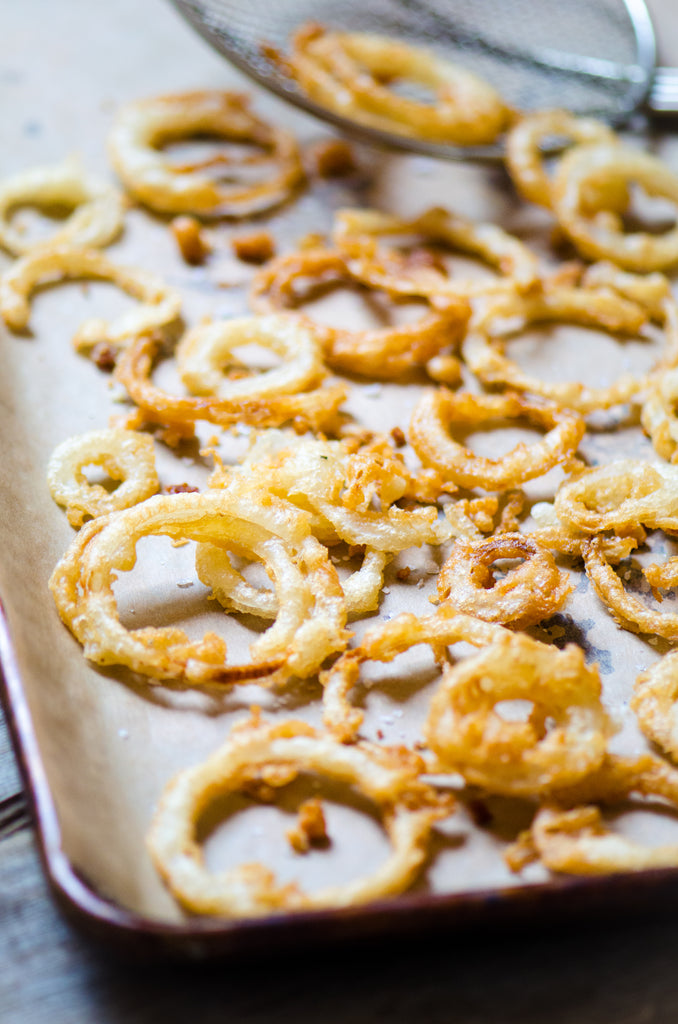
I was introduced to the mighty Kielbasa Dog by my godmother in Cape Cod and haven’t had a regular hot dog since. So much juicier and packed with flavor, the Kielbasa is an often overlooked sausage. Here, we’ve made it extra decadent with the addition of shoestring onion rings and smoky BBQ ketchup. The onion rings are addictive so be sure to fry up extra for snacking. They also make a wonderful burger topping if you are doing a mixed grill of dogs and burgers. We hope you enjoy!


Grilled Kielbasa with Shoestring Onion Rings 

Makes 4 large Hot Dogs

Ingredients:

Canola/vegetable oil for frying

1/2 cup all purpose flour

1 teaspoon cornstarch

1/2 teaspoon kosher salt

Freshly cracked pepper

6 oz. of beer

1 vidalia onion

Sea salt

1 Polish Kielbasa Ring

4 brioche style hot dog buns

Smokey BBQ Ketchup

Smoky BBQ Mustard


Method:

1. Fill a medium sized stock pot or Dutch oven a few inches high with oil and heat on high until the oil reaches 365F.

2. Meanwhile, whisk flour, cornstarch, salt and pepper in a medium bowl. Then whisk in the beer until the batter is smooth.

3. Line a baking tray with paper towels and set to the side of the frying oil.

4. Discard the ends and outer peel of your onion and then, using a guard, slice on a mandoline slicer to about 1/8″. Pull your rings apart and once oil is heated, begin dipping them in the batter and dropping them gently in the oil. Work in batches to prevent overcrowding. If rings stick together, use tongs to pull them apart. Fry until golden, turning over rings as needed, about 1-2 minutes total per batch. They fry quickly since they are thinly sliced.

5. When rings are golden brown, remove with thongs or a spider to the paper towel-lined tray and repeat with the next batch. Season finished onion rings with sea salt. As you are frying your rings, heat your grill or grill pan for the Kielbasa.

6. Slice the Kielbasa Ring in half. Slice each half again in half lengthwise to form 4 Kielbasa dogs.

7. Grill Kielbasa dogs 3-4 minutes per side until fully cooked and nice grill marks appear.

8. After Kielbasa have grilled, grill your buns, open face for 1-2 minutes until just toasted.

9. To assemble Kielbasa dogs, top each bun with a grilled Kielbasa and dress with shoestring onion rings. Finish with BBQ Ketchup and BBQ Mustard to taste. Enjoy.


BBQ Short Rib Sliders


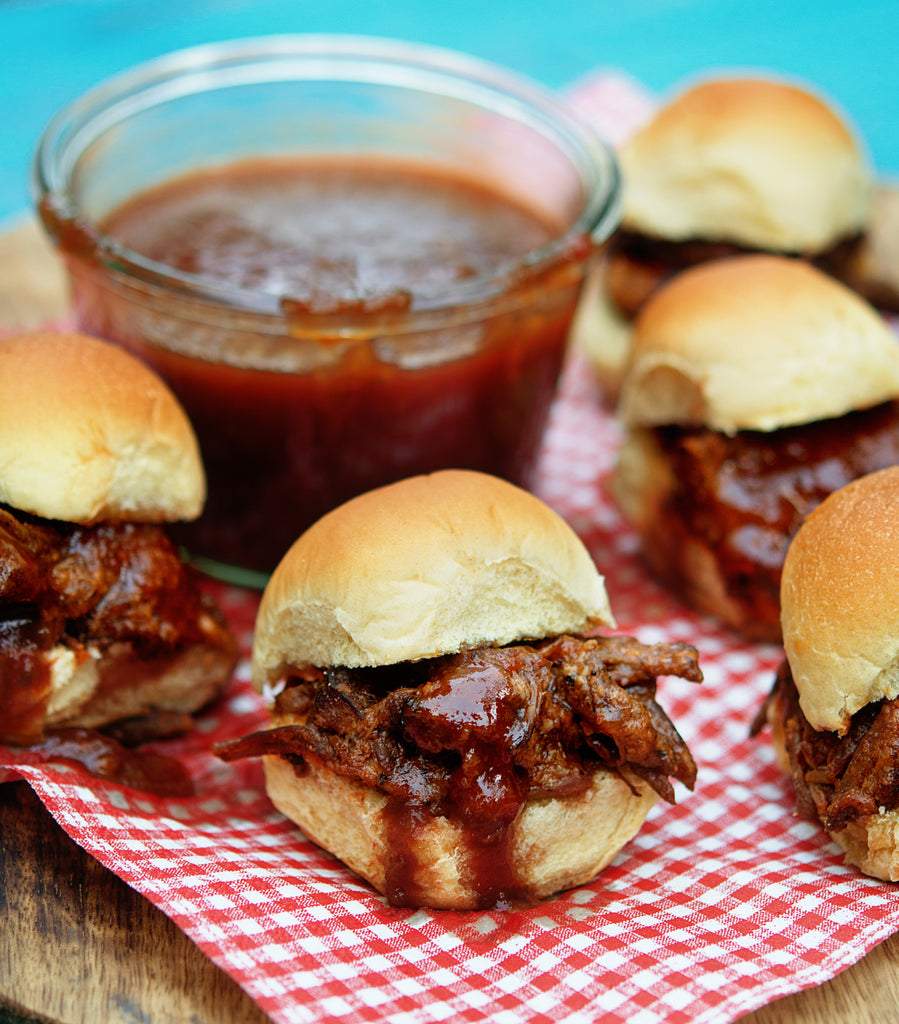
At the launch party for Many Kitchens, we tried to have food from each of our producers. Michael offered to bring short rib sliders to showcase his incredible barbecue sauce. They flew off the plates in a matter of minutes and I’ve been begging for the recipe ever since. I’m so excited that he has agreed to share it here.


Michael Steifman has proved that Barbecuing is no longer exclusive to the South. His expanding selection of rubs and sauces have saved me on multiple occasions when I find myself with some chicken legs and not much inspiration. Michael recently expanded his family too and became the proud father of a daughter. His obsession with all things barbecue is forever confirmed in his nickname for her; Smoky!


BBQ Short Rib Sliders

Makes about 24 sliders

By Stuart & Co. From Recipes from Many Kitchens


Ingredients:

2 pounds (907g) boneless short ribs (you can use bone in if that’s all you can find just buy extra to match bone volume & remove before shredding)

2 cups (470ml) BBQ sauce

2 cups(470ml) beef or chicken broth

¼ cup (25g) beef rub

2 tablespoons (30g) kosher salt

Grapeseed or vegetable oil

24 Martins Potato Buns Slider Rolls (any two bite size roll will do such as a brioche or mini potato roll)


Method:

1. Preheat oven to 350°F (180ºC). Season short ribs with beef rub and the kosher salt.

2. Heat a pan or grill to medium high. If using a pan to sear the beef, drizzle the oil in the pan. If using the grill drizzle the oil on the beef and coat it lightly.

3. Sear the beef on all sides in the pan or on the grill for a bout 1 minute per side then set aside.

4. Place the short ribs in a Dutch oven or roasting pan large enough for all the ribs to be in one layer. Mix BBQ sauce with 2 cups (470ml) of broth. Pour the mixture over the short ribs until they are just covered. Cover the pot with aluminum foil and place in the oven for 3 hours.

5. Once the ribs are tender and falling apart remove them from the pan and let them cool.

6. Pour the leftover braising liquid into a smaller sauce pot to heat the shredded beef back up in. Once the ribs are cool enough to handle, shred them and place them in the sauce. Warm over low heat then spoon onto potato buns and serve.

Plank Grilled Salmon Sandwich from Not Without Salt


We are thrilled to be able to share this recipe from the talented Ashley Rodriguez of Not Without Salt. We actually discovered Porter & York through her blog which we devotedly follow. What a delight to connect with not only such an outstanding food blogger but also with a new producer who sources the finest Pacific Northwest Salmon and other high quality meats. There’s nothing we enjoy more than building the Many Kitchens community to include such talented and creative individuals. We hope you enjoy the recipe, our newest products and also don’t forget to check out the Not Without Salt gift box which features some of Ashley’s favorite BBQ cuts from Porter & York.


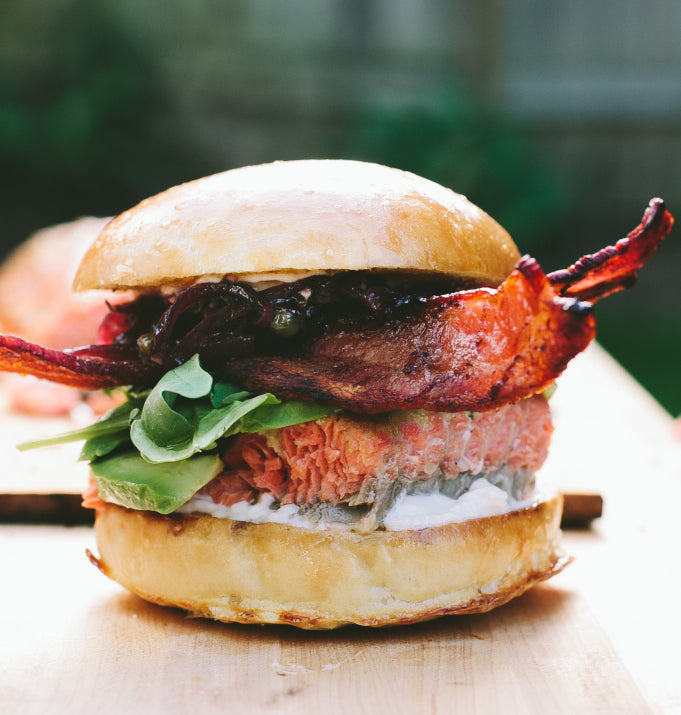
Plank Grilled Salmon Sandwich

Recipe by: Ashley (Not Without Salt)

Serves 6

Ingredients:

2 1/2 pound fillet of King Salmon

Salt & pepper

2 heaping tablespoons dijon mustard

3 tablespoons dark brown sugar

12 strips bacon

2 large avocados, peeled, pitted and sliced

3 cups arugula

6 brioche buns, halved

1/2 cup mayonnaise

cedar plank, soaked for at least an hour


Method:

1. Preheat your grill while you prepare the salmon.

2. Set the salmon on the soaked plank then season with salt and pepper. Spread the mustard on top then finish with the dark brown sugar.

3. Grill the salmon for 20 to 30 minutes or until the flesh is firm when touched and flaking.

4. After 10 minutes on the grill lay the bacon directly onto the grill and cook until crisp on both sides, about 10 minutes, flipping once halfway through.

5. Remove the salmon and bacon from the grill then let the salmon rest while you prepare the burgers.

6. Slather the brioche buns with mayonnaise.

7. Cut the salmon into 6 or so burger-size pieces. Place a piece of the salmon on the bottom bun then top with avocado, arugula and bacon. Finish with the red onion relish and then the other half of the bun.


Red Onion Relish

Ingredients:

1 large red onion, halved and thinly sliced

2 tablespoons olive oil

½ teaspoon kosher salt

1 tablespoons dark brown sugar

3 tablespoons red wine

1 teaspoon fresh thyme leaves

1 tablespoon balsamic vinegar

¼ cup drained capers


Method:

1. In a medium pan over low heat, add the olive oil.  Add the red onion and salt and saute for 15 minutes or until very soft, stirring frequently until done.

2. Add the sugar, wine, thyme leaves and vinegar. Cover and simmer for 8 minutes. Remove the lid and simmer for 5 minutes or until the liquid is syrupy. Fold in capers. Cool, then store in a jar in the fridge.

Building Your Perfect Burger


Burgers, like eggs, are highly personal – everyone likes them in a different way. The key to the perfect burger is having all the right building blocks.


Aurora and I had such a fun day grilling in her backyard – it felt like a party for two on one of those perfect sunny New York days when it’s hard to believe that work now includes a bbq! We had just taken on Victoria Amory and her amazing condiments and what better way to try them all out but on the perfect burger?


Aurora likes her burger medium and with all the trimmings: cheese, mustard with mustard seeds, a generous helping of ketchup, pickles for crunch and the smallest bit of mayonnaise. I like mine rare with cheese, ketchup and a little mayo on the bun. I still remember the best burgers that I ever had were made by Mrs. Bean in Cape Cod. I discovered years later that the reason that I would run to the beach club on burger days was that she seared the buns in butter before topping the burgers.


However you like them, make sure you have the best meat you can find and keep the burger itself simple – I like to use 80% lean ground chuck and just a little salt and pepper.


All American Cheeseburger 

Serves 4 people

Ingredients:

1 lb ground beef (100% lean ground chuck)

Salt and freshly ground pepper

4 slices of cheddar cheese

4 burger buns

Toppings: Lettuce, tomato, ketchup, mustard, mayonnaise, pickles


Method:

1) Heat the grill. If gas, heat to high and if using coals, until they glow orange and begin to ash.

2) Divide the meat into 4 plump patties and season with salt and pepper.

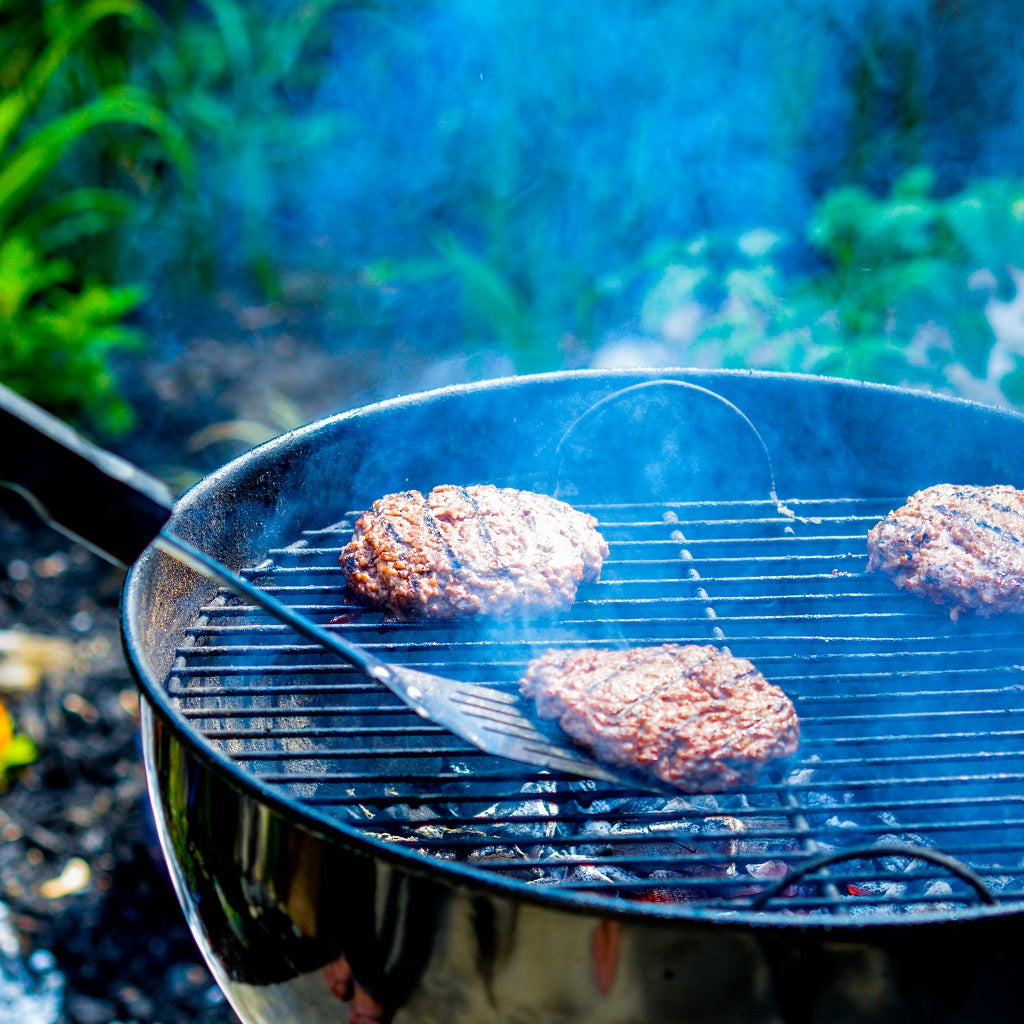
3) Grill burgers for 3 minutes on one side or until nicely charred.

4) Flip the burgers and grill for a further 3 minutes.

5) Add a slice of cheese to each burger, close the lid and cook for a further 1 minute for medium rare.

6) Remove burgers to a platter and add buns to the grill flat side down until slightly browned.

7) Go forth and create your burger adding all of your favorite toppings!


Croque Monsieur


I’m slightly obsessed with the Croque Monsieur at Buvette on Grove Street in the West Village. I’ve been a huge fan of the chef/owner, Jodi Williams since her days at Gusto and can honestly say that she’s responsible for getting me over my long lived ambivalence to salads. Her Fava Bean, Escarole and Pecorino Salad is something I’ve tried to recreate and am very excited to hear she has a cookbook coming out so I can finally make it myself.  Every time I visit Buvette, I’m stuck between ordering her Steak Tartare and the Croque Monsieur. The Steak Tartare usually wins out only because I’ve figured out how to make the Croque Monsieur at home using an Ina Garten recipe that comes wonderfully close. The Steak Tartare, I’m yet to figure out!


Croque Monsieur

1 serving

Ingredients:

1 tablespoon unsalted butter

1 tablespoon all-purpose flour

1 cup hot milk

Salt and pepper to taste

1 bay leaf

2 cups grated Gruyère cheese, divided

1/2 cup freshly grated Parmesan

2 slices of white bread (I use Italian Round)

Dijon mustard to taste

1 thick slice of ham


Method:

1. Preheat oven to 400 degrees.

2. Make a Béchamel sauce by melting the butter over a low heat in a saucepan and then adding the flour.

3. Stir for 2 minutes until it reaches the consistency of a fine paste.

4. Add the bay leaf and hot milk and stir over a low heat until the sauce thickens (about 5 minutes).

5. Turn off the heat and remove the bay leaf.

6. Add in 1 cup of Gruyère, all of the Parmesan and salt and pepper to taste. Stir well until the cheese has melted.

7. Lightly toast the 2 slices of bread.

8. Assemble the sandwich on the baking sheet. On one slice of toast, spread a little mustard then add the ham and sprinkle 1/2 cup Gruyère on top.

9. Top with the other slice of bread then slather over the cheese sauce until the sandwich is covered. Let the sauce spread over the edges and don’t be afraid to let it get a bit messy.

10. Top with the remaining Gruyère and bake in the oven for 5 minutes.

11. Finish the sandwich under the broiler for a further 3 minutes until the top is nicely browned.

12. Serve warm.