Crab Cakes with Hot Pink Mayonnaise


My friend Ben always says that September feels more like the start of a new year than January and I know just what he means. After two beautiful weeks in Italy, I’m enjoying that back-to-school feeling filled with resolutions. Fueled by jet lag, I’ve already resumed my early morning walks on the high line and started planning the fall in my head. I had forgotten how much I love to start the day watching the city come to life on the streets below with the sun bursting through the high rise buildings in the east and the breeze off the Hudson from the west.


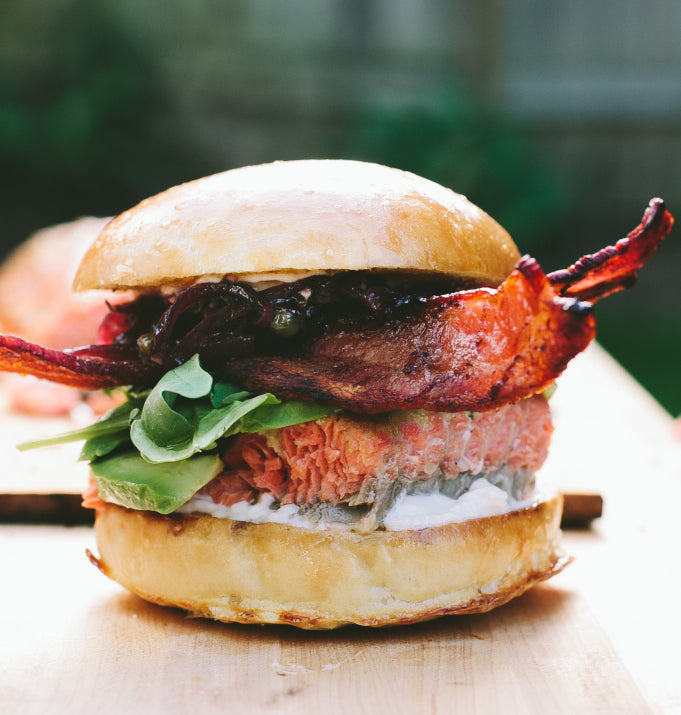
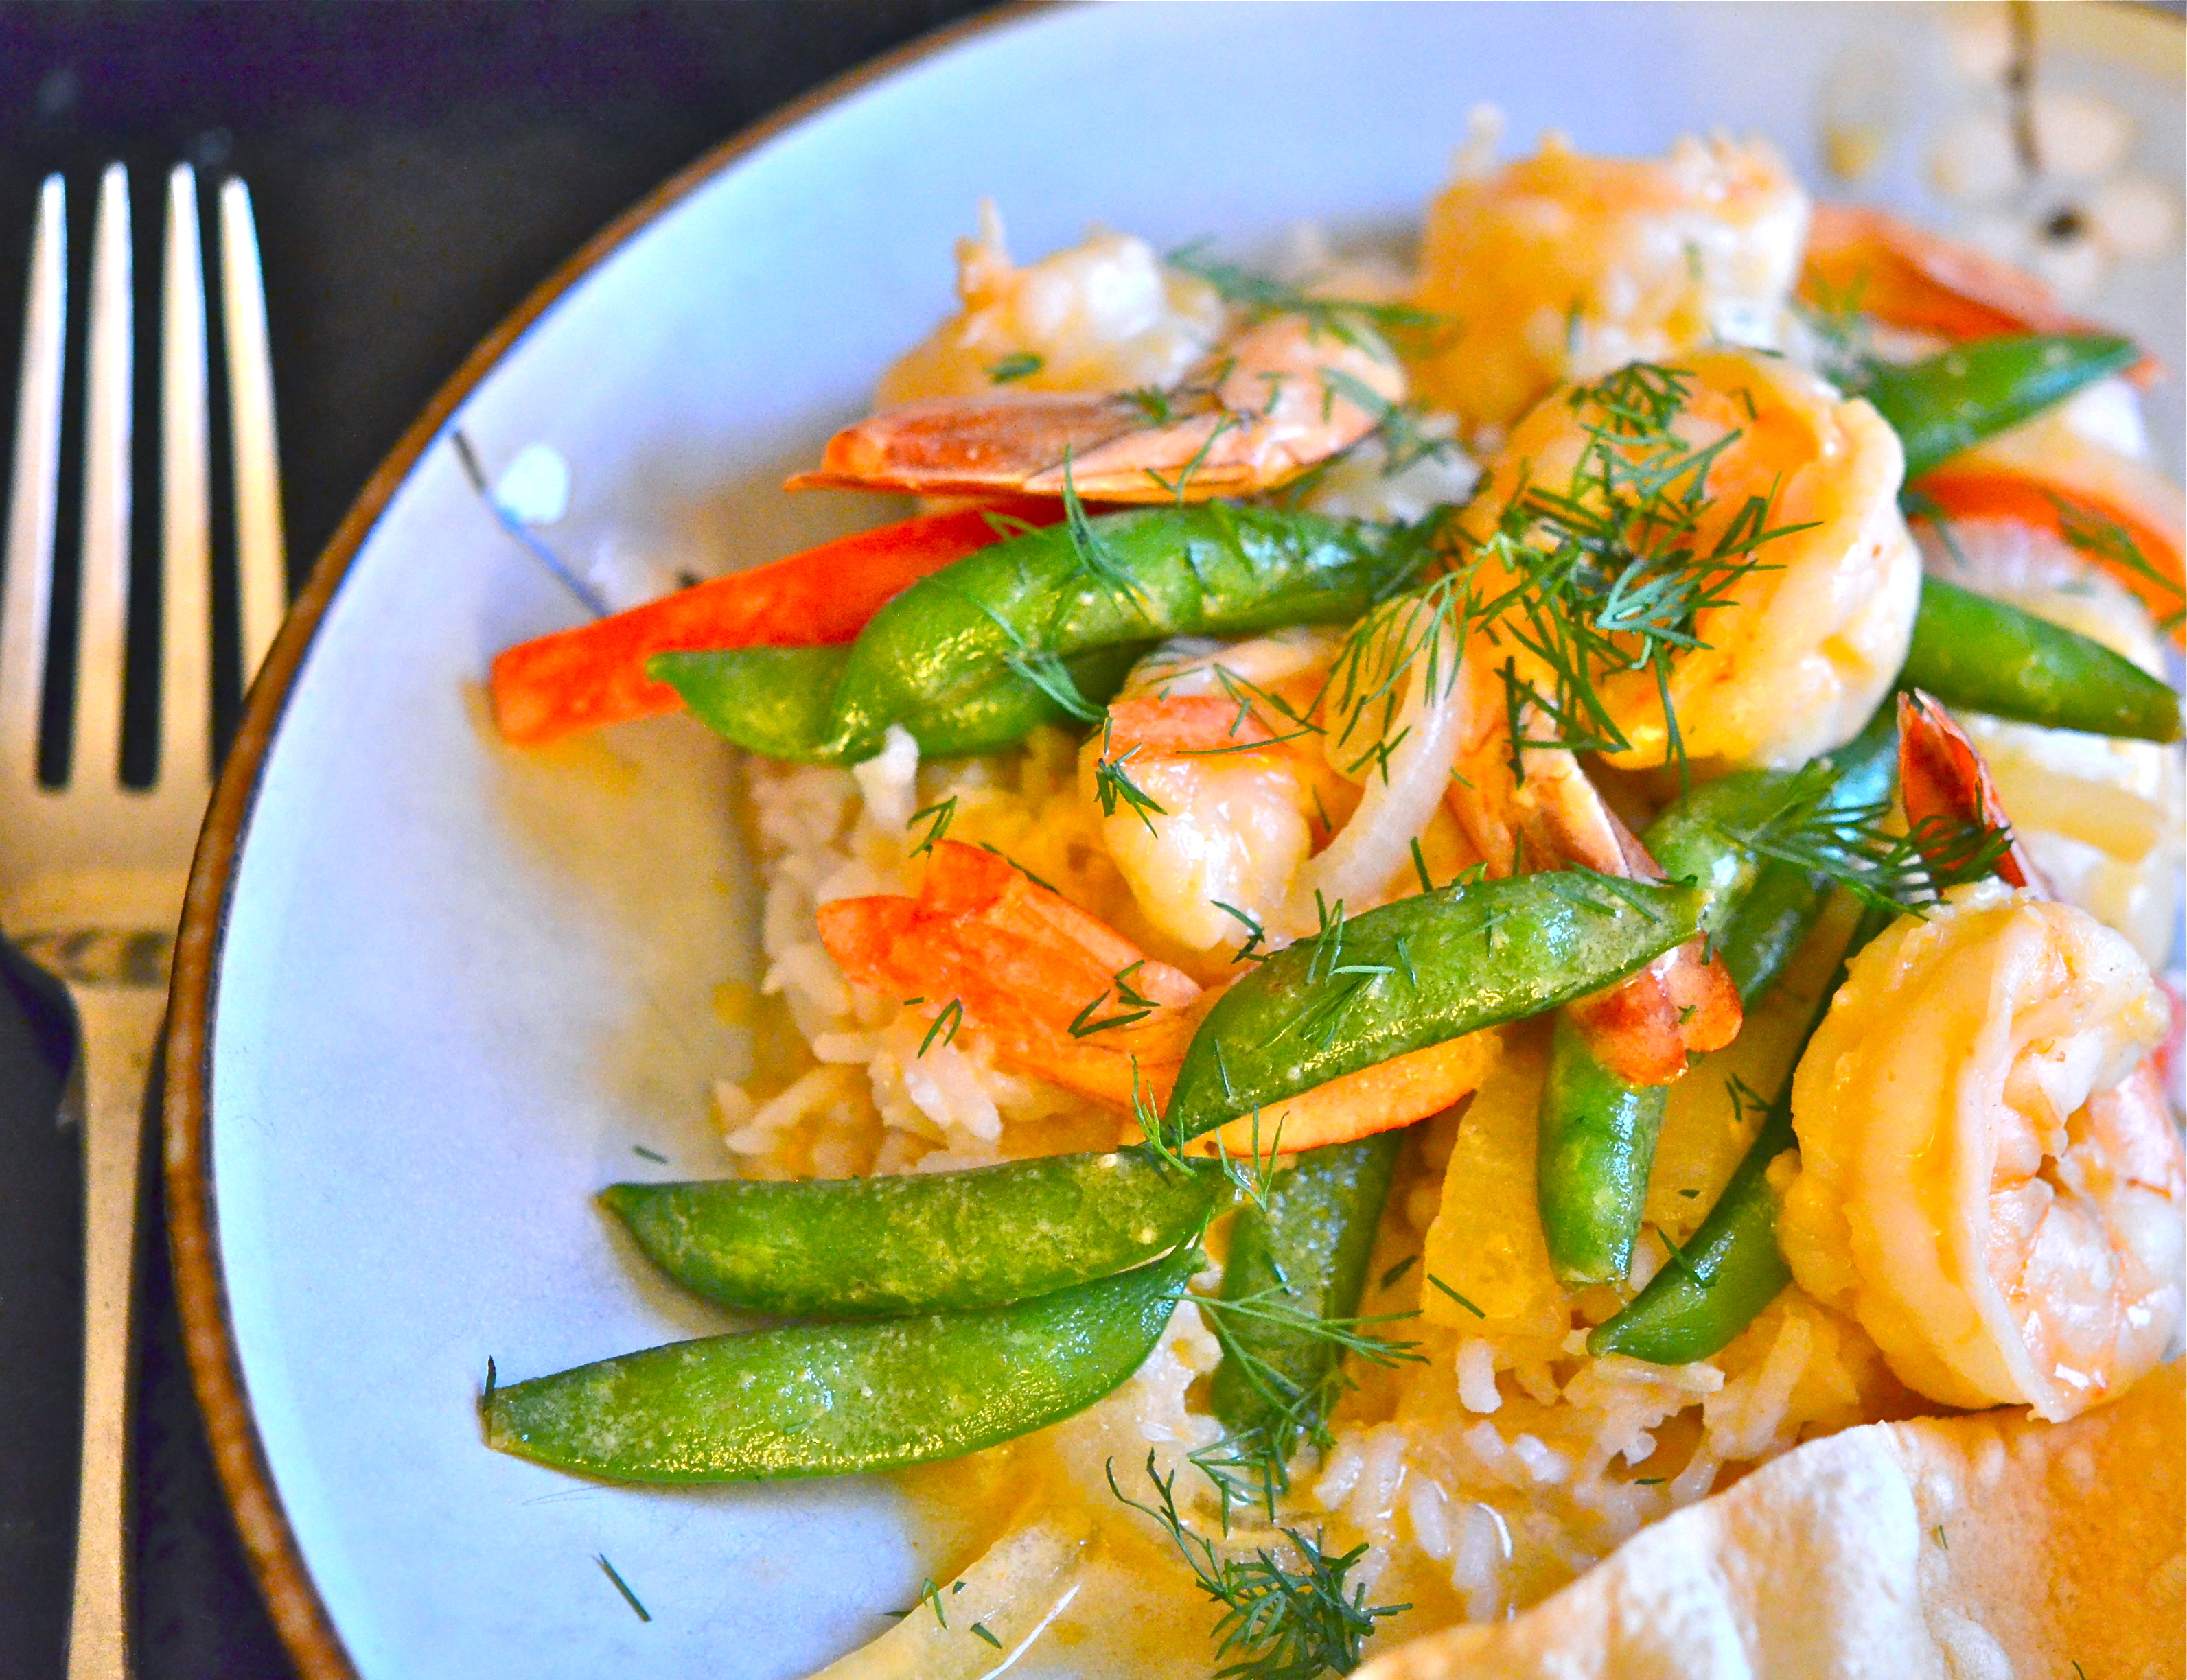
I tend to arrive home starving as the ideas I come up with are naturally food related and centered on what I plan on cooking. We’ve got a lot of wonderful new products that we’re going to be launching on Many Kitchens and coming up with recipes for them is one of my favorite past times. The utterly charming Victoria Amory has added a Hot Pink Mayonnaise to her growing collection of condiments and it’s a new favorite already. I used it both in, and on top of, these crab cakes making them incredibly succulent and flavorful. 


Crab Cakes with Hot Pink Mayonnaise

Serves 4

Ingredients:

1 egg

1lb jumbo lump crab meat

2 tablespoons Hot Pink Mayonnaise (plus more for serving)

2 tablespoons chopped chives (reserve a few for serving)

2 teaspoons of lemon juice

1 teaspoon lemon zest

1/4 teaspoon cayenne peppe

1/4 cup breadcrumbs

1/4 cup canola oil

lemon wedges for serving


Method:

1. Whisk the egg in a bowl and then add all the other ingredients except for the oil. 

2. Cover and refrigerate for at least 1 hour.

3. Divide the mixture into 8 patties about 1″ thick.

4. Heat the oil in a large skillet until shimmering.

5. Add the crab cakes (if they don’t all fit, you can do in batches) and cook for about 3 minutes on each side – they should be nice and browned on both sides. Flip them very gently.

6. Serve topped with Hot Pink Mayo, a sprinkling of chives and lemon wedges.

Plank Grilled Salmon Sandwich from Not Without Salt


We are thrilled to be able to share this recipe from the talented Ashley Rodriguez of Not Without Salt. We actually discovered Porter & York through her blog which we devotedly follow. What a delight to connect with not only such an outstanding food blogger but also with a new producer who sources the finest Pacific Northwest Salmon and other high quality meats. There’s nothing we enjoy more than building the Many Kitchens community to include such talented and creative individuals. We hope you enjoy the recipe, our newest products and also don’t forget to check out the Not Without Salt gift box which features some of Ashley’s favorite BBQ cuts from Porter & York.


Plank Grilled Salmon Sandwich

Recipe by: Ashley (Not Without Salt)

Serves 6

Ingredients:

2 1/2 pound fillet of King Salmon

Salt & pepper

2 heaping tablespoons dijon mustard

3 tablespoons dark brown sugar

12 strips bacon

2 large avocados, peeled, pitted and sliced

3 cups arugula

6 brioche buns, halved

1/2 cup mayonnaise

cedar plank, soaked for at least an hour


Method:

1. Preheat your grill while you prepare the salmon.

2. Set the salmon on the soaked plank then season with salt and pepper. Spread the mustard on top then finish with the dark brown sugar.

3. Grill the salmon for 20 to 30 minutes or until the flesh is firm when touched and flaking.

4. After 10 minutes on the grill lay the bacon directly onto the grill and cook until crisp on both sides, about 10 minutes, flipping once halfway through.

5. Remove the salmon and bacon from the grill then let the salmon rest while you prepare the burgers.

6. Slather the brioche buns with mayonnaise.

7. Cut the salmon into 6 or so burger-size pieces. Place a piece of the salmon on the bottom bun then top with avocado, arugula and bacon. Finish with the red onion relish and then the other half of the bun.


Red Onion Relish

Ingredients:

1 large red onion, halved and thinly sliced

2 tablespoons olive oil

½ teaspoon kosher salt

1 tablespoons dark brown sugar

3 tablespoons red wine

1 teaspoon fresh thyme leaves

1 tablespoon balsamic vinegar

¼ cup drained capers


Method:

1. In a medium pan over low heat, add the olive oil.  Add the red onion and salt and saute for 15 minutes or until very soft, stirring frequently until done.

2. Add the sugar, wine, thyme leaves and vinegar. Cover and simmer for 8 minutes. Remove the lid and simmer for 5 minutes or until the liquid is syrupy. Fold in capers. Cool, then store in a jar in the fridge.

Poached Salmon with Herb Mayonnaise


I always thought that I hated mayonnaise. All I knew was Hellmann’s and it wasn’t until I was “tricked” into trying a homemade version with sorrel that I fell in love with it. I refused to believe the two were both called mayonnaise. For everyone’s protestations about how easy it is to make yourself, I’ve had some epic fails. To have discovered a jarred version that tastes and looks like the real deal is basically life changing (as well as waist changing).


I think the perfect way to enjoy a good mayonnaise is alongside poached salmon paired with nutty fingerling potatoes and crunchy green beans. It feels summery and is light without being rabbit food and even better when eaten at room temperature. It’s a dish that makes me nostalgic for England in the summer and those long afternoons napping on a lawn after too many strawberries and cream. I can almost see the Burleigh pottery plates piled high and ignored while the last few drops of white wine are passed around.


Poached Salmon

Serves 4

Ingredients:

1/2 cup of dry vermouth

4 cups of water

1 lemon (thinly sliced)

2 bay leaves

A bunch of dill (I used 1/3 of the bunch)

1 desert spoon black peppercorns

Salt

2lbs of wild king salmon

1 jar of Fine Herbs Mayonnaise


Method:

1. In a large skillet, add the vermouth, water, half the lemon slices, bay leaves, dill and peppercorns.

2. Bring the liquid to a low boil and simmer for 10 minutes.

3. Season the salmon with salt and add to the poaching liquid, skin side down.

4. Cover the pan tightly and reduce heat to lowest setting.

5. Poach until the salmon is just cooked through and barely opaque (10-12 minutes).

6. Using a spatula, remove the salmon from the liquid onto a serving platter. Carefully peel off the skin and discard.

7. Serve at room temperature with herb mayonnaise with the remaining lemon slices and more fresh dill.

Linguine with Clams


Usually the worst day of the week, Monday has now become my favorite with the start of a new tradition. Kate and I have decided to walk the High Line every Monday after work and then tackle a recipe that we’ve both been wanting to master.


Our first choice was obvious. A dish that we both love and order whenever we see but have been fearful of trying at home for as much as everyone says it’s easy, there’s still something that has stopped me from trying to recreate the classic linguine with clams. Will they open? Won’t they open? It turns out everyone was right – it really is incredibly easy and fast and yes, they do open as if by magic.


We wanted to recreate the best version we’d ever had which was at a restaurant in Florence. They had just a hint of tomato but it was in no way the dominant flavor.  The fun for me was in the research – pulling out all my cookbooks and comparing recipes. Trying to take an element from each, we set about making our dinner and it was a total hit. Within minutes we were at the table toasting to our success and discussing what we would tackle next.


Below is a fantastic illustration by Aurora of one of my favorite pasta tricks for long shapes like spaghetti and linguine when you’re pot is not quite big enough!


Linguine with Clams

Serves 2

Ingredients:

1/2 lb of linguine

1 lb of small clams – I used Manila Clams.

2 tablespoons of butter

2 tablespoons of extra virgin olive oil

3 large cloves of garlic (sliced paper thin)

1/2 cup of dry white wine

A good pinch of red pepper flakes

The juice of one fresh tomato

A big handful of roughly chopped fresh parsley

Zest of 1/2 a lemon


Method:

1. Bring a large pot of water to the boil with plenty of salt and cook the linguine a couple of minutes less than the instructions on the packet. You will finish cooking them in the sauce.

2. Rinse the clams in cold water in a colander – make sure you ask the fishmonger if they are already cleaned.

3. In a large pan that has a lid, melt half the butter and all of the olive oil.

4. Add the garlic and cook on a low heat until soft – do not let it brown – about 5 minutes.

5. Add the clams and the wine, turn up the heat and leave covered for a couple of minutes.

6. Uncover and check for any that haven’t opened – discard these. There always seem to be a couple!

7. Drain the linguine making sure to reserve a mug full of pasta water to use if the sauce is too dry.

8. Add to the sauce and mix well with the remaining butter.

9. Then add the remaining ingredients: pepper flakes, tomato, parsley and lemon zest.

10. Toss well and serve immediately.

Linguine with Crab


I’ve become slightly obsessed with linguine and clams lately – scouring restaurants with my friend Kate in search of the perfect version.  Top of the list so far was one we had in Florence last year at a restaurant called Trattoria dei 13 Gobbi (13 hunchbacks). I’m also a fan of Frankies linguine and clams for something closer to home. I’m embarrassed to admit that I have an irrational fear of trying to recreate this even though I’ve been collecting recipes for years. For some reason, I worry that the clams won’t magically open as they do for everyone else.


Until I get over that fear, I will continue making this wonderful and simple recipe that my friend Nina gave me years ago. It has many of the same flavors and none of the fuss! It’s completely fail proof, exceedingly fast and utterly delicious. Most importantly, it makes me think of summer even when it’s freezing outside!


Linguine with Crab

Serves 4

Ingredients:

2 cloves of garlic (peeled)
1 tablespoon of sea salt flakes
1 large red chile (seeded and finely chopped)

3/4 lb of crab meat (I used Peekytoe)

1/2 cup of good extra virgin olive oil
Zest and juice of 1 lemon
1 lb of linguine
1 large handful of Italian parsley (coarsely chopped)

Red pepper flakes (optional)


Method:

1. Bring a large pot of salted water to the boil and add the pasta. Boil the pasta till al dente (approximately 9 minutes).
2. Meanwhile, smash the garlic and salt together using a mortar and pestle until you create a paste.
3. Add the chile and keep grinding until you have a wonderful red mixture.
4. Pour into a medium-sized bowl and add the olive oil, lemon zest, lemon juice and crab meat.
5. Mix well with a fork.
6. Drain the pasta when it’s done making sure to first reserve a cup of the water from the pot.
7. Pour the pasta into a large (warmed) serving bowl and mix well with the crab sauce.
8. Add the parsley and stir again.
9. Serve immediately using the reserved water to loosen the pasta if it feels too dry. You can also add red pepper flakes for heat.

Tacolicious Tulum


Going on holiday with a best friend pretty much guarantees a good time. Ben and I have been going on holiday together now for 14 years and we both agree that this might be our best one yet. Tulum is my idea of the perfect beach holiday with not a high rise building in site. Our basic but charming room with a simple hammock on the balcony had unadulterated views of the Caribbean that we were photographing every few minutes as the light seemed to become ever more beautiful.


Tulum has also become quite a foodie destination mainly because of the much written about Hartwood Restaurant. The food is undeniably delicious and all cooked in a wood burning oven with a menu that changes daily. The rustic open air setting feels like a well styled movie set and the lines to get in feel more like New York than a Mexican beach town. The difference being that the hour and a half wait for The Hartwood was spent chatting to Matt, a clown doctor and his wife Stephanie, a dancer, over a pitcher of margaritas. 


Hartwood Restaurant

The bar at the Hartwood Restaurant (pictured above)


But the real discovery of the trip were the new chefs at our hotel; Mauro and Federico Cappi, twins born 5 minutes apart in Uruguay and taught to cook by their grandmother as children. Their food was both simple and delicious. We became slightly obsessed with their tacos; particularly their flank steak tacos for which they kindly shared their recipe. I alternated between their steak, shrimp and octopus tacos for almost every lunch. 


I’m afraid I’ve been sworn to secrecy by the friend who recommended the hotel so you’ll have to email me directly and I can give hints as to where we stayed. It was hard to leave paradise and return to the Polar Vortex but I’m excited to try these at home and share the recipe with you all. 

Salmon Carpaccio and a Visit Home


I’m worried I’ve developed culinary OCD. I’m spending a few days in London visiting my family before my annual pilgrimage to Italy and I realized that I had mapped out every meal before even arriving. It turns out I have a gastronomic check list for every city I’ve been to more than once.


First there’s the obligatory Chinese meal; Chinese food in England is to Chinese food what Tex Mex is to Mexican; delicious but not exactly authentic. Then there’s a curry from Brick Lane in East London, Bangers and Mash and a drink at The Holly Bush (a beautiful old pub in the backstreets of Hampstead) as well as various other unhealthy ‘musts’ giving me no chance to try anything new.


Between meals, I’ve been helping my father clear out his cupboards and taken a nostalgic trip down memory lane including some spectacularly bad but ambitious childhood art projects. There’s something very comforting about spending time in the house where you grew up, where every creak is familiar – I still know which floorboards to avoid when coming home too late and passing my father’s bedroom door. The breakfast room with its crazy William Morris wallpaper is my favorite room where my place at the head of the table is still left empty even though I haven’t lived here for 15 years.


Next on to my mother’s house where there’s always something cooking on the stove and a fridge full of delicious leftovers. My first meal there is always her famous Salmon Carpaccio. I love this dish so much that I find myself scarfing down my third helpings as I look up to watch everyone else demurely finishing their first. It’s a wonderful starter for a dinner party as it can be prepared the day before and just brought to room temperature before serving.


So here’s the much coveted recipe for Salmon Carpaccio.


Salmon Carpaccio

Serves 6-8 people as an appetizer


Ingredients

2lbs of thinly sliced raw sushi grade salmon (ask your fishmonger to cut it for you)

1 cup of washed dill

½ cup of freshly squeezed lemon juice

1 ¼ cup of olive oil

1 ½ teaspoon of salt

2 ½ teaspoon of pink peppercorns (if you can find these soaked in brine, they are the best)


Method

1. Mix the salt and lemon juice together in a bowl and beat in the olive oil.

2. Bash the peppercorns in some foil with a rolling pin.

3. In a large bowl put a spoonful of the dressing, layer over some salmon and then sprinkle some dill and a few crushed peppercorns.

4. Continue layering as above until you’ve used up all the salmon.

5. Serve with toasted French bread.


Quesadillas, Bahamian Style


I try to meet up with my friend Ben at least once a year somewhere fun since we live so far away from each other. Five years ago we spent an idyllic Christmas on Harbour Island and finally decided to return after some misguided attempts by me at winter sports. By misguided I mean that my idea of sports is an energetic game of Ping Pong. I hadn’t skied since my teens and was more than a little terrified but having based my hotel research more on food than quality of slopes, I felt reassured that even if I broke my leg on the first day, at least I would eat well for the rest of the vacation.


Coming from a long line of sun worshippers though, the call of the winter sun was just too strong so a few weeks ago, after what seemed like a brutal winter, we returned to the pink sands and clear blue waters of The Bahamas. Top on my list of reasons to return to Harbour Island were the Lobster Quesadillas at Sip Sip. It’s rare that after 5 years of craving a particular food, the reality lives up to the memory. In this case, they were actually better than I remembered! There’s something very comforting about returning to a place you’ve been before and knowing the lay of the land, even bumping into some locals that we had made friends with on our last visit as well as making new ones. It was a perfect vacation.


On my return to New York, with the snow falling outside, I tried to recreate those Quesadillas in the hope that they would transport me back to the slow bliss of Island life. It was a little hard to replace the grey sleet falling outside with the bright glare coming off the Caribbean Sea so I actually closed my eyes on the first bite and imagined that the cars outside my window were the waves lapping the shore. It almost worked until a siren came roaring down my street and rudely brought me back to reality.


So here are a few photos from Briland (as we learnt to call it) as well as my slightly more economical version of Sip Sip’s famous Quesadilla.


 The Landing Hotel


The Pigly Wigly where we stocked up on snacks for our sundowners!


Sunset from our balcony at The Landing.


One of the many art galleries on Harbour Island.


The View from the infamous Sip Sip.


Without a shadow of a doubt, the best photo of me ever taken. Thanks Ben!


Sip Sip’s board promoting the crown jewels.


The original Lobster Quesadilla (almost) big enough for two.


Shrimp Quesadilla

Serves 1-2


Quesadilla

Ingredients

½ lb cooked shrimp
2 flour tortillas
½ cup of grated Jack cheese
½ cup of grated sharp cheddar cheese
Small bunch of scallions finely chopped
1 yellow pepper finely diced
1 red pepper finely diced


Chipotle Lime Crema 

Ingredients

1/3 cup of sour cream
1 teaspoon of chipotle sauce
1 generous squeeze of lime juice


Method

1. In a large non stick frying pan heat a little butter or olive oil on a medium flame.
2. Place one tortilla in the pan and cover with shrimp, grated cheese and the white part of the spring onions.
3. Place the second tortilla on top of the cheese and shrimp.
4. Leave for a few minutes until the bottom tortilla has started to brown.
5. Using 2 spatulas, flip the quesadilla and brown the other side.
6. Transfer onto a cutting board and cut into 4 wedges.
7. Once on a plate, garnish with the diced peppers and green portion of the spring onions.
8. Mix all the ingredients for the lime crema and drizzle over the quesadilla before serving.


New Year’s Eve Dinner, or Practice What You Preach


It was all planned. After lengthy discussions (kindly indulged by my great friend and host Ben Pentreath), we had finally decided on Beef Wellington. There’s nothing I like more than planning a menu and Ben’s kitchen in Dorset is not only one of the most beautiful kitchens I know but has the added delight of an AGA oven. I grew up cooking on an AGA and even though you have little control over heat, I feel comfortable with one and was looking forward to attempting my first Beef Wellington after hours spent researching recipes.


Ben and his AGA


The night before, we went for dinner at a friends’ home, which is affectionately known as the Pink Palace. Bellamont Farm deserves it’s own story so I’ll just show a picture of it here and say that it has been a home away from home for me since it was first built almost 20 years ago. In food terms alone, I could write a hundred posts about the most delicious meals at the Pink Palace and December 30th was no exception with Longhorn beef raised on the farm and potatoes Boulangère.


However, the morning of the 31st, after having over indulged on all that juicy, tender beef, our New Year’s meal no longer seemed appealing and a new plan was hatched. We decided to buy ready made fish pie from Dorchester. Imagining that I would write to all of you about my adventures with Beef Wellington, I had a slight panic about buying a prepared dinner until the realization hit me in a Eureka moment. This was exactly what I have been preaching since launching Many Kitchens— supporting all of these producers working hard so we don’t have to. Charlie Bigham’s fish pie is something he has perfected over years and is far better than any I could ever cook. (I still dream of being able to make a chicken potpie that comes close to the one we sell from Pie Corps.)


Suddenly we found ourselves in the unfamiliar position of having all this extra time on our hands. We all lead such crazy lives and the unexpected pleasure of having an extra few hours with nothing to do at first left us a little confused. We resorted to showing each other slightly unfunny videos on YouTube. We ran out between rain showers for a refreshing walk. We even had time to play my favorite board game before dinner. No pots to wash, no last minute preparations, the main course was perfect. I won’t mention dessert which was an unmitigated disaster and only brought home the appeal of leaving it to the experts.


Should you wish to pass the dinner off as your own, you can even transfer from original packaging to your own dish – attempted below:


As resolutions were being shared around the table, I resolved to hunt down the best fish pie in America and convince its maker to let me sell it on Many Kitchens. If you know of one, please email me!


I just have to leave you with a few photos from our walk on New Year’s day, the first sunshine I had seen since arriving in England and I’m hoping was a sign of the year to come.


St. Catherine’s Chapel, Abbotsbury


St. Catherine herself on Chesil Beach


Happy New Year to you all.

Cooking up a Storm


Knowing that there was a strong possibility that I might lose power due to hurricane Sandy, I set about using up everything in my fridge and freezer. My misguided obsession with food had me far more worried about going hungry than I was about the practicalities of living without power.


Hoping that necessity would breed creativity, I got to work on discovering a genius new recipe that would make me my fortune. Not quite. The first ‘mash up’ was a risotto using up all the frozen stock as well as a mixture of cheeses and some leftover roasted peppers. It was fair but not good enough to be written down and shared. It did however teach me that risotto, like pasta, can really be a conduit for anything you have left in the fridge.


Next up was a pesto using up all the basil and arugula I had on hand and that was definitely a hit. I liked the mixture of the two with the arugula giving the pesto a peppery taste.


The third and slightly incongruous meal for my pre-hurricane hoarding was by far the best – a delicious and very quick Thai prawn curry with Poppadoms. We usually fuse East and West but why not Indian and Thai? The result was definitely worth sharing. I would have added a red chili pepper if I’d had one to give some heat but that is optional.


Thai Prawn Curry with Poppadoms

Ingredients

1 (14oz can) of unsweetened coconut milk (whisked to blend)
2 Teaspoons red Thai curry paste
1 large red bell pepper, cut into 1/3-inch-wide strips
2 cups of sugar snap peas
1 medium onion, thinly sliced
1 pound King prawns (shelled and deveined)
1 ½ teaspoons of palm sugar (or brown sugar if you can’t find palm sugar)
1 tablespoon fish sauce (nam pla)
1 tablespoon fresh lime juice
Chopped fresh dill


Method

1. Bring 1/4 cup coconut milk and curry paste to boil in large skillet over medium-high heat, whisking constantly. 

2. Add bell pepper, sugar snap peas and onion; sauté 5 minutes stirring frequently. 

3. Stir in prawns, remaining coconut milk and sugar. 

4. Cook until prawns are cooked through, stirring often, about 3 minutes. 

5. Stir in fish sauce and lime juice and cook for a further minute. 

5. Plate over Jasmine rice and sprinkle with fresh dill. Serve alongside warmed poppadoms.


Note: poppadoms can be brushed with oil and microwaved between paper towels for 40 seconds.