Warm Lentil Salad with Roasted Beets and Goat Cheese


I first tried this dish in 2008. I was on a sales trip in Asia and escaped for a week to a hotel in Bali that I had been dreaming of for years. Since I was going alone, I thought I’d break the habit of a lifetime of rich food and cocktails and actually try one of the juicing cleanses they offered. It was less than a week so I figured it couldn’t kill me.


The hotel was everything I imagined: a room in the jungle with 3 walls of windows and an outdoor bath in total seclusion. A butler would find me at one of the various pools every few hours for my next juice. As the days went by I was pleasantly surprised by the juicing diet. I even naively marveled at how reasonable the pricing was – conveniently forgetting that I was only injesting a few fruits and vegetables so my overheads weren’t exactly high!


The juices were practically meals unto themselves but I had been passing these incredible restaurants that I was dying to try so I eagerly awaited day 5 when I would be back on solid foods. Since I needed to ease my way back, I decided to start with this salad. It was so delicious that I immediately asked them for the recipe. I now make it every year in January to remember that healthy, wonderful week in Bali. I may not be juicing but it is still a salad- despite my friend’s incredulous comments when I tell them what I’m making for lunch. I actually had to email a picture to my friend who refused to believe me.


Warm Lentil Salad with Roasted Beets and Goat Cheese

Serves 2

Ingredients:

2 medium red beets, roasted and sliced (see below – you can also expedite by buying pre-cooked beets)

Olive oil

1 cup of lentils (I like Puy lentils but any small ones will work)

1 red onion, finely diced

8 oz vegetable stock

4 tablespoons of good quality goat cheese

A small handful of green beans, remove stems, halve and then boiled for 4 minutes

1/2 cup baby arugula greens (I prefer frisee but the store was out of stock)

1 pear, peeled and cored


Dressing:

2 tablespoons extra virgin olive oil

2 tablespoons walnut oil

1 tablespoon champagne vinegar

1 teaspoon honey

Salt and pepper to taste


Method:

Roasted beets

1. Preheat oven to 375°.

2. Drizzle the beets with a little olive oil, sprinkle some salt and wrap tightly in foil.

3. Roast the beets anywhere between 30 and 60 minutes depending on size. They’re ready when you can easily pierce with a knife.

4. When cool enough to handle, slice off the ends and peel the skin off with a paper towel.

5. Cut into 1/4 inch slices.


Lentils

1. In a medium sized saucepan, sweat the onions in 2 tablespoons of olive oil until soft (about 8 minutes on low).

2. Add the lentils, the stock and a good pinch of salt.

3. Bring to a simmer and cover for about 40 minutes or until the lentils are tender.

4. Season as desired with salt and pepper.


Assembling the salad

1. In a small bowl, whisk together salad dressing ingredients and season to taste.

2. Mix half of the lentils gently in a little of the dressing and spoon onto each plate (save the remaining lentils for another meal – they are wonderful eaten alone).

3. Divide the goat cheese between the two plates and place on top of the lentils.

4. In a medium bowl, dress the arugula and green beans with dressing as desired.

5. Arrange the arugula and green beans on top of the goat cheese and lentils. (this is a beautiful stacked salad when finished)

6. Add some paper thin slices of pear on top of the salad. I use a pairing knife and shave thin slices but you could also use a potato peeler as well.

7. Finish by dividing the beets between the two salads.

8. Serve while the beets and lentils are still warm, allowing the goat cheese to melt slightly and all the flavors to combine.

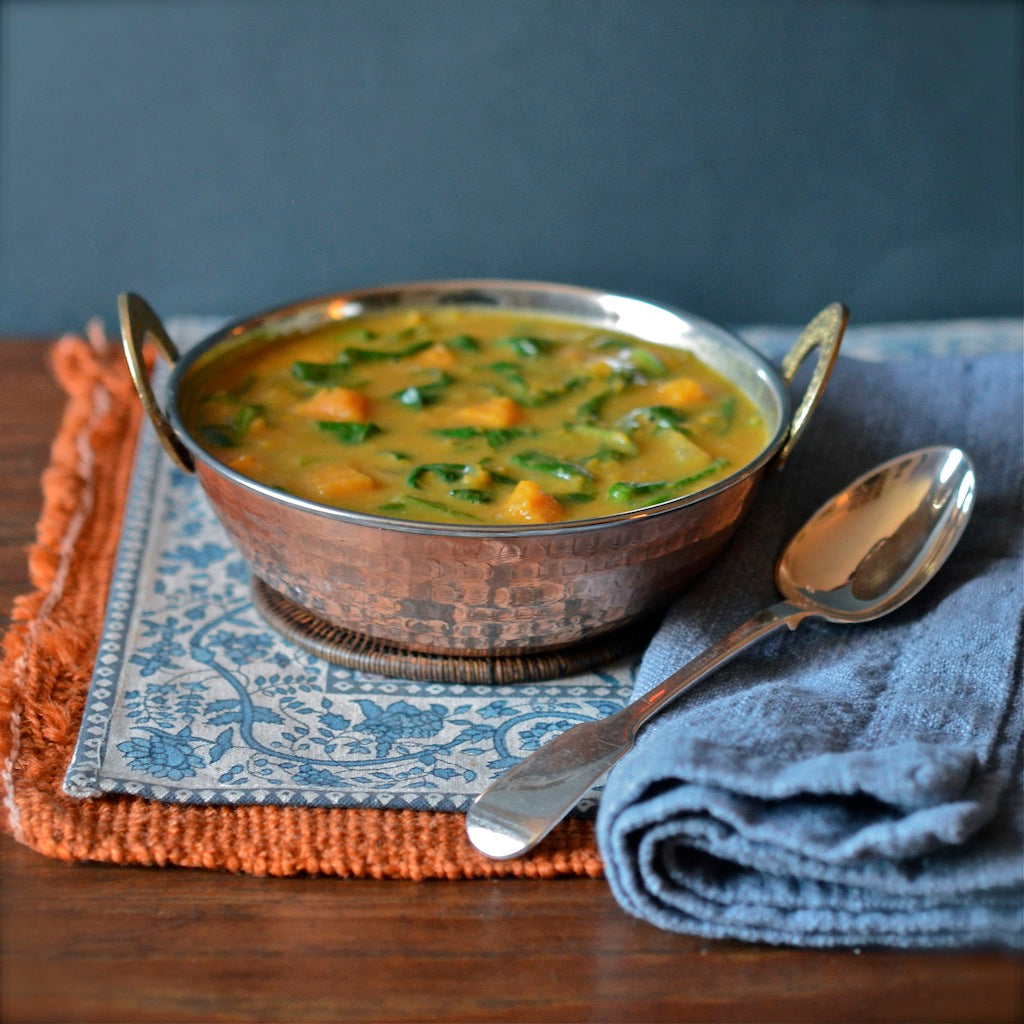
Thai Coconut, Sweet Potato and Spinach Soup


I spent Christmas at home in London this year and like most people, definitely overindulged! My mother’s inability to eat much at the moment in no way impeded her ability to feed me. There was goose, foie gras, smoked salmon with blinis, pasta, pasta, more pasta and the traditional cotecchino with lentils on New Year’s Day.  The lentils are supposed to represent gold coins. Their abundance and the richness of the cotecchino signify a year of wealth ahead. Here’s hoping!


My father, who miraculously survived a fall down a flight of stairs on Christmas Eve was also intent on sending me back to New York well fed. There was a decadent and delicious old school French dinner complete with escargots, lamb and Tarte Tatin, a wildly over ordered Chinese meal and a nostalgic chicken paprikash that we cooked together (recipe to follow).


All this to say, that when I finally returned to New York after a (not so fun) 37 hour journey home thanks to winter storm Hercules, I was ready to cut back a bit. This is a soup that my father used to make for me years ago and I crave every winter. It is incredibly tasty, easy to make, filling and about as healthy as I’m ever prepared to get. It’s also perfect when you’re hiding from an Arctic vortex. 


I have a week to get beach ready before I leave for my annual holiday with Ben in the sun. I plan to eat this soup for as many meals as possible before Mexico! Once I get there, I’ll be on a diet of guacamole and margaritas. And people say I don’t eat enough greens! 


Thai Coconut, Sweet Potato and Spinach Soup

Cook time 25 minutes

Serves 4


Ingredients:

2 tablespoons butter

1 lb sweet potatoes, peeled and cut into 1/2 inch dice

1 yellow onion, diced

2 cloves garlic, crushed

1 teaspoon grated fresh ginger 

1 tablespoon red Thai curry paste

1 pint vegetable stock

7 fl oz coconut milk

Juice of 1 lime

6 oz fresh baby spinach

Salt and black pepper


Method:

1. Melt the butter in a saucepan and fry the potatoes, onion, garlic, ginger and curry paste for about 5 minutes until lightly browned.

2. Add the stock, coconut milk and lime juice.

3. Bring everything to the boil, cover and reduce to a simmer. Cook until the potatoes are tender (approx. 15 minutes).

4. At this point, I turn off the heat and use an immersion blender (blend as smooth as you would like- I like mine about halfway blended so that I can spoon up some potato cubes with each bite).

5. Add the spinach and return to heat, covered for a few minutes.

6. Once the leaves are wilted and the soup is heated through, season to taste and serve warm.


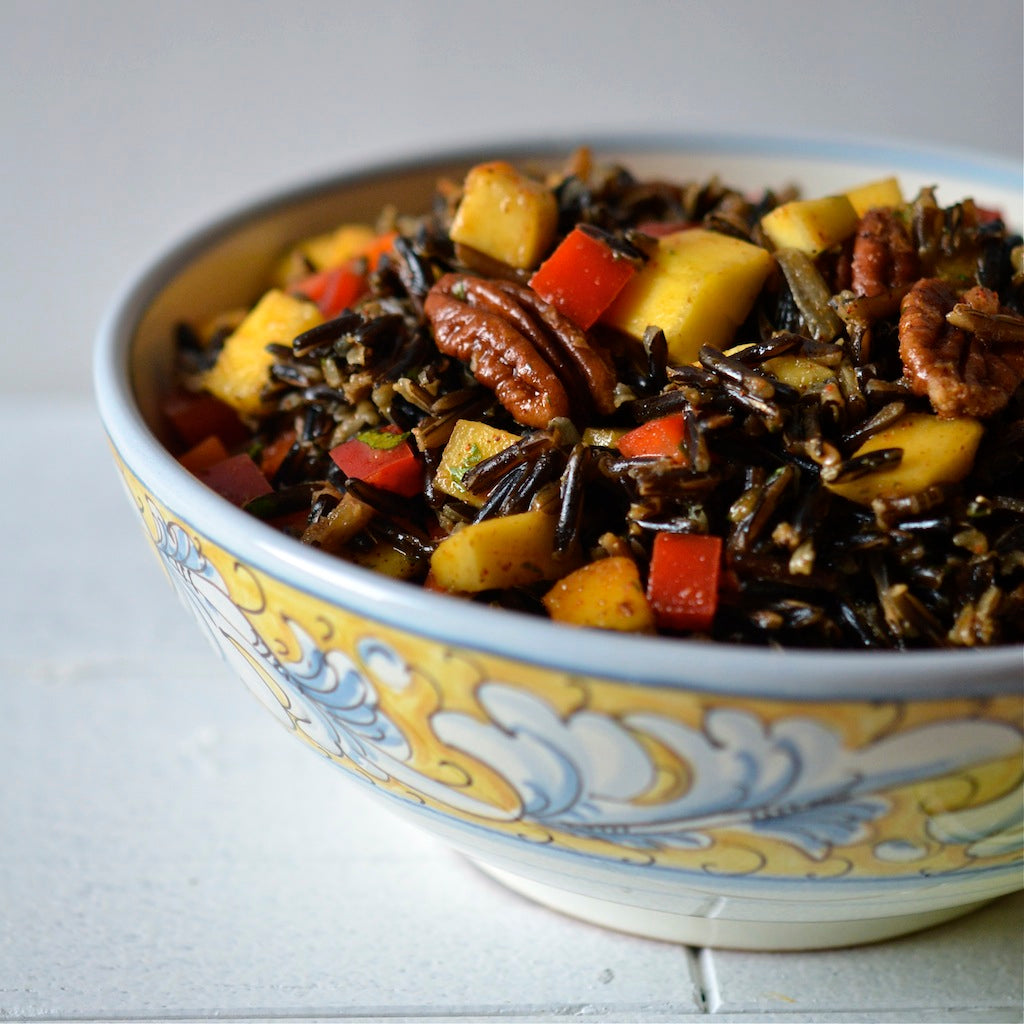
Wild Rice Salad with Mango and Pecan


You may have figured out from previous posts that I feel very strongly about pasta and could blind taste the difference between most brands. The same, I’ve discovered, is absolutely true of beans and grains which I’m trying to eat more of. I came across Rancho Gordo on a food foraging trip in San Francisco and after tasting, quickly understood why they are so universally beloved. Steve Sando founded Rancho Gordo out of a frustration of not being able to find ingredients especially those native to the New World. And we’re very grateful that he did! Their beans and grains are so versatile that I’m constantly thinking up new ways to use them.


This wild rice salad is adapted from a Christopher Schlesinger recipe. The flavors and textures are as vibrant as the colors; sweet, tart, spicy, nutty, crunchy and juicy all rolled into one. It is just one of the many ways, I’ve incorporated Rancho Gordo products into my repertoire – more to come soon!


Wild Rice Salad with Mango and Pecans

Serves 4

Ingredients

1 cup of wild rice

Salt to taste
2 mangoes
1 red pepper
1 cup of pecans (roasted)


Dressing:

1/4 cup of chopped cilantro
1 tablespoon ground cumin
1 tablespoon chili powder
1 crushed garlic clove
1/4 cup of olive oil
1/2 cup of lime juice


Method

1. In a medium sized sauce pan, mix rice with 2 cups of cold water.

2. Bring to a boil, cover and let simmer on a low heat for 45 minutes or until the rice is chewy but still has a bite.

3. Drain excess water and let the rice cool, adding salt to taste.

4. Cube the mango and red pepper.

4. In a small bowl, whisk all the dressing ingredients together.

5. In a large serving bowl, mix the rice, mango, red pepper and pecans.

6. Pour the dressing over the rice, mix well and serve at room temperature as a side dish to pretty much any grilled meat or fish.


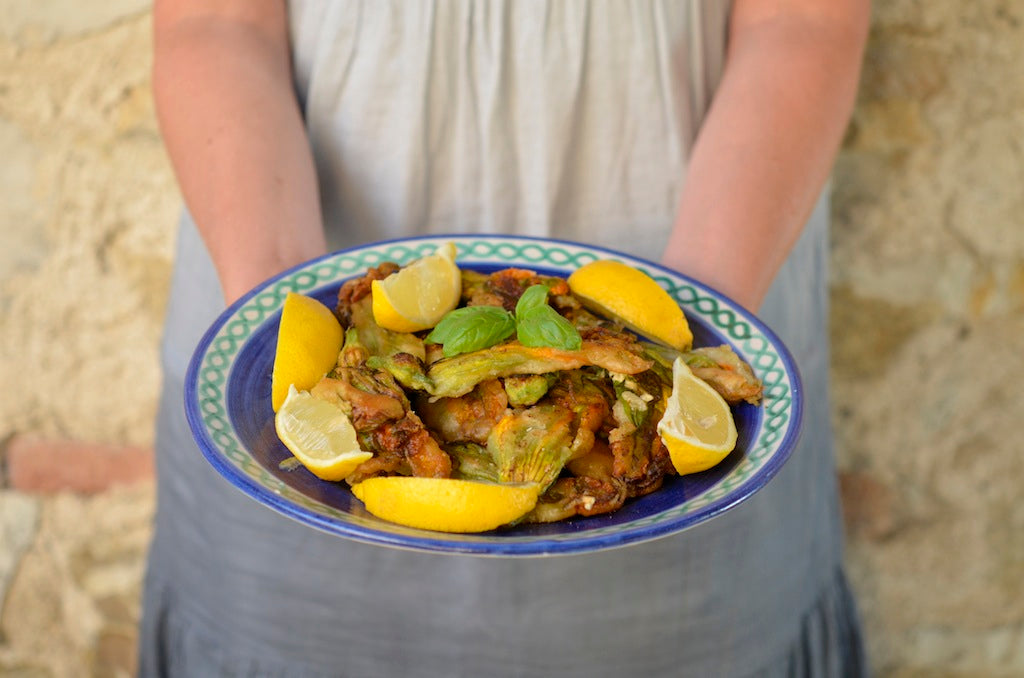
The Wall and Stuffed Zucchini Flowers


I’m writing this from “the wall” — my favorite spot on earth and where I spend most of every day while in Italy. It overlooks olive groves and vineyards and is covered in our sofa cushions from the early 70’s that are falling apart at the seams but I can’t bear to replace. It’s where I fall asleep reading every afternoon, drink my gin and tonic while watching the sky turns its reds and purples and where, after a little too much wine, two lucky people get to “sit soft” after dinner.


The first couple of days of every vacation are spent getting into what Ben and I call “the zone”. It’s not hard to reach the zone when you’re sitting on this wall listening to the cicadas, watching the sun set and figuring out what you’re going to eat for the next 10 days. I had a brief set back taking me to Zone 5 (the outer boroughs of relaxation) when I drove the car into a ditch on day two and had to have it towed out by a kind Albanian but other than that, the days have been blissfully empty except for our morning trips to the local town to buy supplies and check emails. The menu never seems to change as we exhaust all our favorites and then run out of time to experiment. Top of the list which includes Saltimbocca, Sausage sauce and Bistecca alla Fiorentina is fried Fior di Zucca (zucchini flowers) stuffed with ricotta and basil.


Stuffed Zucchini Flowers

Serves 4 people

Ingredients

16 zucchini flowers

1 1/3 cup of all purpose flour

¼ teaspoon salt

1 ½ cups of beer

½ cup of olive oil

250g ricotta

16 basil leaves

2 lemons


Method

1. Preheat the oven to 180 degrees, Very carefully open each flower and remove the stamen. 2. Season the ricotta with salt and pepper and then also very carefully, insert a heaped teaspoon into each flower along with a basil leaf and twist the leaves to close.

3. In another bowl make the batter by mixing the flour and salt and then whisking in the beer until it’s the consistency of loose pancake batter.

4. Heat oil over a medium heat until a drop of batter sizzles when you drop it in.

5. Holding the stem, dip each flower into the batter and swirl to coat, then drag over the bowl’s edge to remove excess.

6. Add to pan and don’t overcrowd. Be extra careful of hot oil that will splatter. I use a splatter guard after some nasty burns!

7. After 2 minutes or when one side is browned, turn and cook for another 2 minutes.

8. Drain on kitchen towel and keep warm in the oven whilst you do the next batch.

9. When they’re all done, sprinkle with salt and serve with lemon wedges.


Sting Came Back For Seconds


Sting Came Back For Seconds. These are the words I want printed on a T- Shirt (and possibly my grave). Due to a bizarre set of circumstances last fall, I found myself cooking for Sting (yes, THAT Sting!). My friends were hosting a dinner party but were stuck in traffic coming back from a wedding in Baltimore and called to see if I could help which I was only too happy to do.


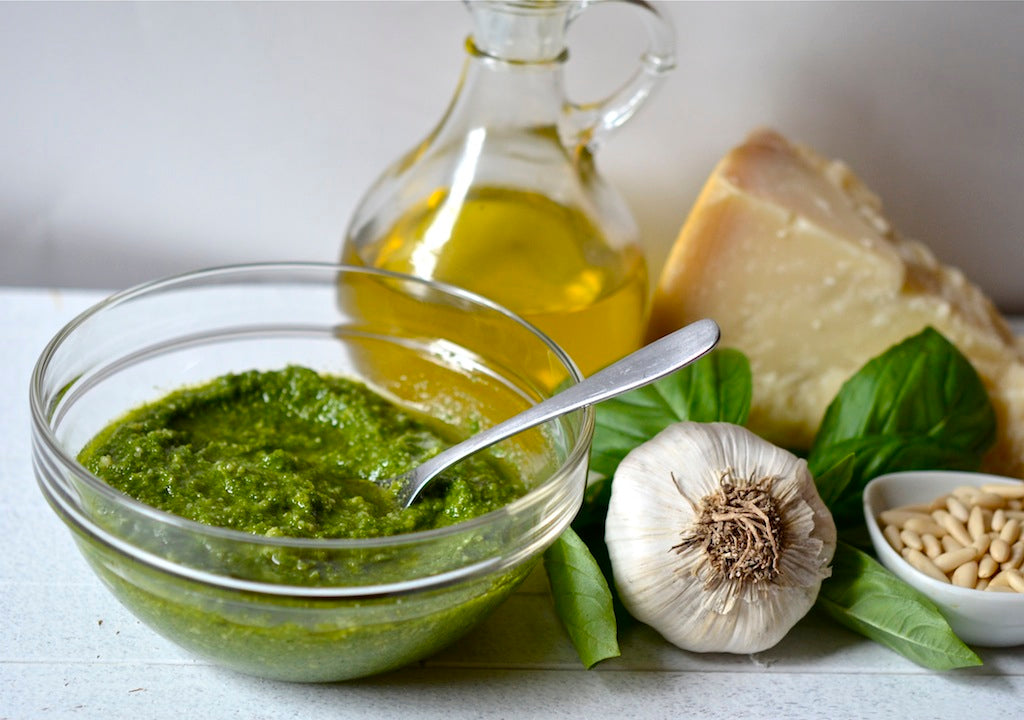
With no time to spare, I decided we should go with some very easy starters; a platter of mozzarella and tomatoes as well as one of Bresaola and Fennel. Then, I decided on a classic pasta that always goes down well; orecchiette with homemade pesto, green beans and ricotta. As a side note, it has always astounded me that I have never been able to find a good pesto in the city. How is this possible when all the ingredients are so readily available and can be whizzed up in a blender in no time at all. Budding artisans take note!


While my friends’ was one of the most beautiful of New York apartments, it was pretty clear no one had ever cooked a meal in it. So with 15 minutes to go before guests arrived, my friend and I found ourselves raiding their neighbor’s apartment, prying open shelves, digging through the pantry, and basically grabbing anything we could get our hands on. Everything from plates to chairs to pots and pans was pilfered and later returned (I hope). My accomplice then busied herself tidying while I started slicing the tomatoes and finding a pot big enough to boil pasta for 12 people. We were still running around when suddenly, out of nowhere, Sting appeared in the kitchen. He came right over and kissed me on the cheek and introduced himself. The furthest thing from a cool New Yorker, I tried desperately to remain calm and chat casually while slicing tomatoes. In reality, I was terrified that I would slice off a finger or that he would somehow inherently know that I had a poster of him on my wall throughout my teenage years.


Before I knew it though, with all my digits intact, the other guests had arrived and everyone was eating, chatting and having a wonderful evening thanks to the relaxed charm of our hosts. I have always believed that you can put on a dinner with minimal effort and time if you just have a few good ingredients. To paraphrase another of my heroes, Nigel Slater, the focus of a dinner should not be on the food but the people. The key to a successful evening is to stick a big vat of something delicious and unpretentious in the middle of a table and let everyone dig in. Serve plates that are impressively complicated culinary works of art and all anyone will be thinking is “how can I possibly have these people over to dinner and top this?”


I think Nigel would have been proud as large bowls of pasta were passed around the table never deterring from the chatter. But of course MY proudest moment was when Sting took a break from talking to a glamorous playwright to get up and serve himself a second bowl and declared the pasta delicious! So here’s a recipe for orecchiette with pesto, green beans and ricotta – if it’s good enough for Sting…


Orecchiette with Pesto and Green Beans

Serves 4 (as a starter)

Ingredients
1lb of Orecchiette

¼ green beans (trimmed)

1 tablespoon ricotta

2 cups of fresh basil leaves

½ cup of extra virgin olive oil

2 tablespoons of pine nuts

1 clove of garlic (peeled and lightly crushed)

½ teaspoon of salt

¼ cup of grated pecorino

½ cup of grated parmesan

2 tablespoons of butter (softened)


Method

1. Put a large pot of salted water on to boil.

2. Blend the basil, pine nuts, oil, garlic and salt in a blender until smooth.

3. Transfer to a bowl and fold in the 2 cheeses and butter.

4. Add the orecchiette to the boiling water.

5. 5 minutes before the pasta is ready, add the green beans to the water.

6. Remove a cup of water from the pasta before draining.

7. Drain the pasta and beans and return to the pan.

8. Add the pesto and the ricotta and mix well.

9. You may need to add some of the reserved water if it feels to dry and bring to the table to rehydrate for seconds (if there are any!)

Garden Fresh Bruschetta


My whole life I was led to believe that you could only get good tomatoes in Italy so I studiously avoided them anywhere else. To be fair, English tomatoes in the 70’s were notoriously bad. I can’t remember who first broke the spell and introduced me to my first home grown American tomato but I now can’t wait until they start turning up in farmer’s markets every summer and I can honestly say that they are better than any I’ve ever had in Italy. Top of the list of the best tomatoes I’ve EVER tasted are grown by Sam Butler in his Connecticut garden.


He gets them from Maple Bank Farm in Roxbury, CT where they have been partially raised in a greenhouse.  I’m lucky enough to visit for a weekend every Summer and even able to take a couple of these wonderfully named ‘Big Boys’ home with me.


My only contribution is to make Bruschetta for the Butler family, which as you can see below is ridiculously easy so I’m definitely getting the better end of the deal.


Bruschetta

Ingredients

Good white bread

Garlic

Tomatoes, in season and sun ripened is the best

Olive oil

Salt


Method

1. Toast the bread slices and rub with a little raw garlic.

2. Cover with chopped tomatoes and drizzle with olive oil.

3. Sprinkle a little salt and some basil and then eat!

Eggplant Parmesan


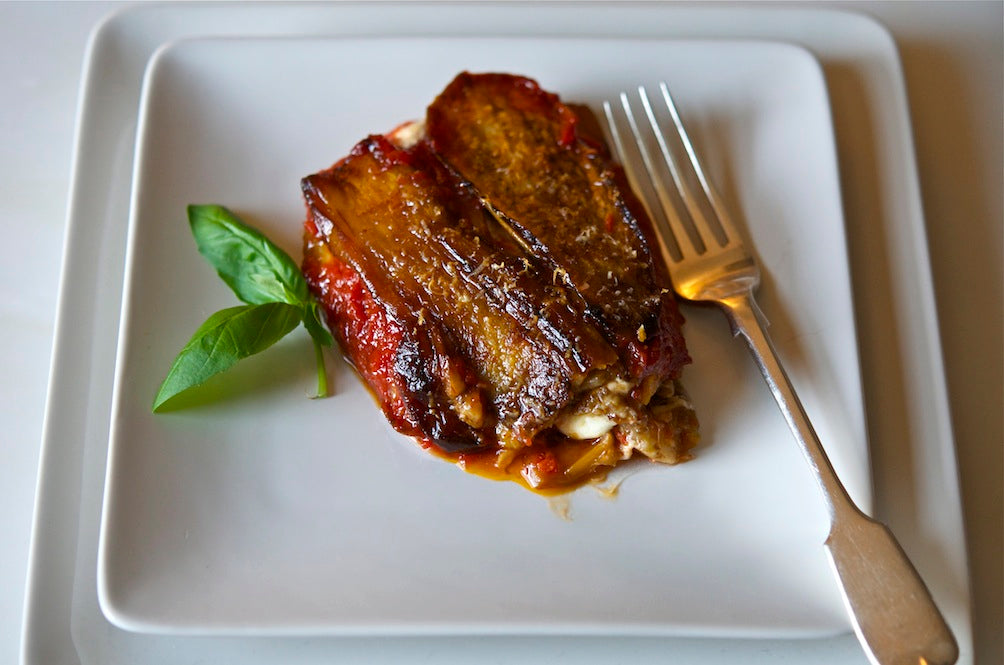
Melanzane alla Parmigiana (Eggplant Parmesan)


Over the last couple of years I feel like I’ve tried every jarred tomato sauce on the market and have always been disappointed. Too sweet, too thin, too bitter – never right, I felt like Goldilocks. It had got to the point where I had considered creating our own until I received an email a couple of weeks ago from Melissa Vitelli of Jar Goods. She asked if she could send me a sample of her Classic Red and ever hopeful, I said yes but was not overly optimistic given my experiences. It was perfection! Just the right amount of sweetness and bursting with flavor and richness. The first night I tossed it with Spaghetti and the second night, I added some cream, vodka and chili for the perfect Penne alla Vodka. My search was over and I’m over the moon to be selling it on Many Kitchens.


I got to meet Melissa and her sister-in-law Laura this week and hear the origins of their Classic Red. Laura’s father has been simmering this sauce for 50 years and agreed to pass on the family’s secret recipe. It seems that Laura too had been frustrated by the lack of a decent sauce on the market and I’m grateful that she has filled that hole.


The sauce is by no means limited to pasta sauces but can be used as a base in anything from Chicken Cacciatore to Pizza. This weekend I used it while making Melanzane alla Parmigiana (adapted from Marcella Hazan’s The Classic Italian Cook Book) and not only did it cut down my cooking time by half but it was also the best one I have ever made.


Melanzane all Parmigiana

Serves 4 people

Ingredients

3 medium eggplant

1 jar of tomato sauce (Classic Red)

1 mozzarella, grated

¼ cup of grated fresh Parmesan cheese

Vegetable oil

Salt


Method

1. Preheat oven to 400 degrees.

2. Peel the eggplant and slice lengthways (about ¼ inch thick)

3. Make a layer of eggplant in a colander standing over a bowl.

4. Salt generously and continue layering and salting until all the eggplant is used.

5. Leave for at least 30 minutes and then dry the slices with paper towels.

6. In a large skillet, pour enough oil to fully cover the pan and turn the heat to high.

7. When the oil is sizzling, add the eggplant with tongs and be careful not to get splattered as it spits. Do not overcrowd the pan.

8. Fry on both sides until golden brown and repeat until all the eggplant is used.

9. Transfer the eggplant to a platter lined with paper towels and cover with more paper towels to remove the excess oil.

10. In an oven proof dish, make a layer of eggplant.

11. Cover the eggplant with a few spoonfuls of Classic Red and smooth over with the back of a spoon.

12. Cover the sauce with grated mozzarella and sprinkle some Parmesan.

13. Repeat these layers – the top layer should be just eggplant and Parmesan.

14. Bake for 30 minutes and let rest for at least 10 minutes before serving.


Asparagus-Lemon Magique


This recipe calls for fresh asparagus, minimally prepared to bring out the vegetable’s naturally distinctive, delicious flavor. This dish is ready in about 15 minutes and pairs well with fish or meat, as its own course or as a fresh and flavorful snack.


Sel Magique’s 

Asparagus-Lemon Magique

Serves 3-4


Ingredients
2 bunches of fresh asparagus (about 2 pounds)
1-2 tablespoons of unsalted butter
1 lemon
Sel Magique classic blend


Method

1. Wash the asparagus and angle-trim to uniform length.

2. Steam until bright green and crisp but easily penetrated by a fork (about 10 minutes).

3. Drain and rinse in cold water and return to the pot.

4. Toss with the juice of one lemon (about 2 tablespoons) and butter.

5. Plate and sprinkle a dash or two of Sel Magique over the asparagus.

6. Garnish with lemon slice and serve warm.


Tamarind and Sumac Date Chutney


Last week I was fortunate enough to have lunch with Louisa Shafia, the woman behind Lucid Food and the author of the upcoming The New Persian Kitchen.


I was excited to tell her about Lezzet Spices and their wonderful Sumac which is so prevalent in Persian cooking and often used by Louisa. Having just come from a meeting with her agent, she had a galley of her gorgeous new cookbook with her so I got a little sneek peek.  I’ve already preordered my copy and you can too:

BarnesandNoble.com,
Powells.com,
IndieBound.org,
Amazon.com.


Louisa has also kindly donated a recipe to Many Kitchens featuring sumac which looks delicious!


Tamarind and Sumac Date Chutney
The New Persian Kitchen
Louisa Shafia


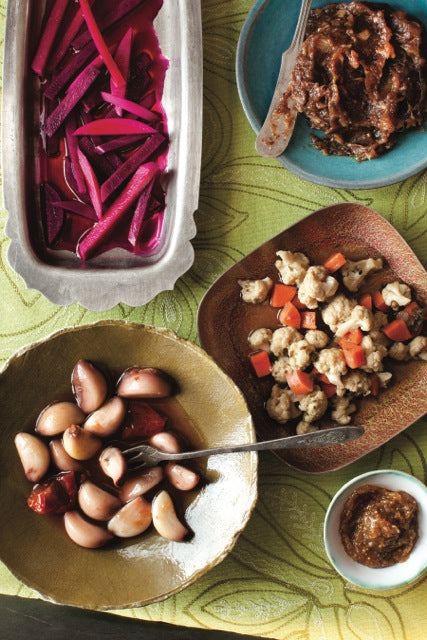
This sublime condiment brings together tamarind, lime, ginger, cinnamon, and sugary dates. Once pickled in the tamarind, the dates crystallize and dissolve into a soft paste similar to a chutney. After 6 weeks, the pronounced salty flavor of the sumac will mellow, and you can enjoy this fragrant pickle on everything from burgers to fish to cheese. For an easy hors d’oeuvre, spread it on a cracker and top it with lime powder–seasoned grilled shrimp and a fresh green herb. The chutney will separate slightly over time, so stir it from the bottom before serving to bring out all its tart lime goodness.


Tamarind and Sumac Date Chutney

Makes about 3 cups

Ingredients

1 cup Thai tamarind concentrate, strained to remove grit

1/3 cup freshly squeezed lime juice, plus more if needed

2 tablespoons sumac

1 teaspoon kosher salt

2 cloves garlic, minced

1-inch piece fresh ginger, peeled and minced

1/2 teaspoon ground cinnamon

1 pound Medjool dates, pitted


Method

1. In a large bowl, whisk the tamarind with the lime juice, sumac, kosher salt, garlic, ginger, and cinnamon. Add the dates and toss well.

2. Transfer the mixture to a clean glass jar and add more lime juice as needed to cover any exposed dates.

3. Seal and store in the refrigerator.

4. Shake every few days to break up the crystallization. The dates will be ready to eat in 6 weeks and will last for about 6 months in the refrigerator.

Reprinted with permission from The New Persian Kitchen by Louisa Shafia, copyright © 2013. Published by Ten Speed Press, a division of Random House, Inc.

Food Photography credit: Sara Remington © 2013

Potato Latkes


Potato Latkes

Ingredients

4 medium sized Idaho potatoes

2 yellow onions

2 tablespoons fresh lemon juice

2 eggs

salt and freshly cracked pepper

3/4 cup matzo meal

vegetable oil for frying


Method

1. Peel and grate potatoes into a large bowl filled with cold water (this will prevent them from oxidizing).

2. Next grate the onion. Wring both the potatoes and the onion until dry. You can work by squeezing handfuls in batches.

3. Mix the onion and potatoes together and add the lemon juice. Mix once more then add eggs.

4. Stir until eggs are evenly dispersed and season with salt and pepper.

5. Mix in the matzo meal and stir until all ingredients are thoroughly incorporated.

6. Next, in a wide pan bring the vegetable oil to frying temperature. I test my oil by dipping a piece of food in. The oil is ready when the food immediately starts to fry. You want to avoid oil that is too hot or it will scorch the food. Once I’ve done one batch of latkes I usually turn my temperature down a couple of notches.

7. Take a handful of the latke mixture and press into a flat pancake (thin is best so the latkes stay nice and crunchy and potato and onion cook through).

8. Repeat, laying each latke on a baking sheet, until you have used all the potato mixture.

9. Fry in batches until latkes are a warm golden brown (roughly 4 minutes per side).

10. Transfer to a baking sheet and finish in the oven for 10 minutes.

11. Season finished latkes with salt and serve warm.

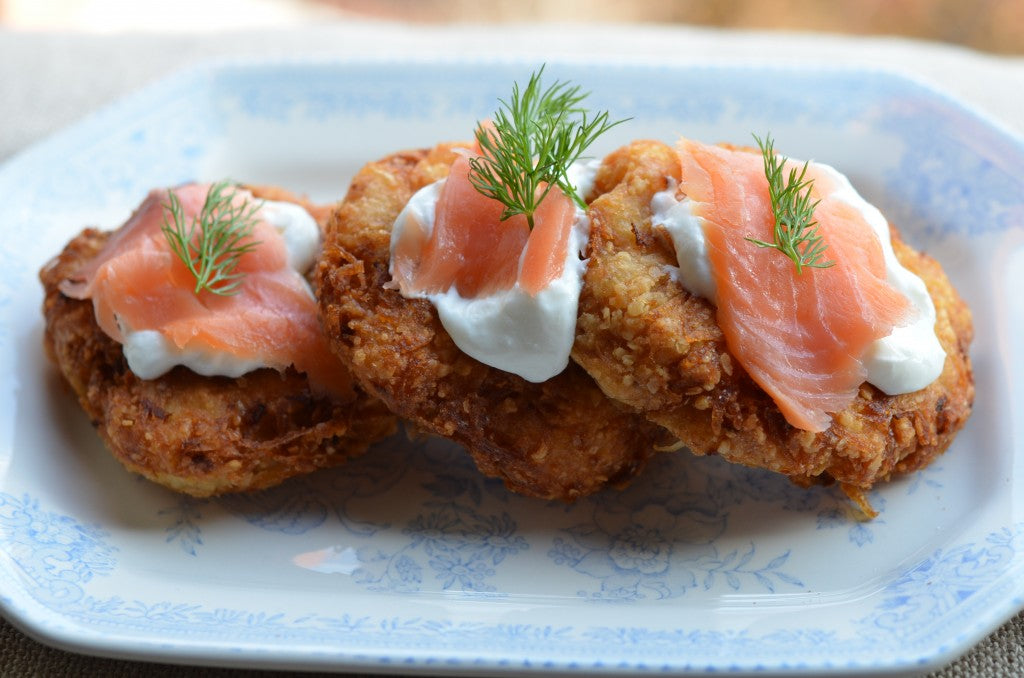
Favorite toppings include sour cream (with smoked salmon and dill) apple sauce or even an egg if you want to make a latke benedict. Enjoy!