Linguine with Clams

Share on FacebookTweet about this on TwitterPin on Pinterest


Usually the worst day of the week, Monday has now become my favorite with the start of a new tradition. Kate and I have decided to walk the High Line every Monday after work and then tackle a recipe that we’ve both been wanting to master.


Our first choice was obvious. A dish that we both love and order whenever we see but have been fearful of trying at home for as much as everyone says it’s easy, there’s still something that has stopped me from trying to recreate the classic linguine with clams. Will they open? Won’t they open? It turns out everyone was right – it really is incredibly easy and fast and yes, they do open as if by magic.


We wanted to recreate the best version we’d ever had which was at a restaurant in Florence. They had just a hint of tomato but it was in no way the dominant flavor.  The fun for me was in the research – pulling out all my cookbooks and comparing recipes. Trying to take an element from each, we set about making our dinner and it was a total hit. Within minutes we were at the table toasting to our success and discussing what we would tackle next.


Below is a fantastic illustration by Aurora of one of my favorite pasta tricks for long shapes like spaghetti and linguine when you’re pot is not quite big enough!


Linguine with Clams

Serves 2

Ingredients:

1/2 lb of linguine

1 lb of small clams – I used Manila Clams.

2 tablespoons of butter

2 tablespoons of extra virgin olive oil

3 large cloves of garlic (sliced paper thin)

1/2 cup of dry white wine

A good pinch of red pepper flakes

The juice of one fresh tomato

A big handful of roughly chopped fresh parsley

Zest of 1/2 a lemon


Method:

1. Bring a large pot of water to the boil with plenty of salt and cook the linguine a couple of minutes less than the instructions on the packet. You will finish cooking them in the sauce.

2. Rinse the clams in cold water in a colander – make sure you ask the fishmonger if they are already cleaned.

3. In a large pan that has a lid, melt half the butter and all of the olive oil.

4. Add the garlic and cook on a low heat until soft – do not let it brown – about 5 minutes.

5. Add the clams and the wine, turn up the heat and leave covered for a couple of minutes.

6. Uncover and check for any that haven’t opened – discard these. There always seem to be a couple!

7. Drain the linguine making sure to reserve a mug full of pasta water to use if the sauce is too dry.

8. Add to the sauce and mix well with the remaining butter.

9. Then add the remaining ingredients: pepper flakes, tomato, parsley and lemon zest.

10. Toss well and serve immediately.

A Retro Cheesecake and a Return to Suffolk

Share on FacebookTweet about this on TwitterPin on Pinterest


In a little corner of Suffolk, on the edge of the River Deben, there’s a beautiful cottage called The Manor House. It’s a house that I spent a lot of time in growing up and thankfully its owner, Penelope, is as averse to change as I am. I went back recently to visit my father and Penelope for a weekend and was transported right back to my childhood. The faded green sofas were a little more faded, the jetty onto the river a little more rickety but otherwise it was blissfully unchanged. The overflowing children’s library had me overdosing on nostalgia as I rediscovered Ant and Bee and Robert The Rose Horse – two of my all time favorite books. For those of you with young children, I urge you all to buy copies!


So while Penelope gardened and my father napped, I walked along the river and felt that release of being close to water and out of the big city. I thought back to the weekends we had here and wondered how everyone used to fit – there seemed to always be at least 15 children and adults squeezed around the table. All of us scrambling for the bench by the window as that meant we didn’t have to clear up; a rule that still exists today. I had a flashback to a cheesecake we often ate and Penelope, an amazing cook, kindly dug out the recipe so we could recreate it.


I was so happy to see that it came from a Cordon Bleu Cookery Course indulging my recent obsession with retro foods. I was a little concerned my love for this recipe was based on sentimentality so I remade it back in New York and served it to Kate who proclaimed it her new favorite desert and asked for the recipe. I think it’s a keeper and like all classics, has stood the test of time.


Viennese Cheesecake

Serves 8-10

Ingredients:

12 oz cream cheese

12 digestive biscuits (if you can’t find them, graham crackers will work fine and you’d use approximately 2 cups crumbled)

2 oz butter

4 oz sugar, divided

3 egg whites (you can use the remaining egg yolks to make Spaghetti alla Carbonara)

1 dessert spoon gelatine (I used one packet)

2-3 drops of vanilla extract

Zest of 1/2 a lemon

1 cup heavy cream


Method:

1. Butter the inside of a 8″ springform pan and set aside.

2. Crush the biscuits in a large bowl.

3. Melt the butter and combine with crushed biscuits and 1 oz of the sugar. Divide the mixture in half and press the first half down firmly into the bottom of the springform pan.

4. In a large bowl with an electric mixer, mix the cream cheese and remaining sugar until smooth.

5. In a separate bowl, whisk the egg whites until stiff peaks form. Use an electric mixer if you have one.

6. In a small bowl, mix the gelatine according to packet instructions. If no instructions, dissolve in a 1/4 cup of boiling water until completely clear.

7. Beat the dissolved gelatine into the cream cheese mixture and add in vanilla extract and lemon zest.

8. In a medium bowl whip the heavy cream lightly. Fold the heavy cream and egg whites into the cream cheese mixture. 

9. Pour the cream cheese mixture into the springform pan, smooth the top and cover with the remaining crushed digestives. Allow to set in the refrigerator for at least an hour and serve chilled with fresh berries.

Potato, Pancetta and Leek Gratin

Share on FacebookTweet about this on TwitterPin on Pinterest


Easter is a big deal in England. The whole country pretty much shuts down on Good Friday and Easter Monday and it’s still strange for me, after 14 years in America, to see that most people work on those days. For the non religious, Easter in England is a bit like Thanksgiving. It’s about family and food without all the stress of buying gifts.


I’m very lucky to have an adopted family in America who always include me in their Easter Sunday lunch. The same large, generous family that I spend Thanksgiving with and it’s one of the days I look forward to most in the year. I remember one Easter Lolly bought kits for us all to make Ukrainian Easter eggs (Pysanky). You use wax to create designs a bit like batik. I still have mine displayed in my bedroom as the only thing I’ve ever made that I’m not utterly ashamed of. I really recommend giving them a try and supporting Ukraine in the process – I wish we were selling the kits on Many Kitchens. A thought for next year! For now, you can find the kits here.


Though I’m not going to be doing the cooking this Easter, I wanted to suggest a recipe that is my go-to for large parties and the perfect side dish to an Easter Ham. Pair those two with a simple salad mixed with an all natural vinaigrette and you have a delicious meal which can be made completely ahead of time so you can join in the Easter egg hunt.


Easter Menu:

The Perfect Glazed Ham
Potato, Pancetta and Leek Gratin
 (recipe below)
Mixed Leaf and Greens Salad
Praline Filled Eggs


Potato, Pancetta and Leek Gratin

Serves 8-10

Ingredients:

2 tablespoons of olive oil

8 oz of cubed pancetta

3 large leeks, cleaned and thinly sliced

1 garlic clove, minced

3 cups of heavy cream

2 tablespoons of fresh thyme leaves

3 large Idaho potatoes, peeled and sliced as thin as possible – ideally with a mandolin

Salt and freshly ground pepper


Method:

1. Heat oven to 350 degrees.

2. In a large frying pan, heat olive oil and sauté the pancetta until golden brown – about 8 minutes.

3. With a slotted spoon, remove and drain on paper towels.

4. Add the leeks and garlic to the frying pan and sweat until soft – about 10 minutes.

5. Add the cream and simmer for 5 minutes until fully heated through.

6. Stir in the pancetta, thyme and add salt and pepper to taste.

7. Butter a large ovenproof dish – I used a 10” casserole dish.

8. Arrange a layer of potatoes on the bottom of the dish.

9. Season lightly and then spoon over some of the leek cream mixture and spread evenly.

10. Repeat with remaining potatoes and sauce until all are used – remembering to season the potatoes as you go and finishing the last layer with the sauce.

11. Press down firmly on the potatoes so that the sauce fully covers the potatoes – if it doesn’t, you can add more cream or some milk.

12. Bake until the gratin is golden on top – approximately 1 hour.

Serve with Easter Ham and a Mixed Leaf and Herb Salad (perfect when dressed with Jacqueline and Jerome’s Citron vinaigrette)

Irish Coffee

Share on FacebookTweet about this on TwitterPin on Pinterest


Irish Coffee

1 serving

Ingredients:

1 cup fresh hot coffee

1 cube of brown sugar (or more if desired, sweeten to taste)

1.5 oz of your favorite whiskey (we love Catskill Provisions’ NY Honey Whiskey)

Heavy cream (whipped to where soft peaks just form)

Ground cinnamon (optional)


Method:

1. Pour coffee into a warmed mug, filling to 3/4.

2. Dissolve sugar to taste.

3. Mix in whiskey.

4. Top with a generous portion of heavy cream.

(Optional: sprinkle a dash of cinnamon on top)

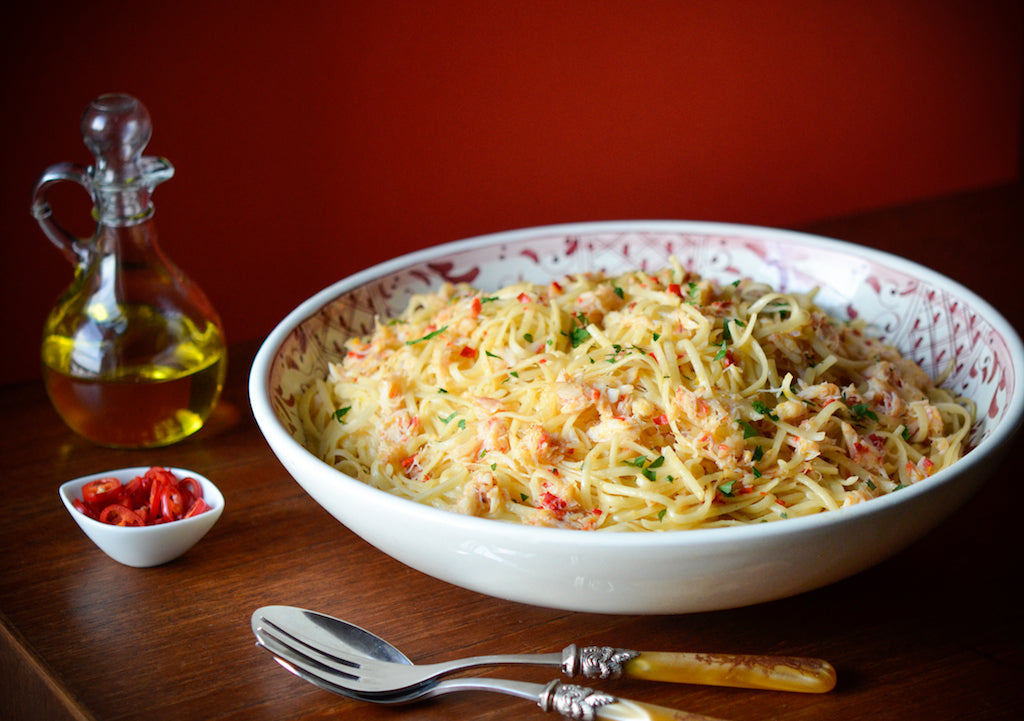
Linguine with Crab

Share on FacebookTweet about this on TwitterPin on Pinterest


I’ve become slightly obsessed with linguine and clams lately – scouring restaurants with my friend Kate in search of the perfect version.  Top of the list so far was one we had in Florence last year at a restaurant called Trattoria dei 13 Gobbi (13 hunchbacks). I’m also a fan of Frankies linguine and clams for something closer to home. I’m embarrassed to admit that I have an irrational fear of trying to recreate this even though I’ve been collecting recipes for years. For some reason, I worry that the clams won’t magically open as they do for everyone else.


Until I get over that fear, I will continue making this wonderful and simple recipe that my friend Nina gave me years ago. It has many of the same flavors and none of the fuss! It’s completely fail proof, exceedingly fast and utterly delicious. Most importantly, it makes me think of summer even when it’s freezing outside!


Linguine with Crab

Serves 4

Ingredients:

2 cloves of garlic (peeled)
1 tablespoon of sea salt flakes
1 large red chile (seeded and finely chopped)

3/4 lb of crab meat (I used Peekytoe)

1/2 cup of good extra virgin olive oil
Zest and juice of 1 lemon
1 lb of linguine
1 large handful of Italian parsley (coarsely chopped)

Red pepper flakes (optional)


Method:

1. Bring a large pot of salted water to the boil and add the pasta. Boil the pasta till al dente (approximately 9 minutes).
2. Meanwhile, smash the garlic and salt together using a mortar and pestle until you create a paste.
3. Add the chile and keep grinding until you have a wonderful red mixture.
4. Pour into a medium-sized bowl and add the olive oil, lemon zest, lemon juice and crab meat.
5. Mix well with a fork.
6. Drain the pasta when it’s done making sure to first reserve a cup of the water from the pot.
7. Pour the pasta into a large (warmed) serving bowl and mix well with the crab sauce.
8. Add the parsley and stir again.
9. Serve immediately using the reserved water to loosen the pasta if it feels too dry. You can also add red pepper flakes for heat.

Skirt Steak Tacos

Share on FacebookTweet about this on TwitterPin on Pinterest


This last Saturday we had a sneak peak of Spring and it seemed like the whole of New York had come out from hibernation. Sidewalk cafés were packed and the streets and parks were filled with the buzz of hope that the long winter was over.


But as quickly as the sun came, it was gone again and replaced by freezing temperatures. My thoughts once again returned to my blissful holiday in Mexico and I was reminded that I had promised a few people the steak taco recipe that the twin chefs in Tulum kindly shared with me.


As chefs often do, they were very approximate with the method so I’ve played around with the recipe and my friend Andrew has been a willing taster of a few versions. I couldn’t quite believe the simplicity of their version of just frying up some steak and onions with a little salt and pepper. Ben and I had become slightly obsessed with the sauce that came with steak tacos and were shocked when they explained it was purely mayonnaise mixed with chili sauce. Mayonnaise with tacos? Seems odd, I know, but I’m a total convert from the sour cream based sauces.


Instead of flank steak, I substituted skirt steak which I think is the most underappreciated cut of meat. It’s reasonably priced and always tender which makes it my go-to for a quick meal. I have also been wanting to try Gustus Vitae’s Taste of the Southwest and it ended up being the perfect addition to this recipe adding just the right amount of smokiness and heat.


Skirt Steak Tacos
Serves 2 


Ingredients:
1 lb of skirt steak
2 teaspoons of Taste of the Southwest rub
3 tablespoons of olive oil
1 large onion (halved and thinly sliced)
1 lime, halved
6 small corn tortillas

Cilantro leaves
1 radish, sliced paper thin (I use a potato peeler)


Guacamole:
2 Haas avocados

1 lime, juiced

1 small jalapeño (finely diced)

1/3 cup cilantro (coarsely chopped)

Favorite hot sauce, to taste

Salt to taste


Chipotle Mayo:

1 can of chipotle peppers in adobo sauce

2 tablespoons of mayonnaise


Method:
1. Cover the skirt steak with plastic wrap and gently pound with the flat side of a meat mallet until it’s a 1/4″ thick.
2. Discard plastic wrap and season both sides of the steak with salt and pepper.
3. In a small bowl, mix the Taste of Southwest rub with a teaspoon of olive oil until you have a paste and then rub the paste all over one side of the steak.
4. Meanwhile, heat a tablespoon of the olive oil and fry the onions in a pan until soft and golden on a low heat (about 8-10 minutes).
5. Heat the remaining oil in a large pan and add the steak, uncoated side down (you may need to cut in half or thirds to make it fit).
6. Cook for 3 minutes on each side (for rare) and then transfer to a cutting board, squeeze the juice of half a lime on top and tent with some tin foil. Let rest for at least 3 minutes.
7. When ready to serve, slice in ¼ “ thick slices.
8. Heat the tortillas in a dry pan on a low heat and keep warm in a low oven.


Guacamole:
1. Scoop out the flesh of the avocados into a large bowl.
2. Add lime juice, jalapeño, cilantro, salt and a dash or two of your favorite hot sauce.
3. Mash everything together and season to taste.


Chipotle Mayonnaise:

1. In a small bowl, mix 1 teaspoon of adobo sauce (from the can of chipotle peppers) with the mayonnaise.

2. Set to the side and serve alongside tacos.


To Assemble:
1. Add a spoonful of guacamole to the center of each tortilla.
2. Next, layer a spoonful of fried onions on top.
3. Top with a few slices of skirt steak.
4. Garnish with some cilantro leaves, radish, a squeeze of lime and a dollop of chipotle mayonnaise.


Retro Oscar Party: Make the Perfect Old Fashioned

Share on FacebookTweet about this on TwitterPin on Pinterest


Thanks to movies like Philomena, American Hustle, The Dallas Buyers Club and The Wolf of Wall Street, there’s definitely a retro theme to this year’s Oscar nominations. To honor these nominees, I’ve decided to plan a retro Oscar party to celebrate.


I love pouring over cookbooks from the 70’s and 80’s and am astounded at how much the food trends and photography have changed. Gone are the garnishes of curly parsley and stuffed olives on every plate. Thankfully gone are all the aspic covered dishes in ring molds and also the mysterious dead birds that appear in far too many cookbooks from that era (see below – I wish I was exaggerating). But sadly also gone are the classic dishes that I grew up with and watched my parents serve at their dinner parties; Duck à l’Orange, Chicken Kiev, Fondues, Beef Stroganoff and so many more. I’m going to make a concerted effort this year to bring them back!


I’m also going to attempt to add a bit more glitz and glamour to my evenings and get out of my uniform of jeans. One look at the photo below of my parents at a dinner from that period is enough to inspire me to dig through the drawer of dresses that I’ve pilfered from my mother’s closet over the years but never worn. I can’t hope to look as glamorous as they did but by convincing my friends to play dress up along with me, I’ll at least have fun trying.


So for this year’s Oscar party, I’ve decided to journey back a few decades with an Old Fashioned cocktail to get the party started (recipe below) then some easy appetizers from 1970’s London like prawn cocktail, sausage rolls and devils on horseback along with a large vat of Pipcorn while we all cast our ballots. I know that the Old Fashioned isn’t technically from that era but add a cherry and it definitely looks like it could be!


I’d love to hear what your plans are for Oscar night and hope that whatever you decide on, it includes a little bit of old Hollywood glamor.


This ‘Old Fashioned’ recipe has been passed down through generations and kindly shared with me by my godmother.


Old Fashioned 

Makes 1 large batch

Ingredients:

1 quart of Bourbon
2 oz of Cointreau

2 oz of Maraschino cherry juice
16 dashes of bitters

6 teaspoons of sugar

1 lemon peel
1 orange peel


Method:

1. Combine all ingredients in a large pitcher.

2. Let sit for at least a day and serve over ice.

3. Optional: garnish with a Maraschino cherry and a slice of orange.


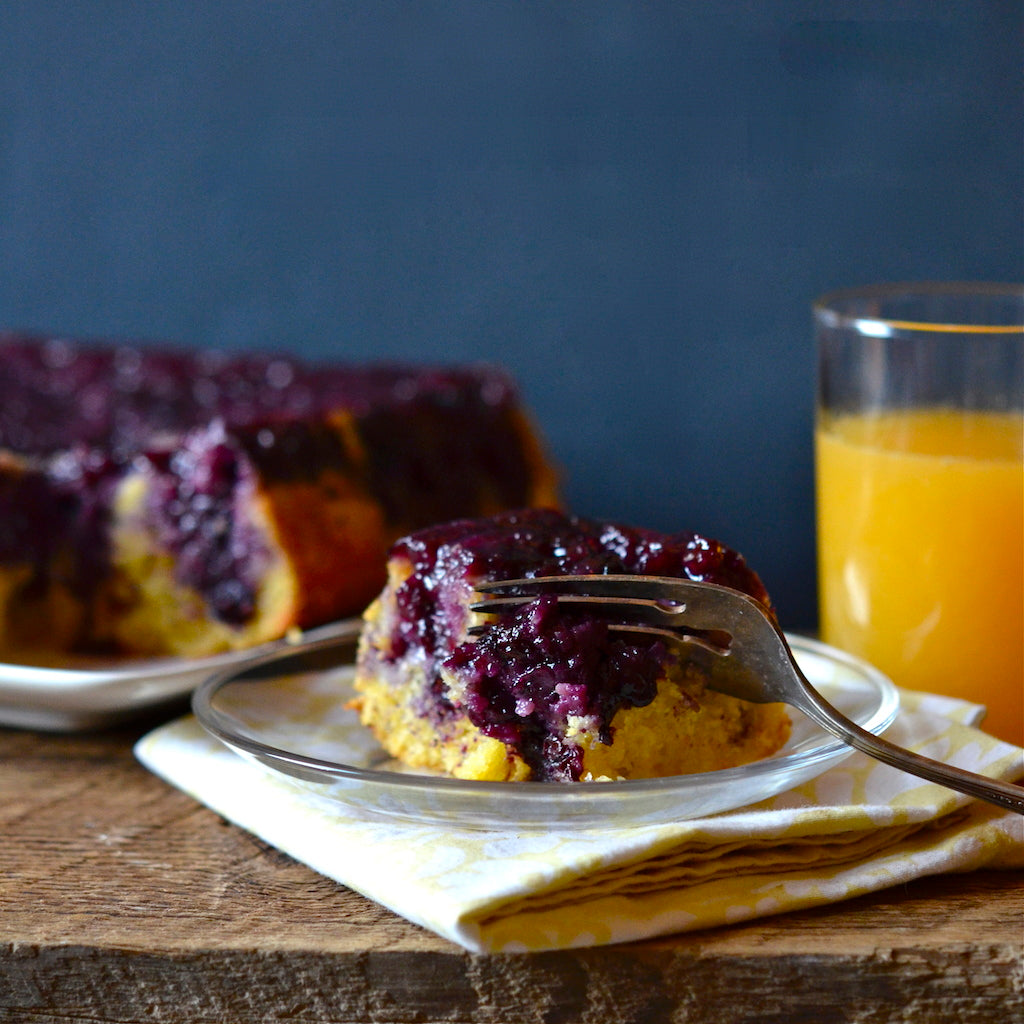
Upside Down Orange and Blueberry Polenta Cake

Share on FacebookTweet about this on TwitterPin on Pinterest


The highlight of every February is the much anticipated arrival of a box of Honeybells (also called Tangelos) thanks to Tim and Lolly’s generous annual gift. For those who have never had one, they are a cross between a tangerine and a grapefruit taking the best from each fruit; the juiciness of the grapefruit and the sweetness of the tangerine.  As corny as it sounds, they bring a touch of summer to this otherwise cold and depressing month. My box arrived last week and there are so many that I try to incorporate them into recipes as well as the obvious morning glass of OJ and the “occasional” evening cocktail.


For all my love of cooking, I have a primal fear of baking. One that I plan to overcome but that I’ve managed to hide for years by having this ONE amazing cake recipe. It is so easy and foolproof that it makes everyone who bakes it look like a domestic goddess. I even baked 4 of them at once when cooking for a friend’s large dinner that included the likes of Al Pacino and Sting! Thank god they went for my first suggestion of dessert as I didn’t actually have a second.


It comes from the self nominated domestic goddess, Nigella Lawson but was introduced to me by my fairy godmother, Eliot who first made it for me over 10 years ago. I thought I’d bake it for ValentinA’s day and get to use some of those juicy Honeybells – killing two birds with one stone.


Upside Down Orange and Blueberry Polenta Cake

Serves 6-8 people

Ingredients and Supplies: 

Parchment paper

1 1/3 cup of sugar

3 cups of blueberries

2 large eggs

The zest of 1 large orange (I just substituted a Honeybell wherever the recipe calls for an orange)

2/3 cup of freshly squeezed orange

2/3 cup of olive oil (not extra virgin)

1/2 cup of polenta

1 1/4 cup of all purpose white flour

2 teaspoons of baking powder

1/4 teaspoon of salt


Method:

1. Heat the oven to 350 degrees.

2. Grease and line the pan (I use an 8 x 8 inch pan) with the parchment paper hanging over the edges.

3. Sprinkle 1/3 cup of sugar over the base then cover with the blueberries.

4. In a large bowl, mix the eggs with 1 cup of sugar and the orange zest.

5. Whisk until mixed then add the orange juice and olive oil and continue mixing.

6. Add polenta, flour, baking powder and salt and mix until smooth.

7. Pour over the blueberries and bake in oven for approximately 45 minutes (insert a skewer and test – skewer should come out clean when cake is done).

8. It should be a nice golden brown on top and still springy to the touch.

9. Let cool for about 10 minutes and then invert over a plate and remove the pan and gently peel off the parchment paper.


Sautéed Chicken with Mustard Cream Sauce

Share on FacebookTweet about this on TwitterPin on Pinterest


I use mustard a lot in my cooking so I was very excited to receive a sample from Seattle based Mustard and Co. I love that they had discovered us through another producer that we work with in the Pacific Northwest, Bunches & Bunches, Ltd. and that our network of producers is expanding across the country. It makes me want to get on a plane tomorrow and visit all 50 states to find all the culinary gems that I’ve yet to discover!


But back to that mustard. The minute it arrived and I had my first taste, I knew it would be perfect with my favorite chicken and cream recipe adapted from Nigel Slater. The flavors were so much bolder and more vibrant than mustard I normally keep on hand. I made the chicken for my friend Leigh this week and paired with spinach and butternut squash to soak up all the yummy mustard sauce. The result was something decidedly different- my same favorite flavors but a bolder taste.


Sautéed Chicken with Mustard Cream Sauce

Ingredients:

1 tablespoon butter
1 tablespoon of olive oil
4 large chicken thighs

Salt and freshly ground pepper
Fresh tarragon leaves (about 30)
1/2 cup of dry white wine

1/2 cup of heavy cream

1 tablespoon of mustard
Lemon juice, to taste


Method:

1. In a large skillet, melt the butter and the oil together on medium-high heat. Season the chicken thighs with salt and pepper and pat dry with a paper towel.
2. When the butter starts to foam, add the chicken thighs (skin side down).
3. Let sit until the skin turns golden brown (about 6-8 minutes).
4. Flip the chicken, lower the heat and add half of the tarragon leaves.
5. Cover and cook for another 10 -15 minutes on low until the chicken is fully cooked. To test, prick a thigh with a skewer and make sure the juices run clear.
6. Remove the thighs to a warm plate and discard most of the fat, but don’t discard the tarragon leaves.
7. Return the pan with the tarragon leaves and browned chicken bits to medium-high heat and add the wine. Allow the wine to bubble while scraping up all the bits left in the pan, incorporating the browned bits as you would for a gravy.
8. Add the remaining tarragon, cream and mustard, stirring to mix.
9. Return the chicken to the pan and let the sauce bubble until it has reduced by half (this will happen very quickly).
10. Just before serving add a good squeeze of lemon and season to taste. Serve warm (I paired with roasted butternut squash and sautéed spinach).

Classic Osso Buco

Share on FacebookTweet about this on TwitterPin on Pinterest


I’m not sure if the old adage about the way to a man’s heart being through his stomach is true for all but it’s always worked for me. By that I mean that the way to MY heart is definitely through MY stomach. To me there is nothing more attractive than someone who will cook me a delicious meal on a cold February night.


If you’re trying to win someone’s heart, I recommend this Osso Buco served the classic way with Risotto alla Milanese. The meat falls off the bone and the whole dish is filled with flavor. Most of it can be cooked ahead of time so there’s very little fussing in the kitchen.


My favorite part, which might seem over indulgent to many, is digging out all the marrow from the bone and eating it with the risotto.


Classic Osso Buco

Adapted from Marcella Hazan

Serves 2 people


Ingredients:
1 small yellow onion, finely chopped
1 carrot, finely chopped
1 celery stick, finely chopped
2 tablespoons of butter
1/4 cup of vegetable oil
2 veal shanks (about 2” thick, tied around the middle with trussing string)
1/2 cup of flour
1/3 cup of dry white wine
1 cup of chicken stock (preferably homemade)
1 cup of canned diced Italian tomatoes (including the juice)
2 bay leaves
2 sprigs of parsley, plus additional for garnish


Method:

1. Preheat your oven to 350F degrees.
2. Melt the butter in a dutch oven and sauté the onion, carrot and celery until soft (approx. 8 mins) and remove from heat.
3. Heat the oil in a separate skillet.
4. When the oil is hot, dredge the veal in flour and immediately add to the skillet. Using tongs, turn after a few minutes to make sure all sides are well browned. Cook about 2 minutes per side.
5. When browned, place the shanks on top of the sautéed vegetables in the dutch oven.
6. Discard the fat left in the skillet and return to the heat.
7. Add the white wine and begin to boil briskly.
8. Scrape the bottom of the pan to loosen any of the veal stuck to the pan.
9. Add the stock and canned tomatoes and bring to a boil.
10. Pour this sauce over the veal shanks. The liquid should reach the top of the veal. If it doesn’t, add some more stock.
11. Add the bay leaves, parsley and salt and pepper to taste. I like to be generous when seasoning.
12. Bring the contents of the dutch oven to a simmer.
13. Cover tightly and place in the oven for 2 hours.
14. Check every 30 minutes, basting the veal when necessary with its surrounding sauce.
15. If the sauce is too thin at the end, remove the veal and place on an oven safe platter. Return veal to the oven on low, covering with foil while you finish the sauce on the stovetop.
16. To thicken: bring the sauce to a rapid boil on top of the stove until it reduces. Sauce should be thick enough to coat the back of a spoon when tested.
17. To finish: remove trussing string and pour the sauce over the veal. Serve hot with Risotto alla Milanese. (You can also garnish with parsley as desired).