Blueberry Crisp

Share on FacebookTweet about this on TwitterPin on Pinterest


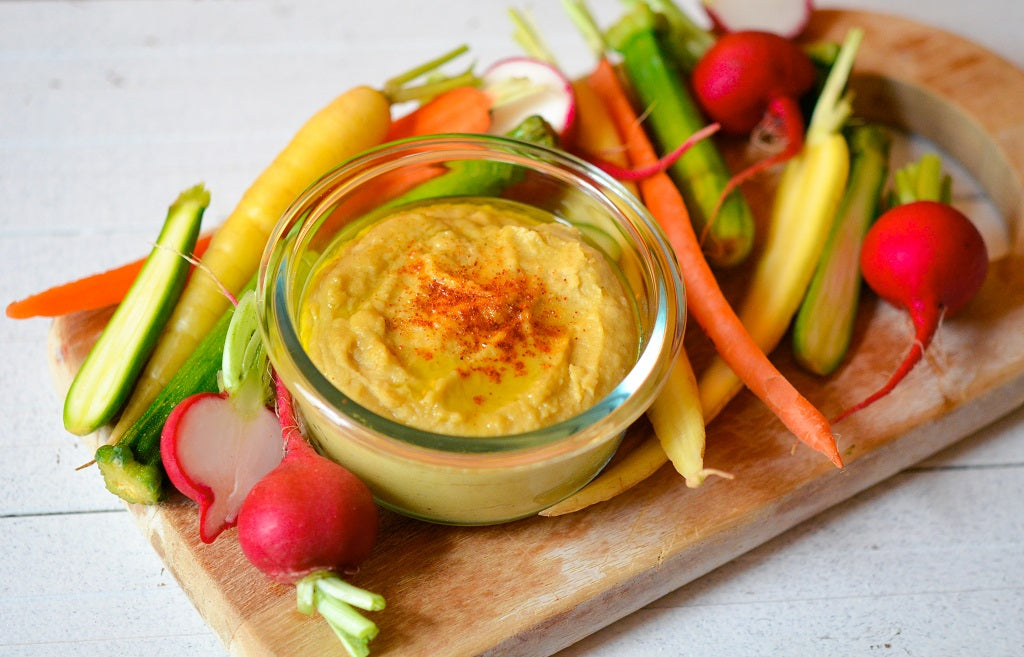
What would you have for your last supper? I know it sounds like a morbid question but it’s one I love to ask people and have been annoying friends and strangers with ever since I was given a copy of the gorgeous  ‘My Last Supper’  by Melanie Dunea. I’ve been perfecting mine for years. It starts with zucchini flowers stuffed with ricotta and fried in a light batter. Then unsurprisingly, if you’ve read my earlier blogs, spaghetti with tomato sauce followed by roast lamb, caramelized carrots and potato gratin all finished off with a fruit crumble buried in heavy cream. What I’ve found in my own little (completely unsubstantiated) anthropological experiment is that no matter how much of a connoisseur of fine food a person has become, most everyone seems to want their last supper to contain something they were fed as a child. The connection between food, emotions and memories that we read so much about proven once more.


Crumbles (or Crisps if you are American) are my kind of dessert; baked fruit bubbling up under a thick streusel like topping. I remember picking blackberries in Suffolk as a child and reaching a little too far for that perfect juicy berry before the inevitable fall into the bramble and the later satisfaction of having contributed to the apple and blackberry crumble for dinner. Perhaps best of all fruit desserts is my godmother’s blueberry crisp, a staple at large dinners she gave; so easy to put together for a big group and always beloved by all.


When Mr. Wittle’s joined our community I instantly thought of how delightful and easy their pie fillings would be as crisps/crumbles. Keeping a jar on hand lets you have a fresh baked dessert all year round, no matter what is in season. So below is my godmother’s recipe adapted for Mr. Wittle’s delectable blueberry pie filling. I hope you enjoy.


Blueberry Crisp

Serves 6

Ingredients:

1 jar of Mr. Wittle’s blueberry pie filling (or if making fresh: 4 cups of fresh blueberries)

1 cup of all purpose flour

1/8 teaspoon salt

1/4 cup of oats

1/2 cup of soft brown sugar

1 stick of butter at room temperature


Method:

1.Preheat the oven to 350°F.

2. Butter a large baking dish.

3. Add the pie filling (or fresh blueberries) and spread evenly.

4. In a large mixing bowl, mix the flour, salt, oats and butter using your fingertips until you get a “crumbly” texture.

5. Add the sugar and combine with the flour, oats and butter.

6. Sprinkle the mixture over the fruit and bake on the highest shelf for 40 minutes or until the crumble has begun to brown and the fruit is bubbling through.

7. Serve warm with creme fraîche, ice cream or my favorite, heavy cream.


Tim’s Beer Can Chicken

Share on FacebookTweet about this on TwitterPin on Pinterest


Tim’s Beer Can Chicken is not only my favorite chicken ever, it has the added bonus of making me chuckle the entire time it’s cooking. There’s no two ways about it – it just looks funny. I got my annual fix of Tim’s signature dish over July 4th while staying with him and Lolly. As a side, I picked sugar snap peas from my godmother’s garden that were so good, we ate them raw. Lolly made an Iranian yogurt sauce that was not the most obvious pairing but that was beyond perfect. Tim removed the impaled can (more giggling) and carved the chicken. The perfect meal was served. The beer had done its magic; the entire chicken was juicy and tender. I’ve always found white meat on chicken a little dry but in this case, I’m happy with any part of the bird.


Only being able to eat this during grilling season is just not enough, so I started wondering why it couldn’t be done in an oven. A couple of seconds on Google showed me that I was far from the first person to have this idea. While there are most definite advantages to the grilled version, it was still absolutely delicious and now I can make it all year round! Below are the recipes for both versions as well as the recipe for Lolly’s amazing yogurt sauce.


To Brine or Not to Brine? 

If you want the most succulent bird possible (i.e as good as Tim’s), then it is definitely worth it but if you are pressed for time, it is not absolutely necessary.


Brine

Ingredients:

1/2 cup of table salt

1/2 cup of sugar


Method:

1. Dissolve the salt and sugar in 2 quarts of cold water in a stockpot or dutch oven.

2. Immerse the chicken in the brine, cover and refrigerate for at least 1 hour. If you want a particularly succulent bird, allow to rest overnight in the refrigerator.


Beer Can Chicken

Ingredients:

1 whole chicken

2 tablespoons of olive oil

1/4 cup all purpose rub (if you don’t like spicy, try the fowl rub instead)

1 can of beer for grill method (2 cans of beer for oven method), any beer will do


Method on the grill:

1. Heat the grill. If gas, heat to high and if using coals, until they glow orange and begin to ash.

2. Wash the chicken inside and out and remove any giblets.

3. Pat dry with paper towels (inside and out).

4. Rub the olive oil all over the chicken.

5. Pat the chicken all over with the rub and set aside.

6. Open the can of beer and pour out at least a third of the liquid.

7. Holding both of the chicken legs apart, gently lower the chicken onto the can until it is able sit upright on its own.

8. When the grill has reached 325 °F,  add the chicken and cook covered until the internal temperature reaches 160 °F in the thigh. Test after 1 hour and 15 minutes but it may take up to 1 hour and a half.

9. Let rest for at least 10 minutes before carefully removing the beer can and carving.


Method in the oven:

1. Heat the oven to 350 °F.

2. Wash the chicken inside and out and remove any giblets.

3. Pat dry with paper towels (inside and out).

4. Rub the olive oil all over the chicken.

5. Pat the chicken all over with the rub and set aside.

6. Open the can of beer and pour at least a third of the liquid into a baking tray that is at least 2 inches deep.

7. Holding both of the chicken legs apart, gently lower the chicken onto the can until it is able sit upright on its own.

8. Open the second can of beer and pour half into the baking tray.

9. Place the chicken in the baking tray and roast in the oven for 45 minutes.

10. Pour the remaining beer over the chicken allowing it to drizzle into the pan and roast for a further 45 minutes (the chicken is done when the internal temperature reaches 160 °F in the thigh).

11. Let rest for at least 10 minutes before carefully removing the beer can and carving.


Iranian Yogurt with Fresh Mint, Raisins and Walnuts

Ingredients:

2 cups of plain Greek yogurt

1/2 teaspoon salt

Freshly ground black pepper

1/4 cup of finely chopped fresh mint leaves

1/4 cup of golden raisins (soaked for 1 hour in hot water)

2 tablespoons of chopped walnuts


Method:

1. Put the yogurt in a bowl.

2. Add the salt and a few grinds of fresh pepper.

3. Mix well with a fork until creamy.

4. Add all the remaining ingredients and mix again.


Baked Peaches (Pesche alla Piemontese)

Share on FacebookTweet about this on TwitterPin on Pinterest


My mother has a repertoire of a few desserts that she does expertly but rarely and I’m sure I have her to thank for my relatively savory tooth. Baked peaches were one of these famous few and a dish that her grandmother used to make for her when she was a child growing up in Piedmont. Every summer, the minute I start to see ripe peaches in the market, I feel the need to bake up a batch and hope that they taste as good as my great grandmother’s.


I have just returned from a blissful but brief visit to Italy where the peaches were in abundance and so juicy that I had to eat them over the sink. I crammed a two week holiday into 5 days with my oldest friend Catherine. She has the house across the way from me and as children we used to talk about being old ladies together in Italy. Sitting on ‘The Wall’ last week, we joked that we were finally living the dream! Ben joined us from London for just two nights and wrote how he felt like he’d been away for a whole week. There’s something about being there (probably the lack of internet) that makes you feel wonderfully cut off and relaxed.


But back to those peaches! Ever since Aurora and I first discovered Bunches & Bunches delicious Snaps ginger cookies, I’ve been dying to try them on top of baked peaches. It was one of those pairings that I just knew would work as an improvement on the traditional Amaretti di Saronno. The delicious smells emanating from the oven told me I was right before I even tasted them. Wanting to still include a little of that classic flavor, I added a few splashes of Amaretto into the baking dish.


Pesche alla Piemontese

Serves 8

Ingredients:

3 tablespoons unsalted butter, divided

4 peaches (as ripe as you can find)

1/4 cup sugar

8 ginger snaps

1/2 cup Amaretto


Method:

1. Preheat the oven to 350° F.

2. Grease an ovenproof dish with 1 tablespoon of the butter.

3. Halve and pit the peaches and place in the ovenproof dish.

4. In a bowl, crumble the ginger snaps and mix with the sugar.

5. Divide the mixture among the peaches.

6. Dot each peach with butter.

7. Pour over the Amaretto (you could also use sherry or even white wine) allowing some to fall into the bottom of the dish.

8. Bake in the oven for about an hour and serve warm with creme fraiche.  


Bitchin’ BBQ chicken

Share on FacebookTweet about this on TwitterPin on Pinterest


I’ve always been a little ashamed of how much I enjoy July 4th. As a Brit, shouldn’t I have been hanging my head in shame? But no, I look forward to it every year nearly as much as I do Thanksgiving. Both events are spent in the same place, with the same family which goes a long way to explaining why I love it so much. And this year, for the very first time, I’m officially a US citizen so I get to hold my head high and enjoy the traditions with no embarrassment at all.


Every holiday spent on Cape Cod has countless wonderful traditions and July 4th is no exception with a parade of decorated golf carts, a garden party with my godmother’s famous Tex Mex dip and the grand finale of a fire works display that feels like its custom made for us.


You can’t think of July 4th without thinking of barbecuing so for this year’s festivities, I hope you enjoy this easy and delicious BBQ Chicken!


Bitchin’ BBQ Chicken

Serves 6-8

Ingredients:

3 lbs chicken drumsticks and thighs

Salt and freshly ground pepper

1 jar Bitchin’ BBQ Sauce


Method:

1. Heat the grill. If gas, heat to high and if using coals, until they glow orange and begin to ash. (Or turn on broiler if using the oven -the timing will be the same for both the broiler and the grill).

2. Season chicken pieces with salt and pepper and grill/broil 5 minutes. Turn, baste with bbq sauce and grill/baste another 5 minutes.

3. Baste the chicken generously once more and grill/broil for another 5 minutes until fully cooked through. Once fully cooked, transfer to a serving platter and give another generous coating of Bitchin’ BBQ Sauce.

4. Serve warm alongside Pickled Corn Relish and all your other favorite bbq sides.


Easy Dips and Spreads: Camille’s Hummus and Two Tasty Crostini

Share on FacebookTweet about this on TwitterPin on Pinterest


Everyone has their dish. The one they’re known for and have honed to perfection over years, tweaking here and there. Camille’s is hummus  – there’s always a bowl of it on the kitchen counter when I come round and it has ruined store bought hummus for me. There’s a secret to how she gets it so creamy that I’ve never seen in other recipes. She generously shared her much loved recipe with me and therefore all of you.


Another really easy appetizer to add to a party is a variety of crostini. I have a fridge full of jams and spreads and like to mix them with different cheeses on top of toasted slices of baguette. You can toast a whole bunch together on a cookie tray in the oven and if you’re feeling decadent, you can brush them with olive oil first. Two of my favorite that are pictured here are goat cheese topped with Vidalia Onion Jam and ricotta topped with Honey Lemon Lavender Jelly. I’ve always been a sucker for sweet and savory.


Crostini with Ricotta and Honey Lemon Lavender Jelly

Serves 15-20 people

Ingredients:

1 baguette, sliced into 1/4″ slices

3/4 cup of olive oil

1 tub of ricotta (as fresh as can be found)

Salt to taste

1 jar of lavender honey (or even better Mr. Wittle’s Honey Lemon Lavender Jelly)


Method:

1. Preheat oven to 350.

2. Slice the baguette thinly and arrange slices on two cookie trays. You can brush olive oil on both sides if you want but not necessary.

3. Bake until crispy and golden brown (about 15-20 minutes). Turn the trays halfway through baking.

4. Leave crostini to cool.

5. Meanwhile in a medium size bowl mix ricotta with salt to taste. You won’t need more than about 1/2 a teaspoon but it really makes a difference in taste.

6. Spread the ricotta on top of the crostini and top with a spoonful of Honey Lemon Lavender Jam.

7. Enjoy with friends!


Crostini with Goat Cheese and Vidalia Onion Jam

Serves 15-20 people

Ingredients:

1 baguette, sliced into 1/4″ slices

3/4 cup of olive oil

1 log of goat cheese (about 8 oz.)

1 jar of Vidalia Onion Jam (or you can substitute 1/2 cup of caramelized onions)


Method:

1. Preheat oven to 350.

2. Slice the baguette thinly and arrange slices on two cookie trays. You can brush olive oil on both sides if you want but not necessary.

3. Bake until crispy and golden brown (about 15-20 minutes). Turn the trays halfway through baking.

4. Leave crostini to cool.

5. Meanwhile take goat cheese out of the refrigerator to allow it to come to room temperature. This makes it easier to spread.

6. Spread the goat cheese on top of the crostini and top with a spoonful of Vidalia Onion Jam.

7. Enjoy with friends!


Camille’s Hummus

Ingredients:

1 heaped tablespoon of tahini

1 can of chickpeas (including liquid from can)

4 cloves of garlic (peeled)

1 tablespoon of cumin

Juice of 1 lemon

1/4 cup of extra virgin olive oil

Salt to taste

A pinch of paprika (optional)


Method:

1. Take tahini out of the fridge and allow to come to room temperature. Stir if necessary.

2. In a saucepan, heat the chickpeas and garlic along with all the liquid from the can.

3. Simmer on a low heat for approximately 10 minutes.

4. Add all ingredients to a blender (except paprika) and mix until smooth and creamy.

5. Serve in a bowl and sprinkle with a pinch of paprika for color to finish.

Poached Salmon with Herb Mayonnaise

Share on FacebookTweet about this on TwitterPin on Pinterest


I always thought that I hated mayonnaise. All I knew was Hellmann’s and it wasn’t until I was “tricked” into trying a homemade version with sorrel that I fell in love with it. I refused to believe the two were both called mayonnaise. For everyone’s protestations about how easy it is to make yourself, I’ve had some epic fails. To have discovered a jarred version that tastes and looks like the real deal is basically life changing (as well as waist changing).


I think the perfect way to enjoy a good mayonnaise is alongside poached salmon paired with nutty fingerling potatoes and crunchy green beans. It feels summery and is light without being rabbit food and even better when eaten at room temperature. It’s a dish that makes me nostalgic for England in the summer and those long afternoons napping on a lawn after too many strawberries and cream. I can almost see the Burleigh pottery plates piled high and ignored while the last few drops of white wine are passed around.


Poached Salmon

Serves 4

Ingredients:

1/2 cup of dry vermouth

4 cups of water

1 lemon (thinly sliced)

2 bay leaves

A bunch of dill (I used 1/3 of the bunch)

1 desert spoon black peppercorns

Salt

2lbs of wild king salmon

1 jar of Fine Herbs Mayonnaise


Method:

1. In a large skillet, add the vermouth, water, half the lemon slices, bay leaves, dill and peppercorns.

2. Bring the liquid to a low boil and simmer for 10 minutes.

3. Season the salmon with salt and add to the poaching liquid, skin side down.

4. Cover the pan tightly and reduce heat to lowest setting.

5. Poach until the salmon is just cooked through and barely opaque (10-12 minutes).

6. Using a spatula, remove the salmon from the liquid onto a serving platter. Carefully peel off the skin and discard.

7. Serve at room temperature with herb mayonnaise with the remaining lemon slices and more fresh dill.

Jerk Chicken Skewers

Share on FacebookTweet about this on TwitterPin on Pinterest


This dish is an easy crowd pleaser. The jerk sauce is a wonderful alternative to a rub and the hot sauce gives a burst of heat and flavor (not for the faint of heart). You can serve as a main course by adding a side of rice or as an easy bbq appetizer!


Jerk Chicken Skewers

Serves 4

Ingredients:

1 lb chicken breast, cut into 1 inch cubes

1 cup Baron’s International Kitchen’s Jerk Sauce

1 yellow bell pepper, cut into 1 inch pieces

1 orange bell pepper, cut into 1 inch pieces

1 large yellow onion, chopped into 1 inch pieces

10 wooden skewers

1 bottle Caribbean Hot Sauce, for dipping (optional, if you don’t like spicy food skip it)


Method:

1) Heat the grill. If gas, heat to high and if using coals, until they glow orange and begin to ash.
2) In a large bowl, marinate chicken and and vegetables. Cover and set in the refrigerator for 1 hour.
3) Meanwhile soak skewers in water.
4) Drain the chicken and vegetables, discarding the excess marinade.
5) Start threading the skewers, alternating between chicken, onion and bell peppers.
6) Arrange skewers on the grill. Grill about 3 minutes per side until chicken is fully cooked.
7) Serve immediately with a bowl of Caribbean Hot Sauce as a dipping sauce.

Building Your Perfect Burger

Share on FacebookTweet about this on TwitterPin on Pinterest


Burgers, like eggs, are highly personal – everyone likes them in a different way. The key to the perfect burger is having all the right building blocks.


Aurora and I had such a fun day grilling in her backyard – it felt like a party for two on one of those perfect sunny New York days when it’s hard to believe that work now includes a bbq! We had just taken on Victoria Amory and her amazing condiments and what better way to try them all out but on the perfect burger?


Aurora likes her burger medium and with all the trimmings: cheese, mustard with mustard seeds, a generous helping of ketchup, pickles for crunch and the smallest bit of mayonnaise. I like mine rare with cheese, ketchup and a little mayo on the bun. I still remember the best burgers that I ever had were made by Mrs. Bean in Cape Cod. I discovered years later that the reason that I would run to the beach club on burger days was that she seared the buns in butter before topping the burgers.


However you like them, make sure you have the best meat you can find and keep the burger itself simple – I like to use 80% lean ground chuck and just a little salt and pepper.


All American Cheeseburger 

Serves 4 people

Ingredients:

1 lb ground beef (100% lean ground chuck)

Salt and freshly ground pepper

4 slices of cheddar cheese

4 burger buns

Toppings: Lettuce, tomato, ketchup, mustard, mayonnaise, pickles


Method:

1) Heat the grill. If gas, heat to high and if using coals, until they glow orange and begin to ash.

2) Divide the meat into 4 plump patties and season with salt and pepper.

3) Grill burgers for 3 minutes on one side or until nicely charred.

4) Flip the burgers and grill for a further 3 minutes.

5) Add a slice of cheese to each burger, close the lid and cook for a further 1 minute for medium rare.

6) Remove burgers to a platter and add buns to the grill flat side down until slightly browned.

7) Go forth and create your burger adding all of your favorite toppings!


Italian Meatballs

Share on FacebookTweet about this on TwitterPin on Pinterest


I’m a self confessed hypocrite when it comes to culinary authenticity. I can be silently appalled that an entire nation believes Italians eat Spaghetti with meatballs while I happily chow down on General Tso’s chicken, Chicken Tikka Masala or Fajitas. The lines of authenticity have recently got so blurry for me that I will add cream and even Brussels sprouts to my sauce and still call it Carbonara – an abomination to purists.


So when I found myself yesterday with only a few leftover meatballs, I thought “why not?” and added a handful of pasta to my sauce to make the meal more substantial. Had I just stumbled on the origins of Spaghetti and meatballs? A similar decision made long ago by an Italian American with too many mouths to feed and not enough meatballs to feed them? Clearly authenticity stifles creativity in the kitchen and if we were all purists, some of the great dishes of the new world would never have been created.


Having said that, when researching recipes for meatballs from Swedish to Turkish, and everywhere in between, I unsurprisingly found myself returning to the pages of my ever favorite The Classic Italian Cook Book. I used a mixture of beef, pork and veal but feel free to substitute.


Italian Meatballs “Polpettine”

Serves 4

Ingredients:

1/3 cup of milk

1 slice of good white bread with the crusts cut off (I use Italian Round Bread)

1/3 lb ground pork

1/3 lb ground beef

1/3 lb ground veal

1 tablespoon finely minced onion

1 tablespoon chopped flat leaf parsley

1 pinch of nutmeg

3 tablespoons of grated Parmesan

1 tablespoon Olive oil

1 jar of tomato sauce (We use Jar Goods Classic Red)


Method:

1. Preheat the oven to 350 °F.

2. Soak the bread in the milk for a few minutes and then mash together with a fork until it’s all blended.

3. In a mixing bowl, add the meat, onion, parsley, nutmeg, Parmesan and the bread mixture.

4. Add in 1 teaspoon of salt and 1 tablespoon of olive oil.

5. Mix everything together well with your hands and begin to roll into balls about 1 inch in diameter.

6. Line them up on a baking sheet and then bake them for about 15 minutes or until nicely browned.

7. In a large frying pan, heat the Classic Red and when the sauce starts to bubble, add the meatballs.

8. Serve however you like them: with spaghetti, on a baguette, as mini meatball sliders or with toothpicks as an appetizer!


Chile Rellenos

Share on FacebookTweet about this on TwitterPin on Pinterest


There’s a ‘hole in the wall’ Mexican restaurant around the corner from me that has all of 5 tables and is consistently packed and for very good reason. While not exactly authentic, it’s definitely tasty. Lucky for me, they also deliver. Mexicana Mama has been a long time favorite for their perfect guacamole which is always where I run to when someone’s popping round for a quick drink. When my friend Maria still lived in New York, we had a standing date for Mexicana Mama’s Taco de Puerco and a movie on my sofa. It took me a long time to even try something else on their menu – I’m not great with change.


It’s only recently that I discovered their delicious Chile Rellenos; poblano chile peppers roasted and stuffed with corn and covered in cheese. My new found confidence in the kitchen, thanks to the recent Linguine with Clams success, had me deconstructing my latest delivery and deciding to give it a try in honor of the upcoming Cinco de Mayo. And yet again, I have a new favorite dish! I served it with rice and beans but it could also be a wonderful side dish to Pulled Beef Tacos. It’s a great dish for a dinner party as it can be completely made ahead and finished off in the oven.


Chile Rellenos
Serves 4 as a starter and 2 as a main


Ingredients:
4 poblano peppers
2 tablespoons of olive oil
1 medium red onion (finely diced)
1 jalapeño pepper (finely diced)
4 ears of corn
2 teaspoons of cumin
1 handful of chopped fresh cilantro
1 good squeeze of lime
Salt and freshly ground pepper
1 cup of grated Monterey Jack


Chipotle Lime Crema:
3 tablespoons of sour cream
1 teaspoon of adobo sauce
1 good squeeze of lime juice


Method:
1. Place the poblanos on a cookie tray and broil for about 20 minutes until completely charred. You’ll need to keep turning them as each side is charred.
2. When done, carefully put the poblanos into a brown paper bag and fold down the top to keep the air in. Leave to cool. You can also put in a bowl and cover with plastic wrap. Be careful not to lift from the stalk as you want to keep them as intact as possible.
3. Preheat the oven to 350. Then, in a large skillet, heat the olive oil and gently fry the onion and jalapeño on low heat for about 5 minutes.
4. Cut the corn off the cobs and add to the skillet, turn up the heat and cook for another 5 to 10 minutes until ingredients are  slightly browned.
5. Add the cumin, cilantro, lime juice and stir to mix. Season well with salt and pepper.
6. Remove the peppers onto a board and gently remove the skins – they should peel off easily.
7. Cut each pepper lengthwise making sure not to cut through the other side and then very carefully remove all the seeds with a spoon.
8. Transfer the peppers to an oven proof dish and fill each generously with the corn mixture.
9. Cover each poblano with 1/4 cup of grated cheese and either bake at 350 degrees for 15 minutes. The cheese should be bubbling when ready.
10. Serve immediately with chipotle lime crema.