Harvest Bread Stuffing with Chorizo

Share on FacebookTweet about this on TwitterPin on Pinterest


I have been fighting a losing battle since moving to America 14 years ago. Every year at Thanksgiving, I insist on making what I consider to be stuffing. It’s completely different from stuffing in America in that it’s mainly meat based with very little bread at all – just a few breadcrumbs for binding. I try to convert someone each year and I actually caught a few young’uns early before they were corrupted to the ways of American stuffing. My first American Thanksgiving, I even tried to introduce bread sauce to the table but as I looked at it through new eyes, I realized that, like marmite, unless you grew up with it, you were never going to be convinced it was anything other than disgusting. My stubborness has kept me from trying all the myriads of American stuffing that are laid out each year at the annual banquet that I’m lucky enough to attend.


Aurora convinced me to put aside my pig headedness and create a stuffing with Nashoba Bakery’s Harvest Bread which screams Thanksgiving with its cranberries and pecans. We added just enough of Schaller & Weber’s Chorizo to satisfy my meat cravings and out of the oven came a stuffing that was so delicious that I ate it on its own for dinner. It still has a gentle nod to my roots across the pond but has its feet firmly placed in America and may very well have finally converted me.


Harvest Stuffing with Chorizo

8 Servings

Ingredients:

1 loaf of Harvest Bread (crust removed, cut to small cubes)

1 stick unsalted butter, plus extra for buttering baking dish

1 large onion, diced

3 leeks, thoroughly cleaned (sliced into half moons)

3 celery stalks, diced

1 large fennel bulb, diced

Salt and freshly ground pepper to taste

2 tablespoons minced fresh rosemary

2 tablespoons minced fresh sage

2 chorizo sausages, casing removed and sliced

2 1/2 cups chicken stock

2 eggs

3/4 cup chopped fresh flat leaf parsley


Method:

1. Preheat the oven to 350° F. Butter a baking pan or casserole dish. Toast bread in the oven for 10 minutes until just crisp. Allow to cool.

2. In a large cast iron pan, melt butter and add in onion, leeks, celery and fennel. Season with salt and pepper and cook until slightly golden (about 12-14 minutes).

3. Stir the fresh rosemary and sage into the onion mixture.

4. Remove the onion mixture to the side in a large bowl and add the chorizo to the cast iron pan. Cook the chorizo until browned (about 5 minutes).

5. Add the chorizo to the bowl with the onion mixture and then add in toasted bread. Toss together until well mixed.

6. Add chicken stock, beaten eggs and parsley to the bowl and mix well. Season once more with salt and pepper.

7. Dish stuffing mixture into prepared baking dish and bake until browned at the top (about 40-45 minutes).  Serve warm.


Acorn Squash with Brown Sugar Glaze

Share on FacebookTweet about this on TwitterPin on Pinterest


What better way to find out how to use products in cooking than asking the producers themselves? We spoke to siblings Ken and Toan about their sauces and glazes and loved how they merged East and West in inventive ways. Since I’m a sucker for all roasted squash, I was excited to try their suggestion of basting the squash with their brown sugar glaze. I decided to add some texture with some fried sage leaves as a hark back to my Italian grandmother who always threw a bunch into the pan no matter what she was frying. The slight crunch and nutty flavor balanced perfectly with the sweetness and soft texture of the squash.


Acorn Squash with Brown Sugar Glaze

Ingredients:

1 acorn squash

1 bottle Brown Sugar Ginger Glaze

Butter

Salt and freshly ground pepper

Sage leaves (optional)


Method:

1. Preheat oven to 350° F.

2. Deseed squash, slice in half and then into long slices.
3. Lay slices flat on a baking sheet covered in aluminum foil.
4. Add a pat of butter on each piece
5. Brush on Sweet Ginger Glaze and season with salt and pepper.
6. Roast for 30 minutes, check for doneness by color or poke with fork for softness.

7. Brush once more with ginger glaze and return to oven for another 10 minutes.

8. In a frying pan, heat 2 tablespoons of butter until it begins to foam. Add a handful of sage leaves and fry til crispy.
6) Remove squash from oven and sprinkle with fried sage leaves. Serve warm.

Mole Beef Nachos

Share on FacebookTweet about this on TwitterPin on Pinterest


Is there such a thing as an original recipe? It’s something I’ve been thinking a lot about recently. The question was asked at a recent panel I attended at the 92nd Y called Food + Media and it seemed that the general consensus was everything’s been done before by someone somewhere; everything’s an adaptation. I would imagine that the likes of Ferran Adrià, Heston Blumenthal and Wylie Dufresne might disagree with their fantastical creations like Ice Cream Curry and reverse spherical olives.


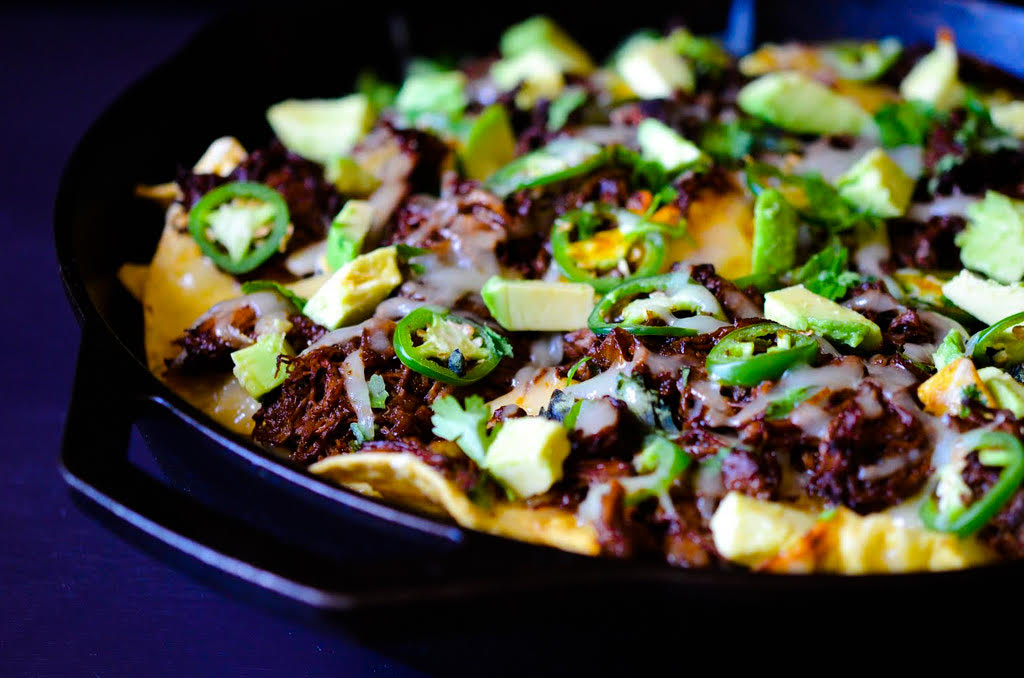
I’m a long way from joining their lofty ranks of molecular gastronomy, but I did stumble upon a culinary combination in the down and dirty Tex Mex world that made me want to eat nothing else for a week. A cursory google search for “Mole Beef Nachos” comes up empty so I’m planting the flag and claiming ownership. That’s quite a big achievement given the amount of time I spent making it, i.e practically none, thanks to Bunches & Bunches incredible Mole sauce. I went for the Smoked Oaxacan Mole this time but I can’t wait to try it with the Red Chilaca Mole!


Mole Beef Nachos

Serves 2 to 4 people (depending on greediness)

Ingredients:

2 lbs of organic beef chuck

Sea salt and freshly ground pepper

2 small onions, coursely chopped

1 jar of Smoked Oaxacan Mole Sauce

1 bag of corn tortilla chips

1 (8 oz block) Monterey Jack or Cheddar cheese, grated

1 jalapeño, thinly sliced


Toppings:

1 avocado, diced

1/4 cup of fresh cilantro leaves

Sour cream, to taste


Method:

1. Preheat the oven to 350°F.

2. Season the meat generously with salt and pepper and place in a large dutch oven.

3. Scatter the onions around the beef and pour the entire jar of mole over the beef. Fill the (now empty) jar with water, shake well and pour over it all over the beef.

4. Cover and cook in the oven for approximately 3 hours. I turned the meat over a few times during cooking but this step isn’t completely necessary.

5. Remove the meat to a board, shred with two forks and return to the pot.

6. To assemble the nachos, fill the bottom of an oven proof dish or cast iron pan with tortilla chips, cover with desired amount of cheese, then add mole beef and scatter with jalapeño slices.

7. Bake in the oven for 10 minutes or until the cheese has melted and then add toppings to your taste.


A Tacotastic Visit to Mexico City

Share on FacebookTweet about this on TwitterPin on Pinterest


It has been a long time since I’ve been this excited about discovering a new city. For me, a vacation has always been about relaxing on a beach or long walks in the countryside. To truly relax, I’ve always believed I need the opposite of the crazy busy life that I lead in a huge metropolis but when my friend Nick offered me an all expenses paid trip to Mexico City for a few days, I was more than happy to bend my rules. And of course now I can’t wait to go back. 


I had passed through Mexico City very briefly in 1991 on my way backpacking around Central America. The vibrant, cosmopolitan city I visited a few weeks ago is unrecognizable from the city I caught a glimpse of all those years ago.


The futuristic building of the Museo Soumaya (pictured above) was one of the few museums that we did not enter as we were assured by everyone that it was far better from the outside than in. It was opposite another brand new museum designed by David Chipperfield, Museo Jumex, where Nick was giving a lecture on Cy Twombly for their wonderful exhibit. It was thanks to the remarkable team at the Jumex that we managed to get a tour of Luis Barragan’s home (pictured below). The home of Mexico’s most celebrated Architect was high on my list of places to visit thanks to Ben’s blog on Mexico City. Walking through his home and being shown his genius use of light and color as well as an insight into his life, was my favorite part of the trip. Top of my list when I go back is to visit the stables he designed on the outskirts of the city. His home, in which his housekeeper still lives, is in a neighborhood filled with galleries. One in particular, the Kurimanzutto was so spectacular that I had to have Nick explain the difference between a gallery and a museum! 


For those who haven’t visited DF (as the cool kids call it), the best way I can think to describe it is a cross between the best of Miami and Bangkok. The Art Deco houses with their central courtyards on leafy avenues fill the glamorous neighborhood of Condesa. We were lucky enough to be staying in the uber hip Hotel Condesa DF with its throngs of beautiful people lounging on beds on the rooftop bar with views of the mountains beyond. 


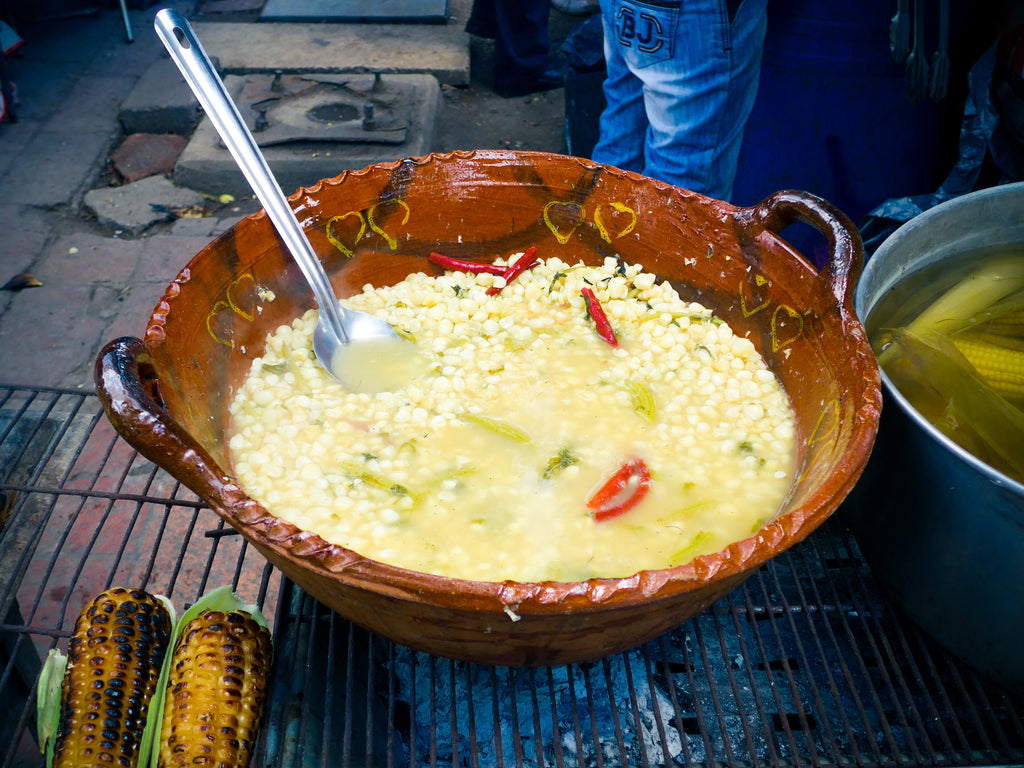
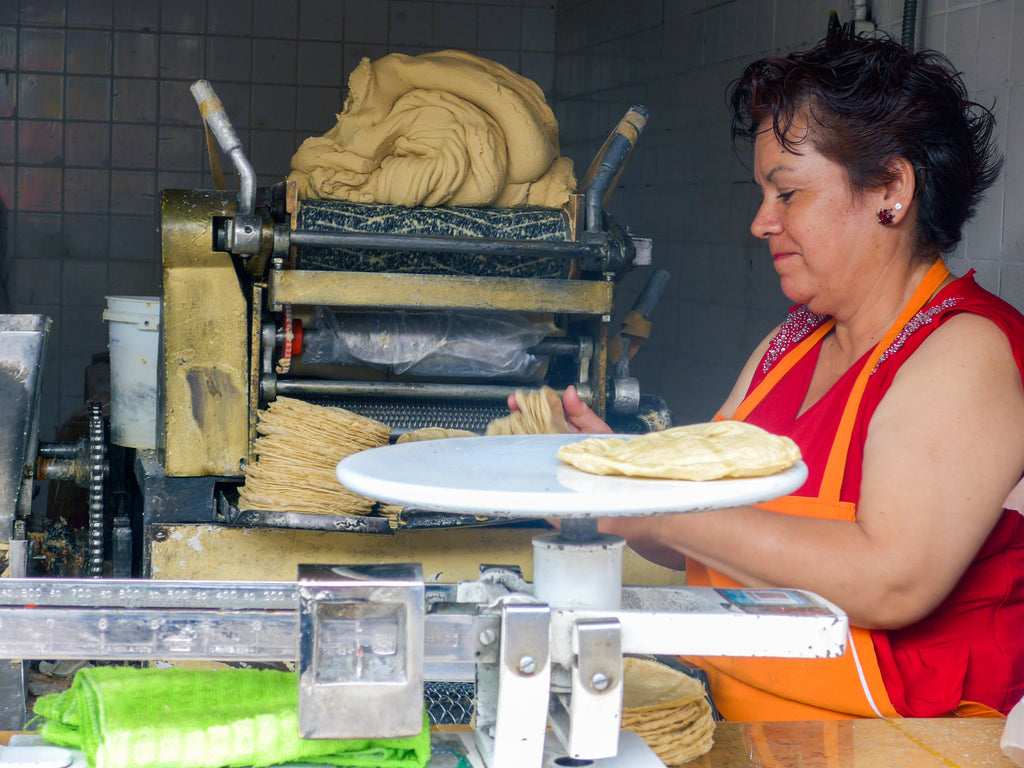
A few blocks away, the mass traffic jams and street vendors reminded me of all that I love about Asia. The wares they were selling were different but equally as mouthwatering. 


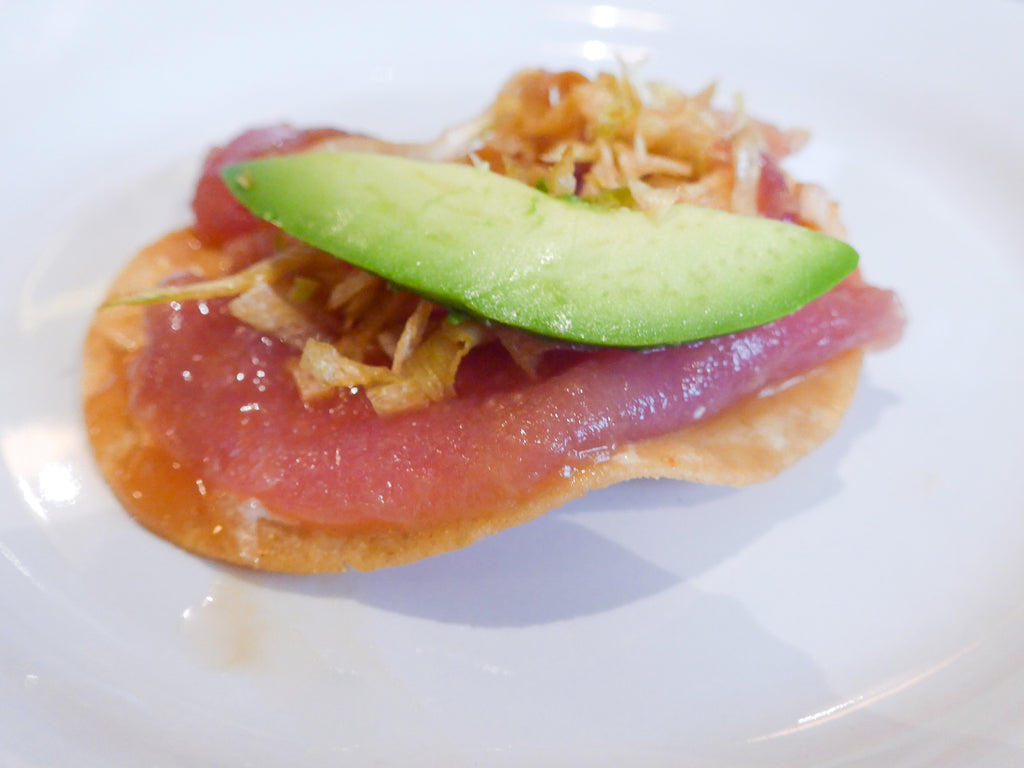
We were there for just four days and I left wishing I had just a couple more days to tick a few things off the lists I’d compiled from friends who have long been aware of DFs multitude of charms. We visited about four museums or galleries a day and punctuated each with yet another meal. We learnt quickly that no one has lunch before 2.30pm and since there’s no way I could wait that long to eat after breakfast, we were averaging four meals a day. Nick kindly indulged my search for the perfect taco and the perfect tostada. I found both at the overflowing Contramar. Their tuna tostada (for which it is famous) was utter perfection. Crispy fried tortilla topped with fried leeks, super fresh tuna, avocada and a touch of crema. Their fish taco was equally simple and equally delicious and the muse for my fish taco recipe below. 


The food scene there is booming and I’m kicking myself that I didn’t book ahead for some restaurants which I’m now dying to go back and savor – the list keeps growing. If any of you are planning a trip, let me know and I’ll send over my favorites so far. Since returning, I’ve been even more taco obsessed than I was before so I thought I’d include a fish taco recipe with this mini travelogue. 


Baja Style Fish Tacos

Serves 2


Ingredients:

Tacos

1/2lb fresh white fish (cod, tilapia or another firm variety)

1/2 cup of all purpose flour

Salt

Approximately 1/2 cup of Mexican beer

Vegetable oil

4 small corn tortillas

2 Radishes (thinly sliced)

1 avocado (sliced)

Cilantro leaves

1 lime (quartered for serving)


Chipotle Lime Crema

1/2 cup of sour cream

1 tablespoon sauce from can of chipotle in adobo sauce

1 tablespoon of lime juice


Method:

1. Cut the fish into small strips (about 1″x4″) and pat dry. In a small bowl, thoroughly mix ingredients of Chipotle Lime Crema and set aside.

2. In a separate bowl, mix the flour with 1/2 a teaspoon of salt and slowly mix in the beer until you get a consistency a little thinner than pancake batter.

3. In a frying pan, heat enough oil to completely cover the bottom of the pan. 

4. When it begins to spit, dip each fish slice in the batter with tongs, allowing excess to drip off before gently placing in the pan. (I strongly recommend using a splatter guard and an apron!)

5. Turn the fish when well browned -approximately 2 minutes per side. 

6. When fried, leave on a plate lined with paper towel. Season fish with salt and a squeeze of fresh lime juice.

7. Set your stove top burners to medium heat and brown the tortillas directly above the flames (about 1 minute per side). Remove with tongs and set aside.

8. Compose the tacos by placing 2 strips of fish on each tortilla and covering with a few slices of radish, avocado, cilantro leaves and a drizzle of chipotle lime crema.


Earl Grey Poached Pears with Caramel Sauce

Share on FacebookTweet about this on TwitterPin on Pinterest


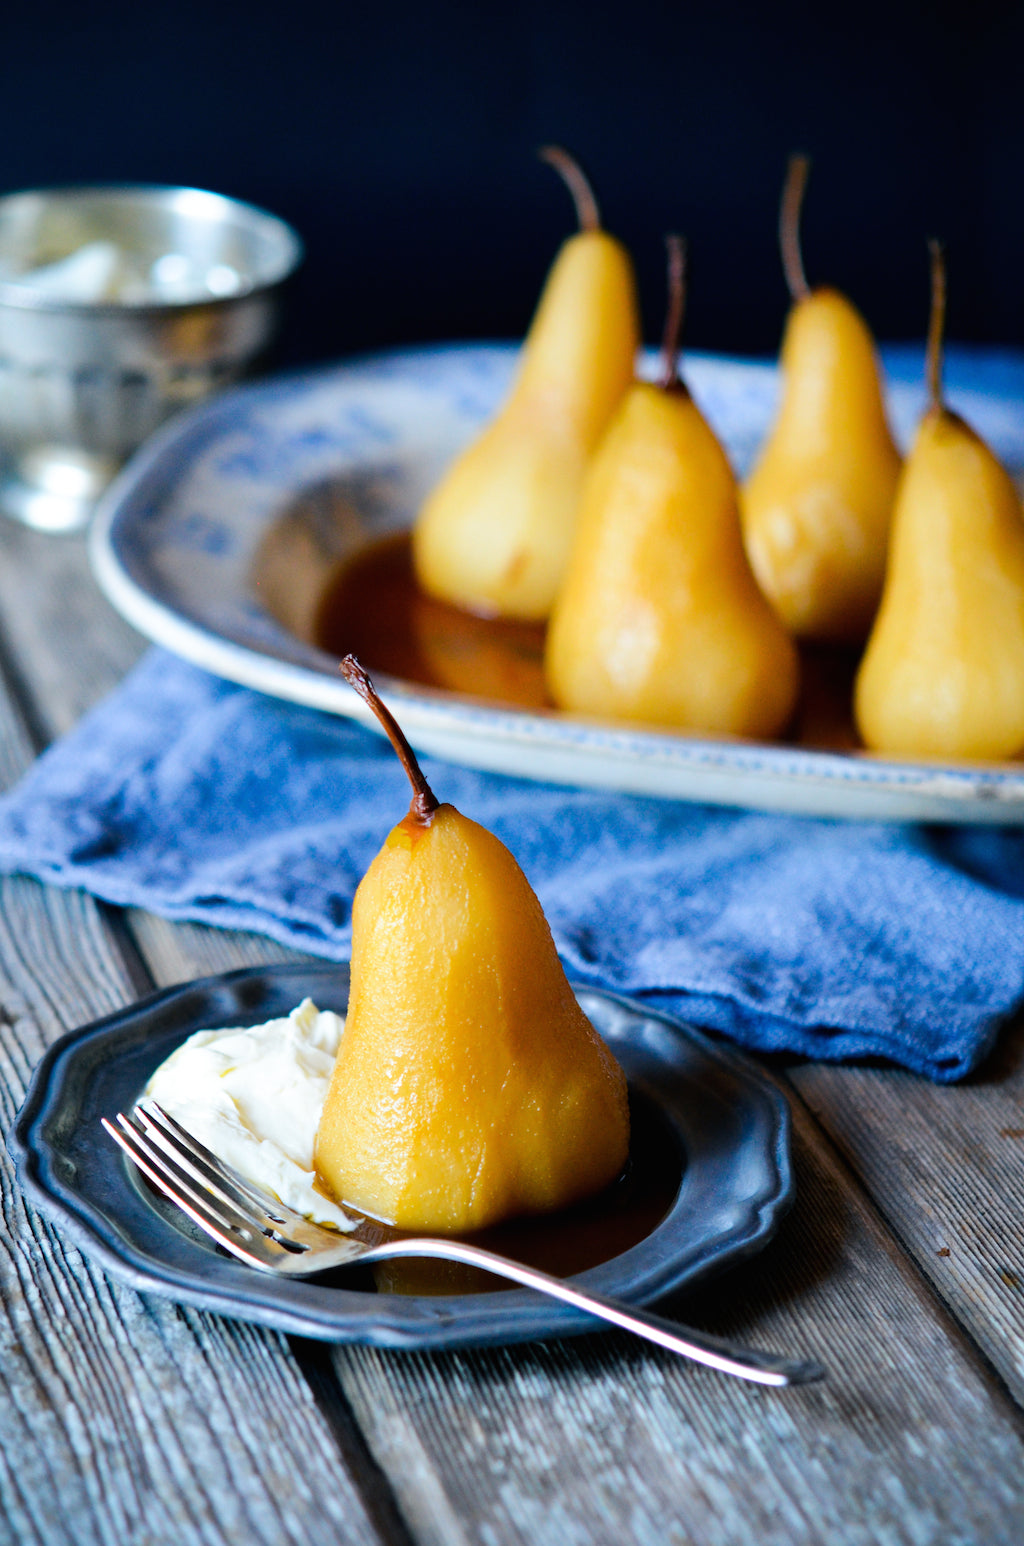
Apparently October is National Caramel Month. They seem to have a day and a month for everything – not just a National Pizza Day but a National Sausage Pizza day!? Caramel though seems like a great one to get a whole month to itself and I’m definitely not going to complain about another reason to pour it over everything in the name of national pride. Drizzling it over these delicately flavored poached pears made an already amazing dessert even better. This caramel sauce is one of the newest products from our friend Nicole, founder of The Caramel Jar. It is scrumptiously decadent – if you’ve ever tasted her Fleur de Sel Caramels, you’ll know what to expect. 


After a little bit of fuss peeling and coring, the pears really just cook away with almost no work on your part and look almost majestic when displayed on a platter. Perfect for a dinner party as they can be made days in advance – refrigerating them in their sauce only makes them taste better!


Earl Grey Poached Pears with Caramel Sauce

Serves 6

Ingredients:

6 cups of brewed Earl Grey Tea

3/4 cup granulated sugar

Juice of 2 lemons, plus peel of 1 lemon

1 orange peel, peeled into large strips

6 ripe pears, peeled and cored (try to leave the stem intact)

Fleur de Sel Caramel Sauce

Crème fraiche


Method:

1. Brew Earl Grey tea and pour into a saucepan wide enough to hold the pears in a single layer.

2. Over medium-high heat, stir in the sugar until dissolved. Then add the lemon juice, lemon and orange peels and finally the pears.

3. Bring the liquid to a simmer then cover, reduce the heat and cook the pears until tender (approximately 30 minutes but cooking time will vary depending on pear’s ripeness). Test with a pairing knife.

4. Once pears are done, scoop them out with a slotted spoon or spatula onto a serving dish and allow to cool. Once cooled, you can slice a small amount from the bottom of each pear to leave a flat bottom so they stand up straight.

5. Remove the zest from the poaching liquid and bring the mixture to a boil. Continue to boil until mixture has reduced to 1 cup of liquid. Allow syrup to cool.

6. Plate poached pears and drizzle with syrup. Serve with fleur de sel caramel sauce and crème fraiche.


Chicken Paprikash

Share on FacebookTweet about this on TwitterPin on Pinterest


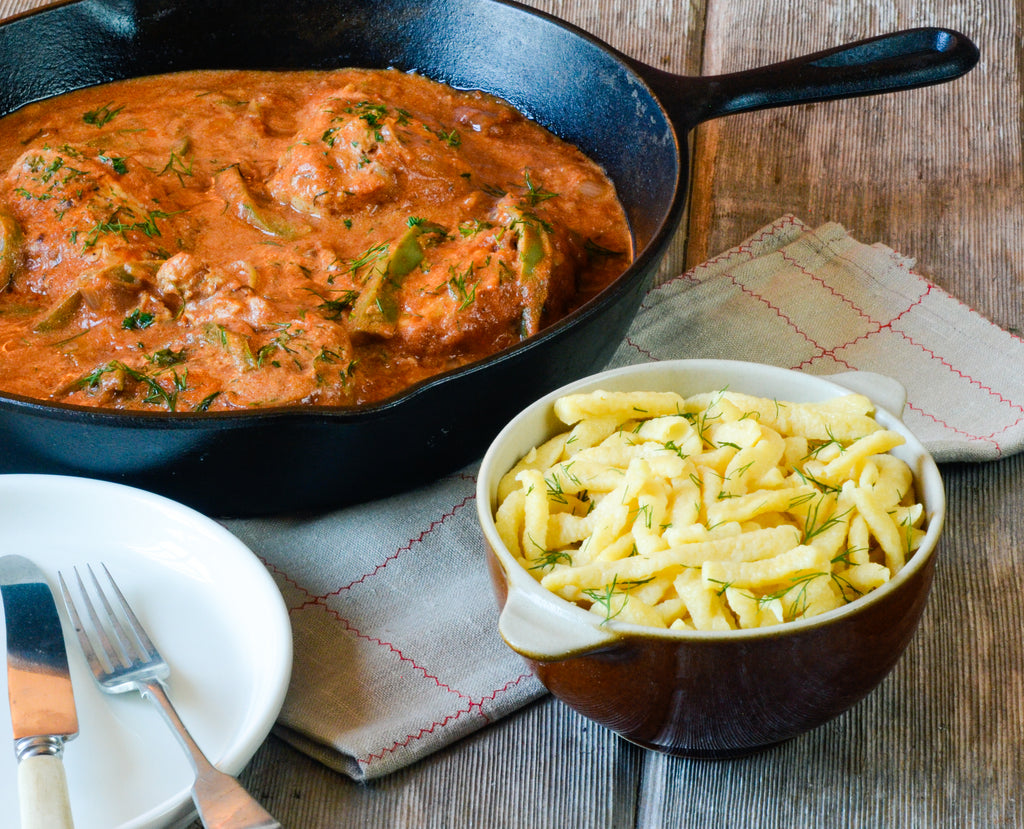
Sunday lunches at my grandmother’s were a wonderful constant in my childhood. The menu rarely veered from Wiener Schnitzel or Chicken Paprikash. Born in 1902, into what was then the Austro Hungarian Empire, those dishes were the classics from the region and still two of my favorites. To this day, the aroma of sour cream and dill takes me back to her flat in London. Unfailingly cheerful, she cooked for us well into her 90’s and I regret never asking her to teach me to make those dishes, wrongly assuming she’d always be around to make them for us. I’ve loved trying recipes for Chicken Paprikash from old Hungarian cookbooks that I’ve found including one written by Maria Flores, my father’s guardian during the war, sentimentally entitled “Cooking for Love”.


As the weather turns and we begin to crave hearty comfort food, it’s one of the first dishes I make each September, trying a slightly different version each time. This latest version not only made use of the incredibly juicy airline chicken breasts from Porter & York but it even got the ultimate stamp of approval from my brother, not known for effusive compliments on my cooking. He thoroughly endorsed it after taking a forkful of leftovers straight from the fridge. I hope my grandmother would have approved too.


Chicken Paprikash 

Serves 4

Ingredients:

4 Airline Chicken Breasts (you can also substitute 8 bone-in chicken thighs with skin)

Salt and freshly ground pepper

2 tablespoons of olive oil

2 medium onions, halved and thinly sliced

3 teaspoons of flour, divided

1 heaped tablespoon of Hungarian paprika

1 teaspoon of cayenne pepper

1 (14 oz) can of tomatoes

1/2 cup of chicken stock

1 green pepper, cut into strips with seeds removed

1/2 cup of sour cream

1 tablespoon of chopped fresh dill

1 teaspoon of Hungarian Paprika Salt


Method:

1. Preheat oven to 350°F.

2. In a large dutch oven, heat the oil. Season the chicken breasts with salt and pepper and fry until golden brown, starting with skin side down (about 5 minutes each side). Fry in batches if they don’t all fit – it’s important not to overcrowd the pan.

3. When all the chicken is browned, transfer to a plate.

4. Add the onion to the remaining fat and fry until soft for approximately 10 minutes.

5. Stir in half the flour, the paprika and the cayenne and continue stirring for about 2 minutes until all the juices have been absorbed.

6. Return the chicken to the pan along with any juices from the plate. Add the tomatoes and stock and bring to a simmer.

7. If using thighs, cover and bake in the oven for 45 minutes. Add the green pepper and return to the oven (covered) for another 30 minutes. If using airline breasts, add the green pepper and cook (covered) for just 30 minutes.

8. Remove from oven. In a small bowl, mix the remaining flour with the sour cream. Then add the flour mixture to the sauce.

9. Simmer while stirring for about 2 minutes until the sauce has thickened.

10. Plate and finish by sprinkling with fresh dill and paprika salt. I like to serve it, as my grandmother did, with spaetzle topped with a little butter.

Honey Cake

Share on FacebookTweet about this on TwitterPin on Pinterest


Rosh Hashanah marks the start of the new Jewish year. We make honey cake not only because it is delicious but also because it bodes well for a “sweet year” and what better way to dish up those blessings on to those we love than a rich, honey filled cake. This recipe is taken from Judy Bart Kancigor’s “Cooking Jewish,” a book my father kindly sent to me when I was finishing my conversion to Judaism. It is a wonderful resource of family recipes and I use it as my go-to for major holidays. By adding Catskill Provisions’ Fall honey to the cake it adds the perfect sweetness and also holds up to the coffee, fruit zests and other Fall flavors like cinnamon and nutmeg. This cake is extremely aromatic and is best dished up with a hot cup of tea or coffee.


Another fun part of Rosh Hashanah, is casting off your sins. If you see groups of Jewish people along the water this September, you’ll now know what they are doing. For Rosh Hashanah, Tashlich is a tradition where you throw bread into the water to symbolize you casting off the sins of the year.  I always love to take a couple slices to the Hudson and slowly absolve my sins by feeding any seagulls or ducks I can find. Almost like a scapegoat, these ducks eat my sins and swim away, making it a very cathartic experience.


So, Rosh Hashanah is really a beautiful holiday where you take stock of the year and get ready to start anew. My family eats this cake the morning of Rosh Hashanah for a sweet start to the day. I hope you’ll enjoy it as well!


Honey Cake

Source: “Cooking Jewish” by Judy Bart Kancigor (Workman) 

www.cookingjewish.com

Ingredients:

2 1/2 cups all purpose flour plus extra for dusting the pan

2 teaspoons baking powder

1/2 teaspoon baking soda

1 teaspoon ground cinnamon

1/2 teaspoon ground ginger

1/2 teaspoon ground cloves

1/2 teaspoon salt

1/4 cup vegetable oil plus extra for greasing the pan

1 cup sugar

1 cup honey

2 large eggs, separated

Grated zest of 1 lemon

Grated zest of 1 orange

1 cup strong brewed coffee, cooled to room temperature (the coffee really influences the taste so use one you love)

1/2 cup walnut pieces, toasted

Powdered sugar for dusting once cake is cooled, optional


Method:

1. Preheat the oven to 325° F. Grease a 9×5″ loaf pan (I doubled the recipe to fit into a massive cake pan but the resulting cake was immense – true family style), dust with flour and tap out the excess.

2. In a medium bowl, whisk the flour, baking powder, baking soda, cinnamon, ginger, cloves and salt together and then set aside.

3. In a large bowl with an electric mixer, blend the oil, sugar, honey, egg yolks and zests on medium speed until thick and well blended (about 3 minutes).

4. Reduce the blender speed to low and add one third of the flour mixture. Next add half the coffee. Alternate between the remaining thirds of flour and the last half of coffee, ending with the flour.

5. Stir the toasted walnuts into the batter.

6. Using a clean bowl, beat the egg whites on medium-high speed until stiff peaks form (1- 1 1/2 minutes). Stir one fourth of the egg whites into the batter to lighten it. Then add the remaining whites in three additions folding them in until incorporated.

7. Scrape the batter into the prepared loaf pan and bake in the center of the oven until the cake springs back when lightly touched and a cake tester inserted in the center comes out clean (about 1 hour and 10 minutes). Set on a wire rack to cool for 15 minutes.

8. Run a knife around the edges and turn the loaf out. Return it to the rack to cool completely.

9. Cut the cake into slices and serve with coffee or tea. This cake also goes extraordinarily well with poached pears and cream as a topping for a more decadent dessert.


Plank Grilled Salmon Sandwich from Not Without Salt

Share on FacebookTweet about this on TwitterPin on Pinterest


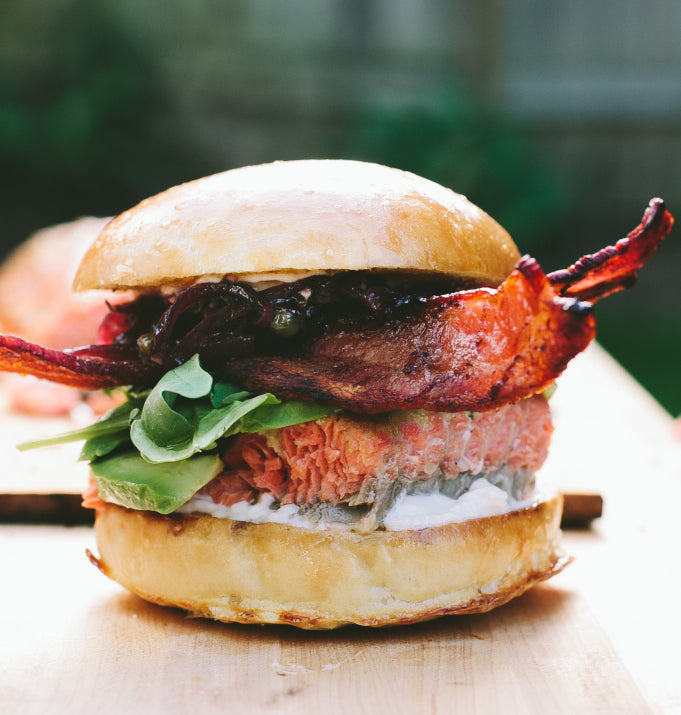
We are thrilled to be able to share this recipe from the talented Ashley Rodriguez of Not Without Salt. We actually discovered Porter & York through her blog which we devotedly follow. What a delight to connect with not only such an outstanding food blogger but also with a new producer who sources the finest Pacific Northwest Salmon and other high quality meats. There’s nothing we enjoy more than building the Many Kitchens community to include such talented and creative individuals. We hope you enjoy the recipe, our newest products and also don’t forget to check out the Not Without Salt gift box which features some of Ashley’s favorite BBQ cuts from Porter & York.


Plank Grilled Salmon Sandwich

Recipe by: Ashley (Not Without Salt)

Serves 6

Ingredients:

2 1/2 pound fillet of King Salmon

Salt & pepper

2 heaping tablespoons dijon mustard

3 tablespoons dark brown sugar

12 strips bacon

2 large avocados, peeled, pitted and sliced

3 cups arugula

6 brioche buns, halved

1/2 cup mayonnaise

cedar plank, soaked for at least an hour


Method:

1. Preheat your grill while you prepare the salmon.

2. Set the salmon on the soaked plank then season with salt and pepper. Spread the mustard on top then finish with the dark brown sugar.

3. Grill the salmon for 20 to 30 minutes or until the flesh is firm when touched and flaking.

4. After 10 minutes on the grill lay the bacon directly onto the grill and cook until crisp on both sides, about 10 minutes, flipping once halfway through.

5. Remove the salmon and bacon from the grill then let the salmon rest while you prepare the burgers.

6. Slather the brioche buns with mayonnaise.

7. Cut the salmon into 6 or so burger-size pieces. Place a piece of the salmon on the bottom bun then top with avocado, arugula and bacon. Finish with the red onion relish and then the other half of the bun.


Red Onion Relish

Ingredients:

1 large red onion, halved and thinly sliced

2 tablespoons olive oil

½ teaspoon kosher salt

1 tablespoons dark brown sugar

3 tablespoons red wine

1 teaspoon fresh thyme leaves

1 tablespoon balsamic vinegar

¼ cup drained capers


Method:

1. In a medium pan over low heat, add the olive oil.  Add the red onion and salt and saute for 15 minutes or until very soft, stirring frequently until done.

2. Add the sugar, wine, thyme leaves and vinegar. Cover and simmer for 8 minutes. Remove the lid and simmer for 5 minutes or until the liquid is syrupy. Fold in capers. Cool, then store in a jar in the fridge.

Potato Salad with Double Smoked Bacon

Share on FacebookTweet about this on TwitterPin on Pinterest


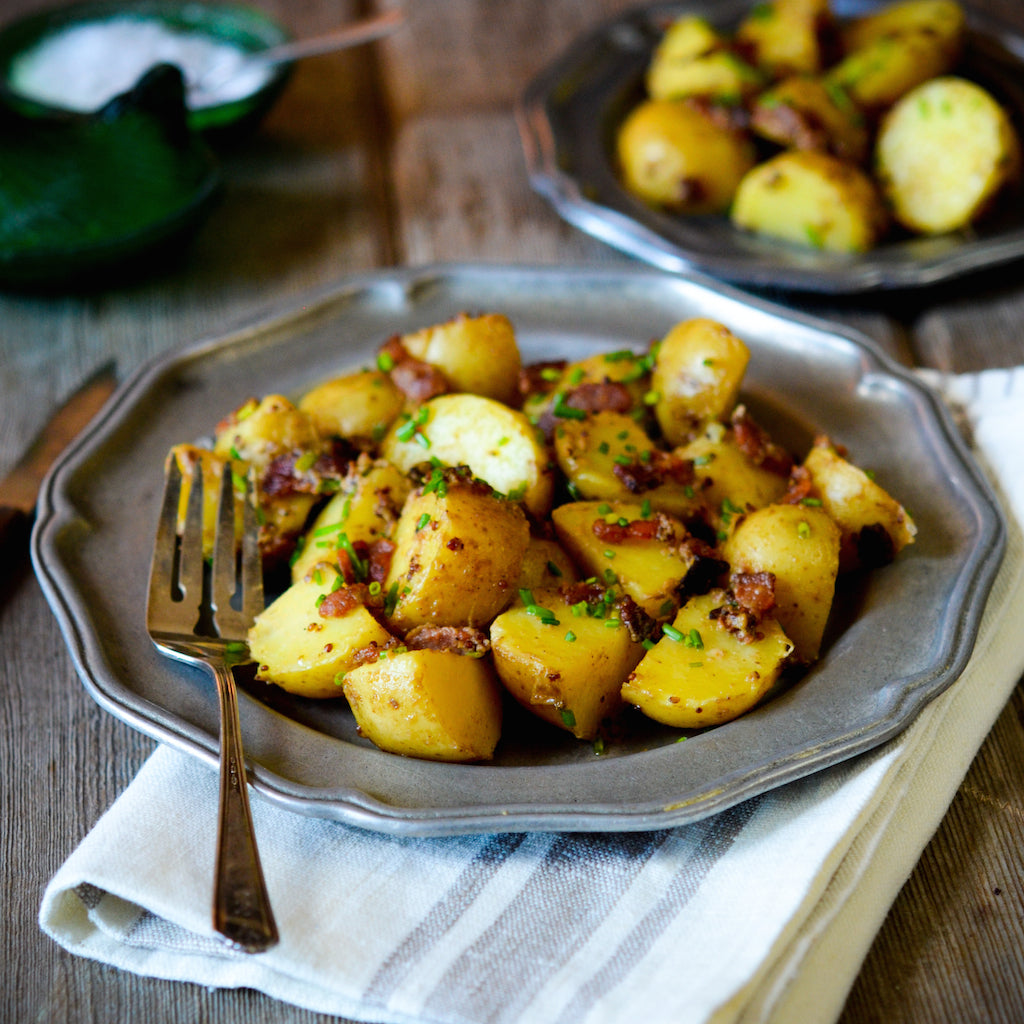
And people say I don’t like salads! Granted, this is about as close to a salad as a bowl of Spaghetti alla Carbonara is to a carb free diet but the recipe calls it a salad and who am I to quibble? I adapted this recipe from Stephanie Alexander’s Cook’s Companion. Stephanie is one of those rare cookery writers, like Marcella Hazan, who has never failed me. The Cook’s Companion is in my top 5 favorite cookbooks and I’ve barely scratched the surface of all she has to offer.


I chose to make this recipe to kick off Oktoberfest (which curiously is always in September). By making use of Mustard & Co.’s signature mustard as well as Schaller & Weber’s ridiculously good double smoked bacon, the recipe went from great to spectacular. Pair it with the Oktoberfest Pack of Schaller & Weber’s award winning German sausages and you’ve got a feast where all you need to do is add the beer. Prost!


Potato Salad with Double Smoked Bacon

Serves 4

Ingredients:

1 lb of new potatoes, cut into bite size pieces (halve or quarter potatoes depending on size)

1/4 lb of Double Smoked Bacon, diced

2 tablespoons of sour cream

3 teaspoons of mustard

1 tablespoon of red wine vinegar

1 tablespoon of finely cut fresh chives

Salt and pepper to taste


Method:

1. Boil the potatoes until tender (about 8-10 minutes, test with a knife). Drain and rinse with cold water to stop the cooking process.

2. Fry the bacon in a large frying pan (make sure pan is large enough to later fit all the potatoes).

3. When the bacon is crispy, turn off the burner and remove the bacon with a slotted spoon to drain on kitchen towel.

4. In a small bowl, mix the sour cream, mustard and vinegar and add to the frying pan while the pan is still hot. Mix thoroughly.

5. Add in the bacon and the potatoes and stir with the dressing.

6. Finish with the chives and season to taste with salt and pepper. Serve warm.

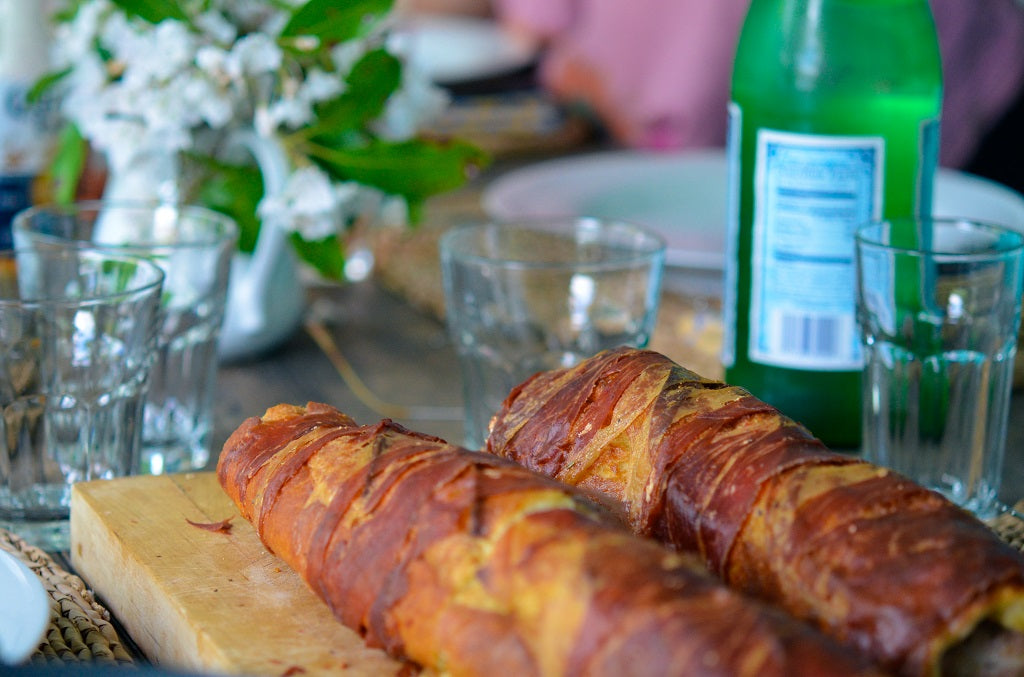
Herbed Pork Tenderloin in a Baguette

Share on FacebookTweet about this on TwitterPin on Pinterest


I remember very clearly the first time I ate this dish. It was love at first sight. The day was July 4th and I was in Cape Cod. My friend Margot had just returned from a trip to Italy and she was feeding a large group of us with recipes she picked up in Tuscany. Like a bee to honey, I found myself ogling at a platter of baguettes that had been stuffed with pork, wrapped in prosciutto, drizzled with oil and roasted. The taste was even better than I had hoped; the crust was salty and crunchy, the bread was soaked through with roasting juices and herbs while the pork remained tender, insulated in all that deliciousness. Absolute genius!


Margot generously shared the recipe with me and I’ve been impressing friends with it ever since. It’s perfect for a large group as you can make it in advance as it’s actually best served at room temperature. Recently, while staying with friends for the weekend, I made it for a large family lunch. Because so little work is involved, my friend Stephen and I managed to go for a hike, a swim and have a leisurely time reading the papers before everyone arrived for lunch. By the time he had set the table, the pork was in the oven and the rest was history.


Herbed Pork Tenderloin in a Baguette

Serves 4 – 6

Ingredients:

1 pork tenderloin

Sprinkle of sea salt

1 heaping tablespoon Herbes de Provence (We use Taste of Provence)

8 slices of prosciutto

1 good French baguette (not too skinny- about 3 inches in width)

Extra virgin olive oil (for drizzling)

(String to truss the baguette)


Method:

1. Preheat oven to 375° F.

2. Pat the pork dry and season lightly with salt then sprinkle half of the Taste of Provence all over the pork.

3. Next, wrap 4 slices of prosciutto around the pork.

5. Cut the baguette so it’s the same length as the pork. Then cut the baguette lengthwise but not all the way through, scooping out as much of the inside of the bread as you can.

6. Drizzle olive oil inside the bread on both sides and sprinkle with the remaining Taste of Provence.

7. Place the pork inside the loaf and then wrap the remaining slices of prosciutto around the outside of the baguette.

8. Tie with string along the length of the baguette to keep in place and then drizzle more olive oil over the baguette on both sides – be generous.

9. Roast for 40 – 45 mins – turning once to make sure both sides are crispy.

10. Let rest for at least 10 minutes. Slice before serving.