Prawn Curry with Eggplant Relish

Share on FacebookTweet about this on TwitterPin on Pinterest


Gone are the days of using jarred sauces and hiding them from guests out of shame. No more pretending that we made every last morsel from scratch. Now we shout proudly, “can you believe how good it is? And straight from a jar!”. The ingredient labels on these “next generation” jarred sauces list foods we fully recognize, sourced from the freshest ingredients and made in small batches so that conceivably, we could have made them ourselves. We’re so lucky to offer a slew of these fantastic sauces on Many Kitchens which take us across Europe and over to Asia. We’re so pleased to be adding Akka’s products to this category. Made from Lawrence Dass’ great grandmother’s recipe, Akka’s Eggplant Relish was a Good Food Award winner and the Curry Paste was a finalist – the two together make for an exceptional and exotic dinner with just the right amount of sweet and heat. And all ready by the time your rice has boiled!


Prawn Curry with Eggplant Relish

Serves 2

Ingredients:

2 tablespoons olive oil

1 onion, diced

1/2 jar of Akka’s Curry Paste

1 can of coconut milk

1lb of fresh prawns, peeled and deveined

Akka’s Eggplant Relish for serving


Method:

1. In a large frying pan, heat the oil and fry the onion for approximately 5 minutes until soft.

2. Add the curry paste, stir well and continue to cook for a further 2 minutes.

3. Add the coconut milk, reduce the heat and simmer for 15 minutes.

4. Add the prawns and cook through – approximately 4-5 minutes.

5. Serve with Basmati rice, nan and Eggplant Relish

Pecan Apple Crumble Pie

Share on FacebookTweet about this on TwitterPin on Pinterest


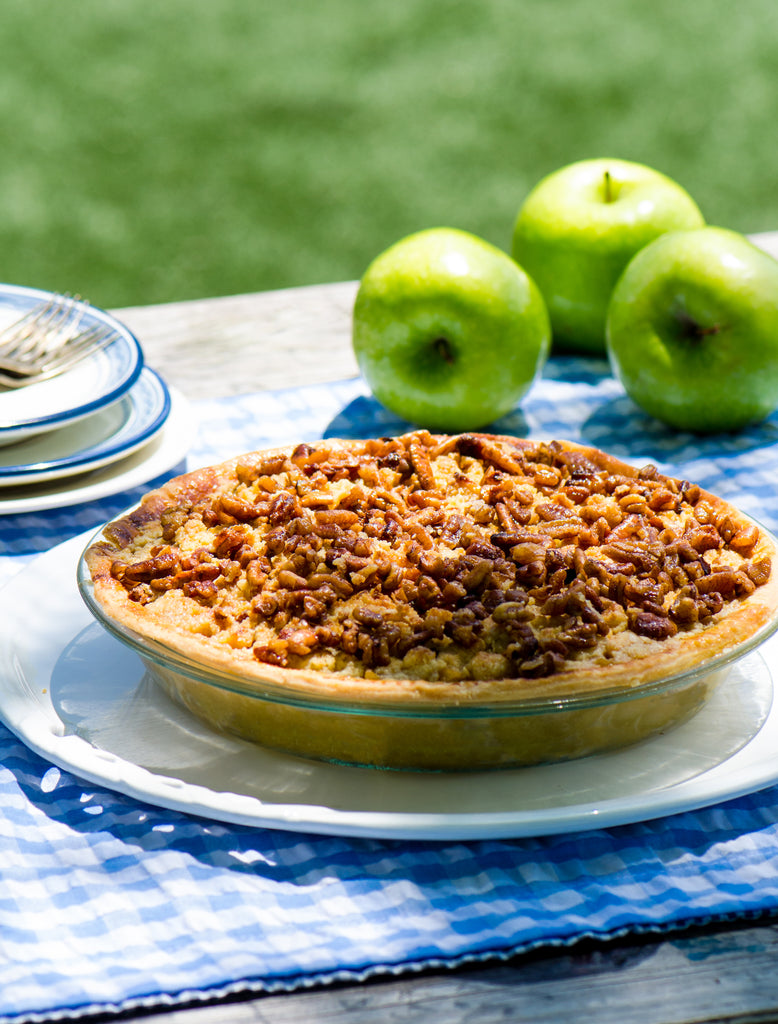
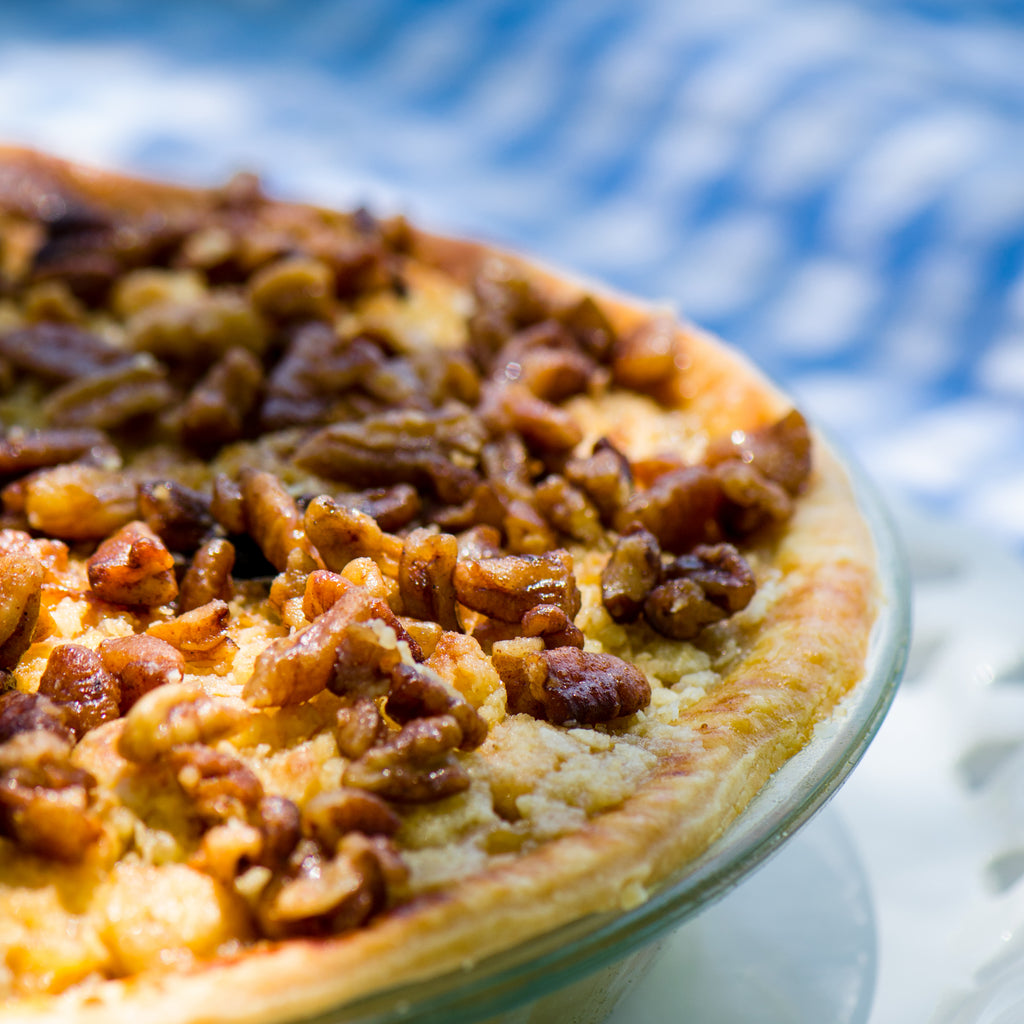
I can never decide which I like more, apple pie or apple crumble and now I don’t have to. The best of all worlds with buttery flaky pastry on the bottom and sweet juicy filling oozing out of the nutty crunchy layer on top. I used Molly and Me’s Praline Pecan Toppings but any of her home grown and home roasted pecan mixes would work just as well.


Pecan Apple Pie

Serves 4-6

Ingredients for the pastry:

8 oz plain flour

5 oz unsalted butter, chilled and cubed

3 ounces sugar

1 egg plus 1 egg yolk mixed with a splash of milk


Ingredients for the filling:

4 or 5 apples, I like to use a mixture

Zest of 1/2 lemon

3 tablespoons muscovado sugar

1/2 teaspoon cinnamon

1/2 teaspoon salt

1 cup of all purpose flour

1/8 teaspoon salt

1/4 cup of oats

1 stick of butter at room temperature

1/2 cup of soft brown sugar

1 jar Praline Pecan Toppings


Method for the pastry:

1. Preheat the oven to 300°F.

2. Put the flour, butter and sugar in a food processor and blitz until you get crumbs.

3. Add the egg and mix again.

4. Roll out the pastry on a floured surface until 1/4″ thick. Lay the pastry in a 9″ pie dish, cut off any overhang with a knife and press the back of a fork around the rim. Refrigerate while you prepare the filling.


Method for the filling:

1. Peel and core the apples then cut into eighths.

2. In a sauce pan over low heat, toss the apples with the lemon, sugar, cinnamon, salt and a tablespoon of water. Simmer for about 5 minutes and then allow to cool completely.

3. In a large mixing bowl, mix the flour, salt, oats and butter using your fingertips until you get a “crumbly” texture. 

4. Add the sugar to the mixture and combine well.

5. Remove the pie dish from the fridge, line with foil or parchment paper and then fill with uncooked rice or beans. Bake for 20 minutes and let cool.

6. Once cool, pack the apple mix tightly into the dish and sprinkle the crumble mixture  and then the pecans over the apples.

7. Use the yolk and milk mixture to egg wash the pastry rim and then bake in the oven for a further 30 minutes or until nicely browned. 


Blueberry Granola Parfait

Share on FacebookTweet about this on TwitterPin on Pinterest


My friend Cree’s homemade granola set the bar so high that we’ve never had one on the site. We dubbed hers ‘Crackola’ as it was so utterly addictive, I had to hide it in my own kitchen. Finally a granola exists that rivals Cree’s and I’m over the moon to finally be able to offer it on Many Kitchens.


Nuts & Bolts Granola has just the right amount of sweet and salty, crunchy and chewy. It’s the maple syrup, extra virgin olive oil and mixture of roughly chopped nuts that makes me look forward to my new favorite breakfast.


I like it with greek yoghurt, a handful of berries and a drizzle of honey but how ever you like your granola, I urge you to give this one a try – you won’t be disappointed.


Blueberry Granola Parfait

Serves 1

Ingredients:

1/2 cup Nuts & Bolts Granola

1/2 cup Greek yoghurt

1/2 cup Blueberries

Kosher Wild Flower Honey for drizzling


Method:

Mix all the above ingredients and eat immediately to start your day off right!

Kale Salad with Farm Fresh Pecans

Share on FacebookTweet about this on TwitterPin on Pinterest


Last week’s visit to the farmers market had me lugging home more kale than I could fit in my fridge. Reducing its bulk to a manageable size was the first order of business. There’s something therapeutic about cleaning a large volume of greens; methodical and rewarding but completely mindless. Next was the Rumpelstiltskin style task of turning a mound of kale into culinary gold. I made a huge batch of pesto (just substitute basil for kale), 2 trays of kale chips and still had enough left over for a bright salad with Molly and Me’s Sneaky Hot Pecans. The pecans added a perfect pop of heat and crunch to compliment the sweet golden raisins and the tart vinaigrette, resulting in a completely satisfying lunch on a steamy hot day.


Kale Salad with Farm Fresh Pecans

Serves 2

Ingredients:

5 oz kale (washed and stems removed)

1/4 cup golden raisins (soaked for 5 minutes in water)

1/2 cup Sneaky Hot Pecans

1/2 cup crumbled goat cheese


Dressing:

1 teaspoon dijon mustard

1 tablespoon balsamic vinegar

3 tablespoons extra virgin olive oil

Salt and freshly ground black pepper


Method:

1. Roll up the kale in bunches and slice into bite size strips. They don’t need to be even.

2. In a small bowl, mix the mustard and vinegar then whisk in the olive oil and season.

3. In a large bowl, add the kale and dressing and massage well with your hands.

4. Add raisins, pecans and goat cheese.

5. Leave to rest for a few minutes before serving.

Jerk Shrimp Sandwich

Share on FacebookTweet about this on TwitterPin on Pinterest


For this post, Aurora and I set about constructing our perfect summer sandwich. We wanted to create a recipe from scratch and really think about each ingredient. We wanted bright colors, refreshing flavors and complimentary textures. We took inspiration from the unforgettable Jerk Chicken Fajitas I had 12 years ago in Jamaica as well as the Louisiana Po’Boy. The result was everything we hoped for and more. Marinating the shrimp in Baron’s International Jerk Sauce gave us the heat we wanted. Spreading the brioche bun with Victoria Amory’s Classic Lemon Mayonnaise gave us just the right amount of tang. The mango and red pepper relish along with some arugula filled in the missing sweetness and extra bite. We hope you’ll make them for your next picnic and enjoy them us much as we did.


Jerk Shrimp Sandwich

Serves 2

Ingredients:

1 lb. large shrimp, peeled and deveined

1 cup Jerk Sauce

2 brioche style buns

Classic Lemon Mayonnaise to taste

1/4 cup arugula


Mango Relish:

1 cup finely diced mango

1/2 cup finely diced red pepper

2 tablespoons minced red onion

1 tablespoon olive oil

1 lime, juiced

Sea salt to taste


Method:

1. In a large bowl, cover shrimp with jerk marinade, toss and cover the bowl with plastic wrap. Allow to marinate for at least 1 hour in the refrigerator or overnight.

2. In a medium bowl, combine ingredients for the relish and mix thoroughly. Season to taste with sea salt.

3. Heat your griddle or grill pan on high.

4. Dress buns with mayonnaise and top bottom buns with arugula.

5. Grill the shrimp on a grill pan till just pink about 1-2 minutes per side. Repeat until all the shrimp are cooked.

6. Divide your shrimp between the two buns and top with mango relish. Eat while shrimp is still warm. Enjoy.

Grapefruit Daiquiri

Share on FacebookTweet about this on TwitterPin on Pinterest


My cocktail mixing skills are pretty limited to gin and tonic in the winter and aperol spritz in the summer. Thanks to producers like Cocktail Crate and Cecil & Merl, I’ve been expanding my repertoire without having to learn any mixology. With fresh citrus flavors and a hint of jasmine tea, this grapefruit daiquiri mix makes it easy to create a perfectly refreshing cocktail. Start your summer weekend right. Enjoy!


Grapefruit Daiquiri

Makes 1 drink

Ingredients:

2 cups crushed ice

2 oz light rum

2 oz Grapefruit Daiquiri

Fresh grapefruit slices and lime for garnish


Method:

1. Pre-chill your cockail glass in the freezer as you lay out your ingredients.

2. In a shaker combine ice, rum and Grapefruit Daiquiri mixer. Shake well and then strain into a cool cocktail glass.

3. Garnish with grapefruit and lime and enjoy!

Lobster Mac and Cheese

Share on FacebookTweet about this on TwitterPin on Pinterest


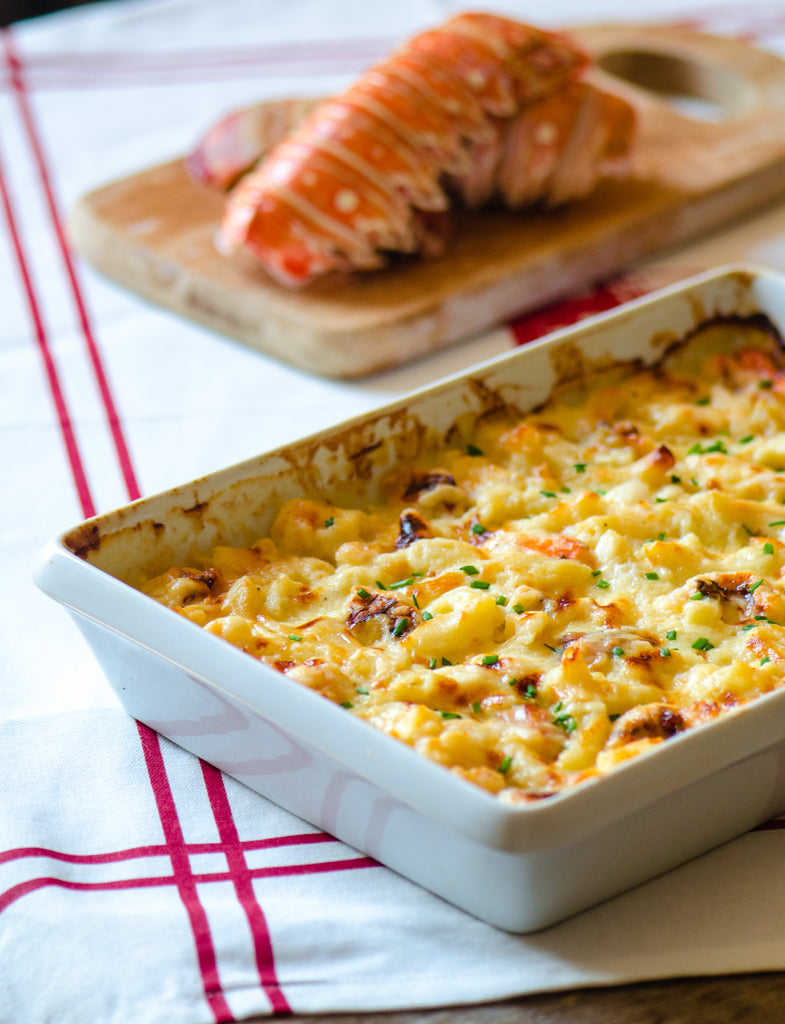
This is one of those recipes that you can’t believe actually works until you try it. The ratio of cheese to pasta (2:1) had me very wary. No pre-boiling of the pasta? No roux? Surely these were typos. Having been assured by my friend Leigh that it was the best mac and cheese she’d ever eaten, I had to give it a try. Absolute genius! And incredibly easy to boot. I added the lobster to make an already decadent dish extra special. After years of trying different recipes, I’ve found the ultimate and am a convert for life.


Lobster Mac and Cheese

Adapted from The New York Times

Serves 6 to 8

Ingredients:

1 tablespoon butter

1 cup cottage cheese (not low fat)

2 cups whole milk

1 teaspoon dry mustard

Pinch cayenne

Freshly grated nutmeg

1/2 teaspoon salt

Freshly ground black pepper

1 pound sharp cheddar, grated

1/2 pound dry macaroni

2 (8oz) raw lobster tails, meat removed from shell and chopped

3 tablespoons of chopped chives


Method: 

1. Heat oven to 375°F and butter a 9″ square baking dish.

2. In a blender, purée cottage cheese, milk, mustard, cayenne, nutmeg, salt and pepper until very smooth.

3. Reserve 1/2 cup of grated cheese for topping. In a large bowl, combine remaining cheese with milk mixture and dry pasta.

4. Pour into buttered baking dish and cover tightly with foil. Bake for 30 minutes in the upper third of the oven.

5. Remove foil, mix in the lobster so that it’s below the surface of the dish and sprinkle reserved cheese. Bake uncovered for a further 30 minutes until browned.

6. Let it rest for 10 minutes, then sprinkle with chives and serve.

Lamb Kofta with Cacik (Tzatziki)

Share on FacebookTweet about this on TwitterPin on Pinterest


When I lived in London, I used to get the most incredible pre-mixed lamb kofta from a slightly run down Persian grocery store in Kensington. I’ve attempted to recreate it with a mix of spices myself but it was never quite as good. A few weeks ago, a package arrived with an array of different spice blends along with recipe cards from Spice Tree Organics. There was no question as to which I would try first. The Istanbuli kofta was exactly as I remembered – thank you Doaa and Freda for your meticulously toasted, ground and blended spice mixes!


Lamb Kofta
Serves 4

Ingredients:
1 lb ground lamb

2 tbsp + 2 ½ tsp Istanbuli Kofta spice

1 medium onion, finely chopped or grated (juices drained)

¼ cup finely chopped fresh parsley

Salt to taste (about 1 tsp)


Method:

1. Combine all ingredients in a bowl. Thoroughly mix all the spices, onion, and parsley into the meat.

2. Chill meat mixture for one hour. In the meantime, preheat broiler or grill and make your tzatziki (recipe below).

3. Depending on the size of kofta you prefer, divide the meat mixture into 6 or 8 portions. Using a skewer or butter knife, mold the kofta around the skewer into a long sausage shape. If butter knife was used, carefully pull the kofta off of the knife without ruining the shape.

4. Place the koftas onto a hot broiler pan or grill. Cook for approximately 5 to 8 minutes until browned on the surface.

5. Turn kofta and cook an additional 4 minutes until cooked through. Serve with tzatziki.


Cacik (Tzatziki)

Serves 4

Ingredients:

2 cups of plain greek yogurt

1 hothouse cucumber, sliced in half lengthwise and seeded

1 tablespoon salt

1/2 cup sour cream

3 tablespoons lemon juice

1 tablespoon extra virgin olive oil

1 garlic clove, minced

1 tablespoon fresh dill, minced

Freshly ground pepper and salt, to taste


Method:

1. Grate the cucumber and mix with 1 tablespoon of salt. Place it in a sieve over a bowl. Fill a zip lock bag with water and use as a weight over the cucumbers to help speed up the draining process. Leave for an hour then squeeze as much liquid out of the cucumbers with paper towels.

2. In another bowl, mix the yoghurt, sour cream, lemon juice, olive oil, garlic and dill. Next add the cucumbers, stir well and add salt and pepper to taste.

Grilled Kielbasa with Shoestring Onion Rings

Share on FacebookTweet about this on TwitterPin on Pinterest


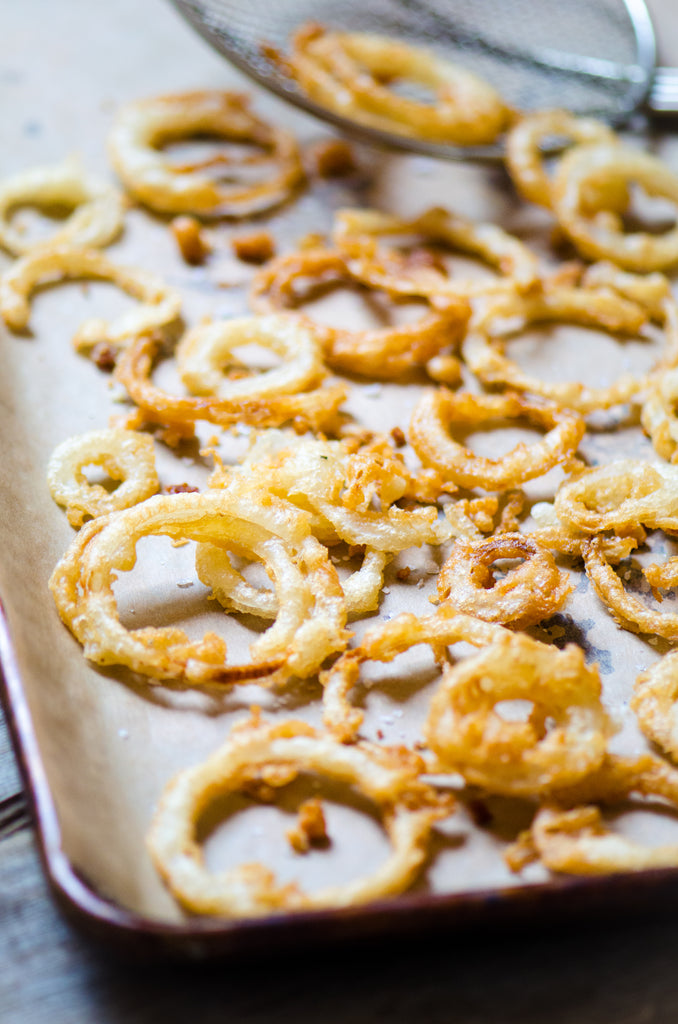
I was introduced to the mighty Kielbasa Dog by my godmother in Cape Cod and haven’t had a regular hot dog since. So much juicier and packed with flavor, the Kielbasa is an often overlooked sausage. Here, we’ve made it extra decadent with the addition of shoestring onion rings and smoky BBQ ketchup. The onion rings are addictive so be sure to fry up extra for snacking. They also make a wonderful burger topping if you are doing a mixed grill of dogs and burgers. We hope you enjoy!


Grilled Kielbasa with Shoestring Onion Rings 

Makes 4 large Hot Dogs

Ingredients:

Canola/vegetable oil for frying

1/2 cup all purpose flour

1 teaspoon cornstarch

1/2 teaspoon kosher salt

Freshly cracked pepper

6 oz. of beer

1 vidalia onion

Sea salt

1 Polish Kielbasa Ring

4 brioche style hot dog buns

Smokey BBQ Ketchup

Smoky BBQ Mustard


Method:

1. Fill a medium sized stock pot or Dutch oven a few inches high with oil and heat on high until the oil reaches 365F.

2. Meanwhile, whisk flour, cornstarch, salt and pepper in a medium bowl. Then whisk in the beer until the batter is smooth.

3. Line a baking tray with paper towels and set to the side of the frying oil.

4. Discard the ends and outer peel of your onion and then, using a guard, slice on a mandoline slicer to about 1/8″. Pull your rings apart and once oil is heated, begin dipping them in the batter and dropping them gently in the oil. Work in batches to prevent overcrowding. If rings stick together, use tongs to pull them apart. Fry until golden, turning over rings as needed, about 1-2 minutes total per batch. They fry quickly since they are thinly sliced.

5. When rings are golden brown, remove with thongs or a spider to the paper towel-lined tray and repeat with the next batch. Season finished onion rings with sea salt. As you are frying your rings, heat your grill or grill pan for the Kielbasa.

6. Slice the Kielbasa Ring in half. Slice each half again in half lengthwise to form 4 Kielbasa dogs.

7. Grill Kielbasa dogs 3-4 minutes per side until fully cooked and nice grill marks appear.

8. After Kielbasa have grilled, grill your buns, open face for 1-2 minutes until just toasted.

9. To assemble Kielbasa dogs, top each bun with a grilled Kielbasa and dress with shoestring onion rings. Finish with BBQ Ketchup and BBQ Mustard to taste. Enjoy.


Mary’s Tomato Tart

Share on FacebookTweet about this on TwitterPin on Pinterest


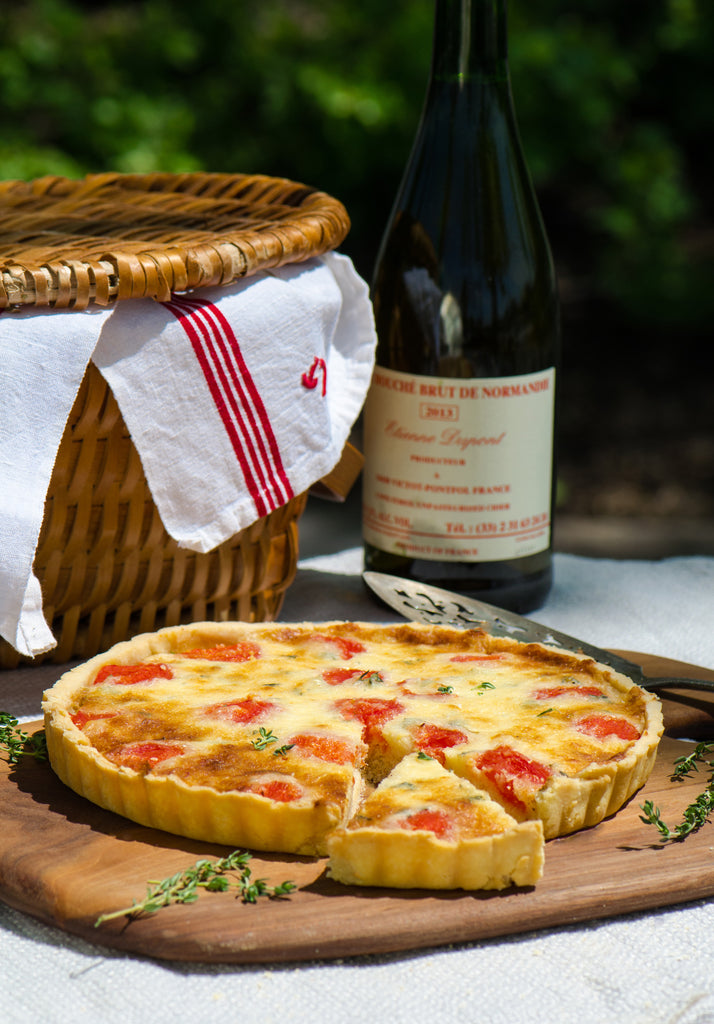
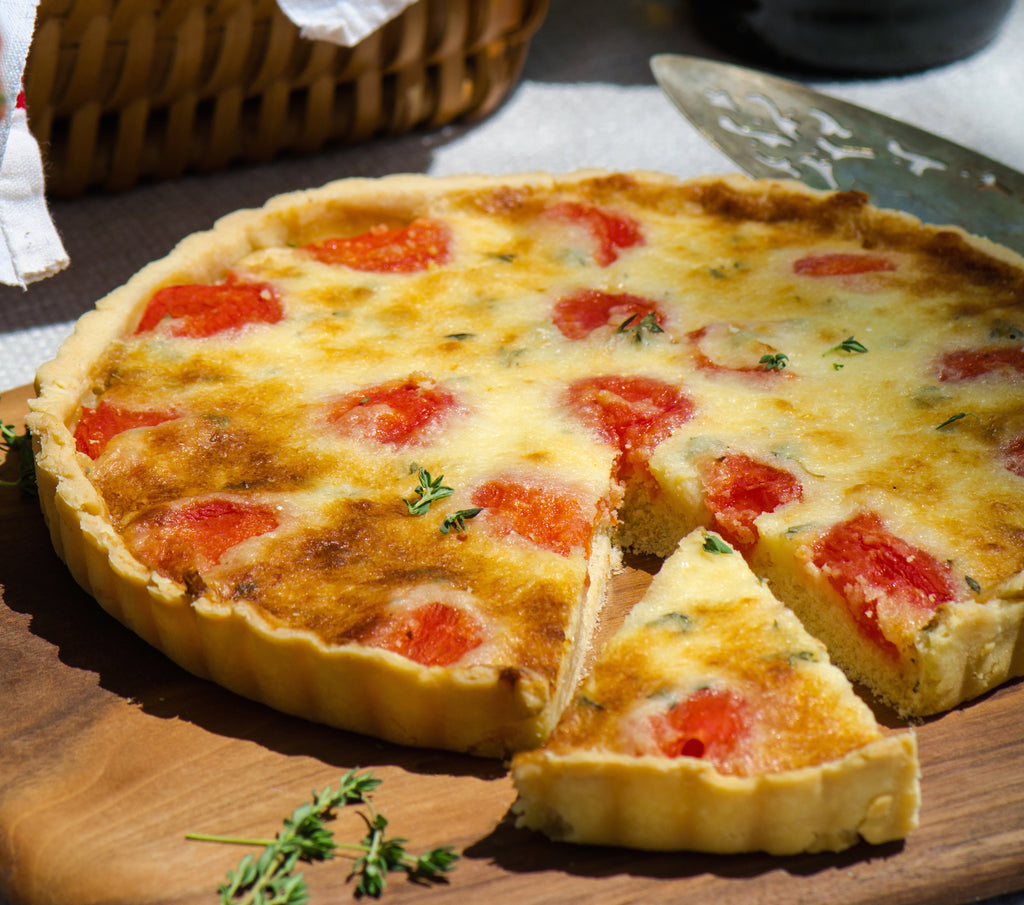
Trying to recreate a recipe from your childhood is challenging. It’s at least 20 years since I’ve had this tart but it’s one of those dishes that I’ve never forgotten. Made regularly for us on weekends in Suffolk by our friend Mary Miller, it has a legendary status and indeed is always referred to as Mary’s Tomato Tart. A couple of failed efforts almost got the better of me. Even after Mary kindly dug out the original recipe, I started to believe that only Mary could make Mary’s Tomato Tart and the memory of it was too entwined with flavors of English summers that I would never be able to recreate it. Now, I’m glad I persisted and the third time was the charm! This recipe now transports me back to a time filled with afternoons of blackberry picking and elderflower cordial.


Mary’s Tomato Tart

Serves 6

Shortcrust pastry ingredients (fills a 9″ tart pan):

7 ounces flour

3.5 ounces unsalted butter, cubed and chilled

1 egg

1/2 teaspoon salt

1 tablespoon cold water


Filling Ingredients:

4 ounces fresh breadcrumbs from brown bread

8 tomatoes approximately

1 teaspoon anchovy paste

1/2 cup heavy cream

6 ounces grated Gruyere cheese

1 tablespoon fresh thyme


Method:

1. Preheat the oven to 350°F. Add all the ingredients for the pastry into a food processor and pulse until it forms a ball of dough.

2. Lightly flour your hands then mold the dough into a flat disc. Cover the disc of dough with plastic wrap and refrigerate for at least 20 minutes.

3. Meanwhile, prepare the tomatoes by bringing a pot of water to the boil. Score a cross on the bottom of each tomato and then blanche for 45 seconds. Once tomatoes have cooked, drain and allow to cool.

4. Once cooled, peel them and cut each in half. Remove all stalks and seeds. Sprinkle the halved tomatoes with salt and leave in a colander to drain for about 30 minutes. Discard any remaining liquid and be sure to dry well.

5. Spread the fresh breadcrumbs out on a cookie tray. Cook for about 5 minutes or until the breadcrumbs are crispy.

6. In a small bowl (it helps to pour if it has a spout) mix the anchovy paste well with the cream and then mix in the Gruyere and thyme.

7. On a lightly floured surface, roll out the chilled shortcrust pastry. Lay the pastry over a 9 inch tart pan and press the pastry flush with the tin, cutting off any overhanging pastry.

8. Prick the bottom of the pastry with a fork, line with parchment paper and weigh down with pie weights or dried beans and blind bake for 10 minutes. If you don’t have old beans to blind bake with, you can use rice or even coins.

9. Once the pastry has baked for 10 minutes, scatter the browned breadcrumbs over the base of the pastry then arrange the tomato halves (rounded side up) to fill the base of the tart. Next add the cheese and cream mixture. You will have to press it in between the tomatoes. Don’t worry if it gets all over the tomatoes, you want to ensure that all the filling is coated with cream.

10. Bake in the oven for approximately 30 minutes. Test with a skewer to make sure the filling is set. Check that it’s not browning too quickly and reduce heat for the last 10 minutes if it is. Serve warm.