Announcing Recipes from Many Kitchens

Share on FacebookTweet about this on TwitterPin on Pinterest


Three years, almost to the day, since sending out our first newsletter announcing the launch of Many Kitchens, I get to write with equally exciting news; the publication of Recipes From Many Kitchens. 27 of our supremely talented producers have generously shared their treasured recipes with me and the result is a book of 80 fabulous recipes that I’m incredibly proud to have curated.


For the last few months, my tiny, windowless kitchen in the West Village has been a constant test kitchen and my sitting room a photographic studio. The last edits have been done, the cover approved and the pages designed. Now the interminable wait to hold a copy in my hands. 102 days and counting until publication day on January 26th. You can pre-order your copy here on at Amazon, Barnes & Noble, Books-A-Million and Indie Bound.

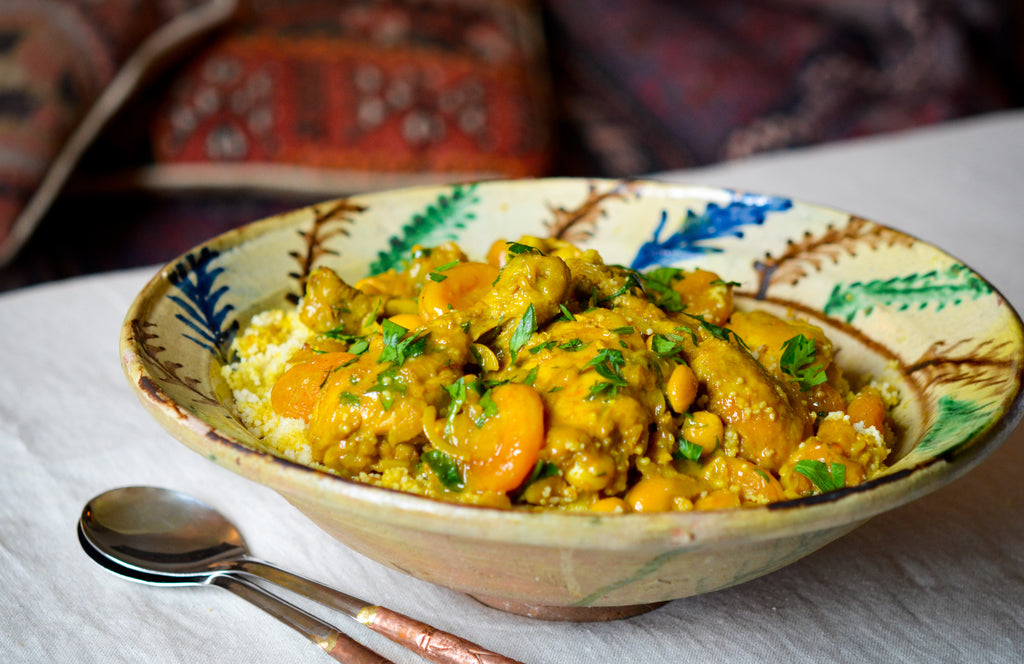
Chicken Tagine with Almonds and Apricots

Share on FacebookTweet about this on TwitterPin on Pinterest


I keep hearing about the magical healing powers of turmeric. From a potent anti-inflammatory to a cure for the common cold and even protection against cancer and Alzheimer’s, it seems to be the ultimate super food. Unable to shake a cold this week, I thought I’d try an old favorite Tagine recipe and ramp up the turmeric in the hope that an extra teaspoon would provide a quick fix cure.


As a child, we visited Morocco many times to get away from the English winter. One particular trip to Marrakech stands out not only because my father jokingly offered to sell me for a few camels (my sense of humor wasn’t fully formed) but mainly for a visit to La Mamounia Hotel just to sample their famous Pigeon Pie (B’stilla). Breaking  through the crispy filo pastry sprinkled with powdered sugar to reach the juicy meat below was unlike anything I had ever tasted. I’ve been in love with Moroccan food and its blending of sweet and savory ever since. This Tagine recipe has all those qualities from the sweet softened apricots to the crunch of the almonds and the juicy chicken. The dish even gets better the next day when all those wonderful flavors have melded!


Chicken Tagine with Almonds and Apricots

Serves 4

Ingredients:

4 chicken legs

4 chicken thighs

2 tablespoons olive oil

2 onions, halved and sliced

2 garlic cloves, crushed

1 teaspoon turmeric

1 teaspoon ground cumin

1/2 teaspoon ground cinnamon

1/2 teaspoon ground ginger

1/2 teaspoon hot paprika

1 teaspoon saffron strands

2 cups (approximately) chicken stock

9 ounces dried apricots

3 ounces marcona almonds

1 tablespoon honey

2 large handfuls of roughly chopped flat leaf parsley


Method:

1. Season the chicken generously. Heat the oil in a large dutch oven or casserole and lightly brown the chicken on both sides. You may need to do in batches.

2. Add the onions and garlic and cook on medium for a further 5 minutes. Make sure to scrape the bottom of the pan to get all those good bits.

3. Add the turmeric, cumin, cinnamon, ginger and paprika and stir well.

4. Pour over just enough chicken stock to cover the meat and bring to a boil. Add the saffron strands and stir well. Cover, reduce to a simmer and cook for 15 minutes.

5. Add the apricots and almonds, stir well, cover and cook for another 15 minutes.

6. Remove the chicken to a plate and add the honey to the casserole and cook, uncovered at medium heat until the sauce begins to thicken (about 5 minutes).

7. Add back the chicken, stir well and check for seasoning. Turn off the heat, stir in half the parsley and serve over couscous. Sprinkle with the remaining parsley.

Baked Penne Vodka

Share on FacebookTweet about this on TwitterPin on Pinterest


After months of chopping, slicing, measuring and testing recipes for the cookbook, I’ve been grateful for a fridge full of sauces that someone else has spent time perfecting. All I have to come up with is a vehicle for them and I pretty much have dinner on the table. I’ve been impatiently waiting for Jar Goods to introduce new sauces and they’re finally here! A Classic Vodka Sauce as well as a Classic Spicy sauce have all the qualities of their signature Classic Red. They are simply the best tomato sauces available and the reason I haven’t made a red sauce in two years.


I’m almost embarrassed to write out this recipe, it’s that simple but satisfied my craving for a baked pasta like the one my mother always made for Sunday lunch but without any of the work.


Baked Penne Vodka

Serves 6

Ingredients:

1 pound of dried penne

1 jar of Classic Vodka Sauce

8 ounces fresh mozzarella, cut into 1/2″ cubes (divided)

1 tablespoon of butter

Fresh basil and freshly grated parmesan for serving


Method:

1. Preheat the oven to 350°F.

2. Bring a large pot of salted water to the boil.

3. Cook pasta for 3 minutes LESS than the packet instructions. It should be really al dente as it will continue to cook in the oven.

4. Drain the pasta and mix with the vodka sauce and half the mozarella.

5. Butter a baking dish large enough to hold the pasta, then pour in the pasta and scatter the remaining mozarella on top.

6. Bake for 40 minutes or until nicely browned.

7. Serve with fresh basil and parmesan cheese.


Roasted Corn with Jalapeño and Manchego

Share on FacebookTweet about this on TwitterPin on Pinterest


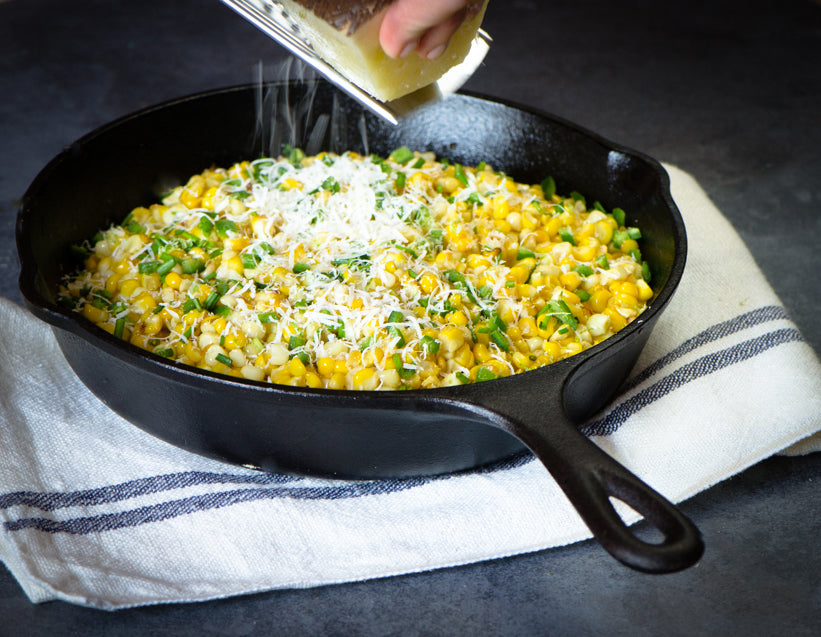
The world of artisanal food is exploding with new products and trends. We’re getting so many interesting packages and are beginning to add a myriad of new products to the site. I’m loving brainstorming and recipe testing with Aurora on unique ways of using these innovative products! First up is The Chili Lab whose subtle but utterly distinctive chili salts are giving a lift to everything I’m cooking from steaks to this delicious corn dish. Their chili butters are now my preferred spread on my ultimate breakfast sandwich and really any dish that needs a pick me up. I am blown away by the bold/bright flavors of their products and already know who I’m sending their gift box to for Christmas! I hope you will find them as tasty as we have.


Roasted Corn with Jalapeno and Manchego

Adapted from Bon Appétit

Serves 8 as a side dish

Ingredients:

6 years of unhusked corn

2 tablespoons extra virgin olive oil

2 tablespoons unsalted butter

1 teaspoon chili salt

1 jalapeño, seeded and finely diced

1 lime, juiced

1/4 cup thinly sliced chives

1 cup finely grated Manchego cheese

2 teaspoons finely grated lime zest


Method:

1. Preheat the oven to 450°F.

2. Roast unhusked corn on a baking sheet for about 15 minutes – turn once.

3. Let the corn cool and then shuck. Cut the kernels from the cobs and discard the cobs.

4. Heat oil in a large skillet over high heat. Add the kernels and sauté for 5 minutes – stirring regularly until you begin to see the corn brown.

5. Add the butter and stir until melted.

6. Season with chili salt of your choosing.

7. Sprinkle with jalapeño, lime juice, chives, cheese and lime zest.

Crab Cakes with Hot Pink Mayonnaise

Share on FacebookTweet about this on TwitterPin on Pinterest


My friend Ben always says that September feels more like the start of a new year than January and I know just what he means. After two beautiful weeks in Italy, I’m enjoying that back-to-school feeling filled with resolutions. Fueled by jet lag, I’ve already resumed my early morning walks on the high line and started planning the fall in my head. I had forgotten how much I love to start the day watching the city come to life on the streets below with the sun bursting through the high rise buildings in the east and the breeze off the Hudson from the west.


I tend to arrive home starving as the ideas I come up with are naturally food related and centered on what I plan on cooking. We’ve got a lot of wonderful new products that we’re going to be launching on Many Kitchens and coming up with recipes for them is one of my favorite past times. The utterly charming Victoria Amory has added a Hot Pink Mayonnaise to her growing collection of condiments and it’s a new favorite already. I used it both in, and on top of, these crab cakes making them incredibly succulent and flavorful. 


Crab Cakes with Hot Pink Mayonnaise

Serves 4

Ingredients:

1 egg

1lb jumbo lump crab meat

2 tablespoons Hot Pink Mayonnaise (plus more for serving)

2 tablespoons chopped chives (reserve a few for serving)

2 teaspoons of lemon juice

1 teaspoon lemon zest

1/4 teaspoon cayenne peppe

1/4 cup breadcrumbs

1/4 cup canola oil

lemon wedges for serving


Method:

1. Whisk the egg in a bowl and then add all the other ingredients except for the oil. 

2. Cover and refrigerate for at least 1 hour.

3. Divide the mixture into 8 patties about 1″ thick.

4. Heat the oil in a large skillet until shimmering.

5. Add the crab cakes (if they don’t all fit, you can do in batches) and cook for about 3 minutes on each side – they should be nice and browned on both sides. Flip them very gently.

6. Serve topped with Hot Pink Mayo, a sprinkling of chives and lemon wedges.

Panzanella (Tuscan bread and tomato salad)

Share on FacebookTweet about this on TwitterPin on Pinterest


I’ve been spending the last few days of my time in Italy staying with my oldest friend, Catherine, in what is to my mind, the most beautiful house in Tuscany. A stunning farmhouse at the end of a treacherous road where I feel completely at home and happy. I’m incredibly lucky to have my nearest neighbor be one of my closest friends and I always make sure our time here overlaps. I just can’t imagine being here without her. We spent last night at a local festa reminiscing about a slightly more glamorous party that used to be the highlight of every summer but which sadly no longer happens.


Every August, the courtyard of Badia a Coltibuono, a 12th Century monastery outside Gaiole, would be the stage for a concert by students of the famous Academia Chigiana. The classical music was followed by food and drinks in the formal garden while the courtyard was transformed into a disco. Huge ceramic bowls filled with Panzanella and platters of Parma ham, salami and cheese were laid out for the guests to feast on before the dancing began. I decided to recreate the panzanella today and I’m sure the fact that it was so delicious was thanks to every ingredient except the bread coming straight from Catherine’s garden.


Panzanella

Ingredients:

4 slices of tuscan bread or good sourdough

1/2 red onion, thinly sliced

1 red pepper, deveined, seeded and sliced into strips

2 large heirloom tomatoes

2 tablespoons red wine vinegar

5 tablespoons extra virgin olive oil

Salt

Basil leaves


Method:

1. The bread should be a little stale. If it is not, you can put it in a low oven for 15 minutes to dry out. Then cut into 1″ cubes.

2. Soak the sliced onions in a bowl of water for 10-15 minutes to bring out the sweetness then drain and dry.

3. In a large bowl, mix the red pepper, tomatoes, bread and red onion.

4. Sprinkle the vinegar and then the olive oil all over the salad and mix well with your hands. Add salt, taste and mix again. Tuscan bread is made without salt so I used quite a lot but it depends on your ingredients.

5. Finish by sprinkling with some chopped basil leaves and leave it to sit for at least 10 minutes. The bread will soak up all the juices of the tomatoes and continue to improve.

Popina’s Plum Tart

Share on FacebookTweet about this on TwitterPin on Pinterest


I’m writing this from my very favorite place on earth. It is pure heaven to be back in Italy where everything is reassuringly unchanged. I slip so easily into the daily routine of morning visits to Gaiole to stock up on supplies; succulent meat from Vincenzo, the butcher and a replenishment of fresh fruit from Angiolo, the green grocer before heading back to a lazy day of reading on the wall before preparing dinner.  


Banished from the wall for a few hours due to a torrential downpour, I decided to try my hand at Popina’s plum tart that is usually Ben’s domain. He started making it a few years ago and it looks and tastes so impressive that I assumed it was beyond my capabilities. Guided by Ben’s husband Charlie, an expert baker, the tart was in the oven in no time at all and our sweet toothed guests were finally given something to satisfy their cravings. I can’t recommend Popina’s Book of Baking highly enough for novices to experts alike.


Popina’s Plum Tart

Adapted from Popina Book of Baking


Ingredients:

Sweet Shortcrust:

8.8 ounces plain flour

4.4 ounces unsalted butter, chilled and cubed

3 ounces granulated sugar

1 egg

Sponge Dough:

1.6 ounces unsalted butter, at room temperature

3.2 ounces granulated sugar

1 egg

1 1/2 teaspoons baking powder

3.2 ounces plain flour

Tart:

A selection of plums (about 15)

3 tablespoons marmalade 

2 tablespoons water


Method:

Preheat the oven to 325°F


Make the Shortcrust pastry:

1. Put the flour, butter and sugar in a food processor and blitz until you get crumbs.

2. Add the egg and blend again until the ingredients form a ball of dough. 

3. Wrap the dough in plastic wrap and put in the fridge while you do the next steps.


Make the sponge dough:

1. With an electric whisk, blend the butter and sugar in a mixing bowl.

2. Add the egg and baking powder and whisk to combine.

3. Gently fold in the flour by hand until you get a smooth paste.


Make the tart:

1. Butter a 9″ fluted tart pan, preferably loose based.

2. Roll out the shortcrust pastry on a lightly floured surface and line the tart pan. You can also cheat like I did and put the ball of dough directly into the pan and use the palm of your hands to distribute evenly and then your fingers to fill the sides. 

3. Trim any excess dough from the edges.

4. Spoon the sponge dough into the tart shell and spread in an even layer.

5. Scatter the plums around the tart. 

6. Bake in the preheated oven for 45 minutes. The sponge dough will rise around the fruit and turn a golden brown.

7. Leave the pie to cool and heat the marmalade in a small pan with the water. 

8. Sieve the marmalade and brush over the tart before serving. 

Ottolenghi’s Green Gazpacho

Share on FacebookTweet about this on TwitterPin on Pinterest


Like many food lovers, I bow to the altar of Yottam Ottlolenghi. I love pouring over his books, visiting his restaurants in London and reading up on him but for some reason I rarely make any of his recipes. This green gazpacho is an exception probably because it’s so quick and easy. Gazpachos are fresh by their very nature but this is simply the freshest as well as the tastiest that I’ve ever had.


My friend Chris made it for me last summer and I’ve been making it ever since when I want something super clean. I made it today in a vague attempt at a pre-vacation cleanse before I overload on pasta in Italy. I’m off tomorrow and already counting the hours until I can sit on ‘the wall’ and watch the sun set with an ice cold G&T!


Ottolenghi’s Green Gazpacho

Adapted from Plenty

Serves 6

Ingredients:

Croutons:

2 thick slices of 7 grain bread, cubed

4 tablespoons extra virgin olive oil

Sea salt


Gazpacho:

2 celery stalks (including leaves), roughly chopped

1 green bell pepper, seeded and roughly chopped

6 mini cucumbers, peeled and roughly chopped

3 slices of stale white bread, crusts removed and broken into small pieces

1 jalapeno pepper (seeds removed or not depending on whether you like heat), chopped

3 garlic cloves, chopped

5 cups of baby spinach

1 cup basil leaves

2 tablespoons of parsley leaves

1 teaspoon sugar

2 tablespoons of champagne vinegar

1 cup extra virgin olive oil

3 tablespoons of greek yoghurt

1 cup of water

2 teaspoons salt

4 ice cubes


Method:

Croutons:

1. Preheat the oven to 375°F.

2. Toss the bread cubes in the oil and salt and arrange on a baking tray. Bake for 10-12 minutes until crisp.

3. Remove and leave to cool.


Gazpacho:

1. Fit as many of the ingredients as you can (except the ice cubes) into a large blender and blitz until smooth.

2. Transfer to a bowl and blitz the rest of the ingredients along with the ice cubes.

3. Add the second batch to the bowl and mix well to combine.

4. Serve immediately with croutons.

Bacon Cheddar Bratwurst Frittata

Share on FacebookTweet about this on TwitterPin on Pinterest


Earlier this week, I found myself on the Upper East Side and popped in for a visit to Schaller & Weber. The store has managed to maintain its charm as it passes from generation to generation. Jeremy Schaller, grandson of Ferdinand Schaller, master butcher from Germany who opened the store in 1937, has maintained the high standards while giving the place a bit of a makeover. A few months ago they opened a café in the back and now he and his business partner, Jesse Danes have turned a meat storage area next to the store into a ‘stube’ selling incredible sausage sandwiches with a modern twist.


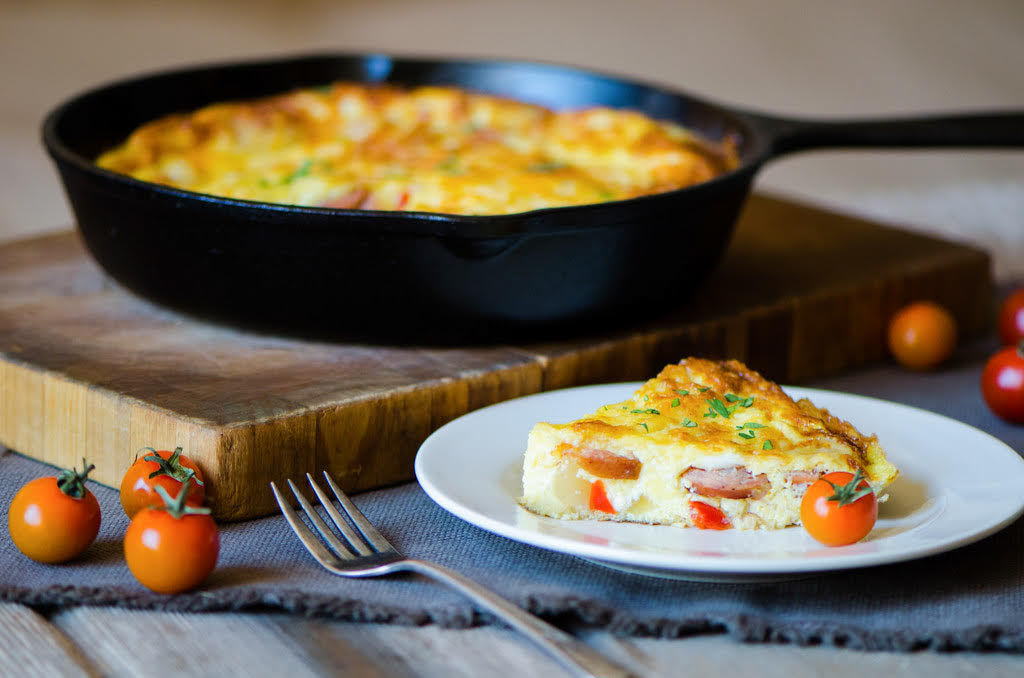
I can never pass by without stocking up on some of my favorites to stack up in the freezer. First and foremost, their double smoked bacon and my new guilty pleasure, their Bacon Cheddar Brats. Naughty but oh so nice, they were an obvious addition to a frittata which works for every meal from breakfast to dinner.


Bacon Cheddar Bratwurst Frittata

Ingredients:

8 eggs

1/2 cup whole milk

1/2 teaspoon salt

3/4 cup grated cheddar, divided

2 tablespoons olive oil

1/2 lb Bacon Cheddar Bratwurst, thinly sliced

1/2 medium onion, finely chopped

1 small red pepper, finely diced

chopped parsley for garnish


Method:

1. In a medium bowl, whisk the eggs, milk, salt and 1/4 cup of the cheddar.

2. In a large skillet (preferably cast iron), heat the oil and fry the bratwurst until browned all over, about 5 minutes.

3. Add the onion and the red pepper and continue cooking on a medium heat until the onion has softened.

4. Turn the heat down to low, add the eggs. At this point you should preheat your broiler. Shake the pan every few minutes until you see the edges begin to set, about 10-12 minutes total. The center will still be completely uncooked.

5. Add the remaining 1/2 cup of cheddar and place under the broiler for a further 4 minutes until the top is nicely brown and the center is just set.

6. Top with chopped parsley and serve in wedges straight from the pan.


Matcha Popsicles

Share on FacebookTweet about this on TwitterPin on Pinterest


The last couple of months have been a whirlwind of excitement working on our first cookbook. Aurora and I have been testing, editing, writing, photographing all with the help of the newest member of the Many Kitchens Team; Jack (aged 8 months). Being on the other side of the publishing process has brought an even higher level of respect for authors as for the life of me, I can’t figure out how they get anything else done. Lest anyone think that my silence on this blog is due to me languishing poolside, it’s really because my creative juices were wholly consumed by this book that I can’t wait to tell you more about.


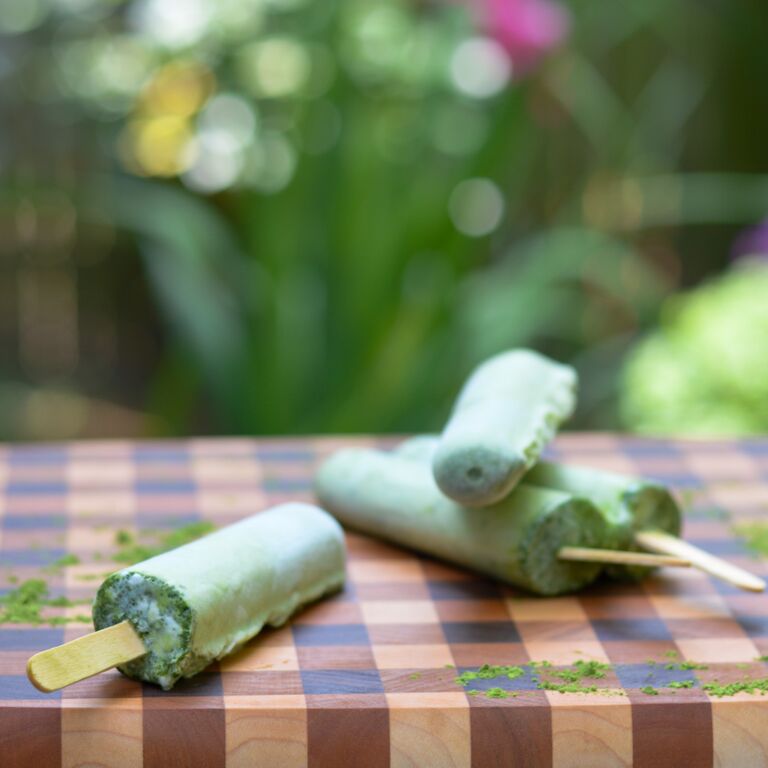
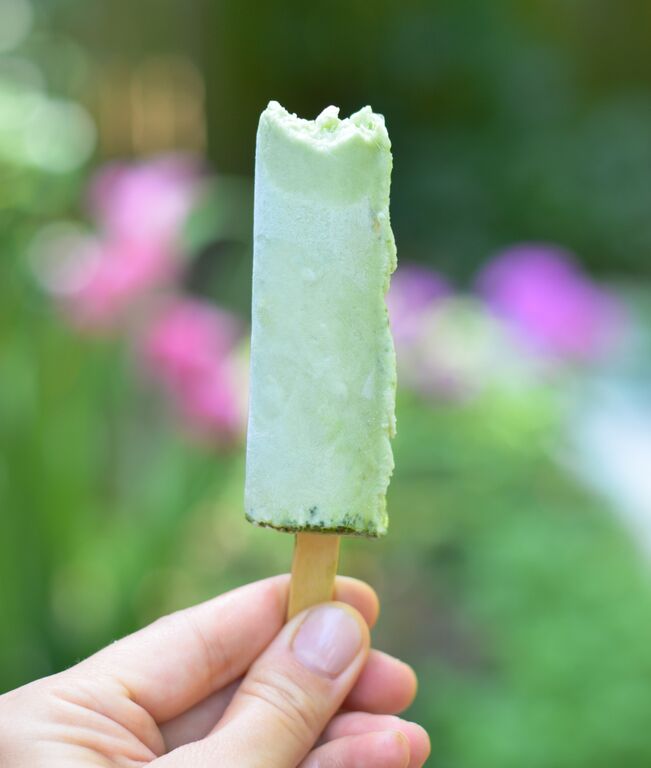
With the manuscript finally delivered, the last photos taken and a much needed and regenerative weekend staying with my friend Leigh, I’m finally back! It’s 94 degrees outside and all I want to eat is popsicles. We made these with In Pursuit of Tea’s incredible Matcha (not all matchas are created equally) and creamy coconut milk. Seriously delicious and refreshing, they are the perfect treat to combat this heat.


Matcha Popsicles

Ingredients:

1 can coconut milk (don’t use reduced fat)

1/2 cup half and half, plus 2 tablespoons

3 teaspoons good matcha powder

1/4 cup agave nectar


Method:

1.  In a large bowl with a pouring spout, whisk coconut milk till the top cream is smooth and mixed throughout.

2. Next, in a small bowl, whisk matcha powder into 2 tablespoons of heavy cream. Work slowly while adding powder and thoroughly whisk till well blended.

3. Transfer matcha mixture to the large bowl and add in agave nectar. Mix ingredients till smooth then pour into popsicle molds and freeze for at least 5 hours.